Baking - The Beginners Guide

What if you dont have an electric mixer, if a recipe says to mix on medium speed for 30 seconds, how many strokes is that by hand? Is there only one type of consistency for hte batter or do different cakes have different types of batters?

How long is the oven supposed to be preheated? and at what temperature?

I made a cake over the weekend using boxed batter. I only wanted to make one layer though so I halved all the ingredients. The sides were tough but whenever I inserted the toothpick, the end would come out wet (which meant the bottom wasn’t done yet). But it was already going way past the recommended baking time and the ends were burning. Wat should I have done differently?

What would you recommend for an absolute beginner?

The stove top/burner serves the same purpose as a cooling rack, right?

What about the sides of the cake? or it wont stick to it, right? :bummer:

Okay my question for all of you…did you ever start baking by using the boxes (betty crocker, duncan hines etc) or did you start baking totally from scratch?? Any time i go to the store..i get sooo confused and overwhelmed by all the variety there.

I know practice is everything…but how do you practice the decorating part (with the tubes and gels) but not waste so much product? Do you use the tubes as they come from the store or do you add attachments to it to make em easier to use?

This is a whole new arena for me so I have a zillion and one Qs along the way :slight_smile:

I know some of you mentioned cutting wax paper to put at the bottom of the pan. I don't do that, I use aluminum foil. I line the bottom, then bring it up to the side, then wrap around the handles of the pan. Very lightly grease the bottom. When the cake is done, all I do is lift the foil and cake out- very easy. And the cake doesn't stick to the foil so it can be transferred to another tray. This is the method I use to make layered cakes too.

But after reading about wax paper, is lining with foil not recommended?

Re: Baking - The Beginners Guide

CB- I hope it helped, just to illustrate what each stage should resemble:D

P.s. MM might let you have me on loan if you ask her :D

Um, if you don’t have an electric mixer, then you have no choice but to use a whisk. I have no clue how many “strokes” to use. Your batter has to be smooth and free of lumps. So when that happens, you know your batter is ready.

I don’t think you should even attempt decorating a cake until you have mastered making a simple cake especially since you don’t have all the basic equipment.

Stick to Duncan Hines cakes for now. They are quite solid and springy so good cakes to practice on.

A cooling rack is not the stove-top burner. :confused: Cooling rack is a seperate accessory … basically just a rack you can place anywhere.

I don’t have any experience with the other types of pans you mentioned so I cannot advise you. Perhaps someone else can.

Re: Baking - The Beginners Guide

Oh Mehnaz i really cannot wait to see the photos of the cake - I hope inshallah it turns out good! What type of icing are you doing and what are the decorations gonna be like?

Okay. thanks. :slight_smile:

Re: Baking - The Beginners Guide

The “plan” is a 10" round cake. I found a picture of a cake I would like to put my own spin on.

Plan is to fill it with buttercream and strawberries … plain cake flavoured with rose water. Buttercream on the outside with fondant decorations on top.

I have some creamcheese left over from the Valentine’s day cake which I may combine into the buttercream. I find that tastes quite nice with a plain cake.

That being said, the last time I had a similar plan was when I made a cake for my friend’s Baptism party for her son. I put blue colour into the buttercream, but for some reason, it wasn’t smooth. It looked very lumpy (maybe the shortening??) so you could see white little lumps in between the blue icing. I ended up covering the whole thing with fondant. I can’t do that this time cause I’m out of fondant (I don’t make my own) and I don’t have time to go buy more. I have to make the cake tomorrow evening, will refridgerate it overnight and decorate it Saturday, inshallah.

So much for me going to the auto show. :hoonh:

Re: Baking - The Beginners Guide

^ what does fondant taste like? where can you buy it already made?

Re: Baking - The Beginners Guide

It's that thick, sugary, icing that you find on wedding cakes. Some people like Sunset_Eyes make their own. Otherwise, you can buy it at Michael's ... but it doesn't taste very good. I prefer the one from McCall's.

see my answers in bold.

also, you can get mixers for as low as $15 from wal-mart, so if you can, get an electric one. it will make your life a lot easier.

fondant tastes like marzipan or like marshmallows, usually. its “icing” but really its more like a sugar dough that you can tint and then roll out and drape over your cake. you can also use it to make decorations in any shape.
think of it as edible plasticine.

as examples, see these:

http://www.simplycreativecakes.net/documents/fondant.jpg
http://www.giftsandgadgets.ab.ca/images2/Fondant_Class_025.jpg

i've never lined a pan with foil, so i'm not sure.

this is an excellent tutorial on preparing baking pans- http://recipes.howstuffworks.com/tools-and-techniques/how-to-bake-a-cake2.htm (scroll down a bit)

i’ve pasted it below too-

Preparing Baking Pans

Some cakes require greasing and flouring the baking pan and some call for using parchment or waxed paper. To assure the best results from every baking recipe, always prepare baking pans as instructed in the recipe or in the manufacturers’ directions. Common preparation steps include:

Greasing a baking pan: Use a pastry brush, paper towel, waxed paper, or fingertips to apply a thin, even layer of butter, margarine, or shortening to bottom and sides of the baking pan, as directed. As an alternative, coat the baking pan with non-stick cooking spray.

http://static.howstuffworks.com/gif/how-to-bake-and-decorate-a-cake-cooking-1.jpg

Softening shortening, butter, or
margarine slightly in the microwave
makes it easier to use a pastry brush.

Greasing and flouring a baking pan: Use a pastry brush, paper towel, or waxed paper to apply a thin, even layer of butter, margarine, or shortening to bottom and sides of the baking pan, as directed. Add 2 to 3 tablespoons flour to each baking pan. Tilt the baking pan slightly. Gently tap and rotate the pan until bottom and sides are evenly coated with flour. Invert the baking pan and tap bottom gently to remove excess flour.

http://static.howstuffworks.com/gif/how-to-bake-and-decorate-a-cake-cooking-3.jpg

Gently tapping the sides of the greased
baking pan helps distribute the flour.

TIP: When a recipe for chocolate cakes calls for greasing and flouring the baking pan, use cocoa powder instead of flour. No more white spots on the surface of the baked cake!

**Lining a baking pan with paper: **Invert baking pan; place a sheet of parchment (or waxed paper) on top. Press all around the edge of the baking pan to form a crease in the paper. Cut out the paper along the crease. Grease the baking pan, but do not flour it. (Coating the bottom with non-stick cooking spray is another option.) Press the paper into the bottom of the greased baking pan. Continue with the recipe, greasing and flouring the paper if so directed.

http://static.howstuffworks.com/gif/how-to-bake-and-decorate-a-cake-cooking-4.jpg

Use fingertips to press paper firmly
around bottom edge of the baking pan
and make a crease.

Preparing a springform pan: Tear off a piece of heavy-duty foil that is at least 2 inches larger than the pan, all the way around. Line the bottom section of the pan with foil, tucking the edges under the bottom. Attach the rim, making sure it fits securely in the groove around the edge of the bottom. Untuck the excess foil and bring it up around the side of the pan; trim if necessary. Grease the foil-lined bottom and side of pan.

http://static.howstuffworks.com/gif/how-to-bake-and-decorate-a-cake-cooking-5.jpg

All springform pans leak a little bit.
Wrapping with foil prevents the
batter from spilling out.

A Bundt®** pan:** To prevent sticking, be sure all the creases and flutes of the pan are well greased (and floured, if recipe calls for it) before pouring in the batter.

http://static.howstuffworks.com/gif/how-to-bake-and-decorate-a-cake-cooking-6.jpg

A pastry brush works well for
greasing all the creases and
curves of a Bundt® pan.

Re: Baking - The Beginners Guide

thanks for answering the foil and fondant questions!

Sounds superb. I hope inshallah it comes out amazing - actually you are my inspiration on GS so please take pics and share them with us. So refrigerating the cake is ok? No affect on the flavour? I tried putting sliced strawberries in the middle of the cake with choc icing but they kept sliding out - ruined the whole look of the cake - but then maybe they were halves!!

Thank you for the point of reference that i make my own fondant Mehnaz - i am still trying to perfect the silly thing! God knows how much icing sugar i have wasted! Haha!

Re: Baking - The Beginners Guide

Sunset, I've had the exact same problem with strawberries, even when I cut them into tiny pieces. I had potential 'disaster' issues with my son's birthday cake, but I threw fondant on top of it so you couldn't see the big gap in the middle of the cake and strawberries sticking out. I think I will pipe a border around the cake before filling it like we normally do if we fill it with custard or pudding.

Refriderating the cake doesn't affect the flavour, at least for the cake recipe I use. It actually stays 'fresh' for up to 5 days if you leave it in the fridge. I find it much easier to torte if it is refridgerated/frozen from before hand. Less crumbs and easier to handle.

I'll take pics. I'm baking it tonight and will refridgerate it overnight, decorate it tomorrow. So i'll take pics for y'all.

Don't write a cake off if it isn't perfect. Oh man, I have such horror stories with cakes I have managed to salvage and pass off to other people who were totally clueless that the cake was far from perfect.

For example, I made a two-tiered cake for my son's first birthday. The top tier was a 6" round cake. I overfilled the pan so the although the cake baked flat and didn't rise, it totally stuck to the top rim.

By this point, I had baked at least 4 cakes and I was so fed up, I wasn't going to bake another one. I ended up having to rip the cake off the edges, stuck it back together and then froze it. Then when I decorated it, again, it was all falling apart cause it was ripped and in pieces from when I froze it ... but then I covered it all in buttercream and fondant and you couldn't even tell.

I made a strawberry filled cake over the summer for my friend's birthday, and even though I covered it with fondant, the strawberry juice was leaking down the inside of the cake into the cake carrier!! Even though I put it in the fridge, it kept leaking .... so I had to keep patting the bottom of the cake dry. You couldn't tell by looking at the outside of the cake, but inside, the juice was seeping all over the place. But again, once you cut it and eat it, you couldn't tell.

So there is always a way to salvage most disasters.

Re: Baking - The Beginners Guide

good thread..
somegroovychick..u used to post lots of pics of ur yummy cakes.. what happened now? i miss them

Re: Baking - The Beginners Guide

^ i made a two-tiered pink and white princess cake for my niece's 5th birthday and i can't find the pics now! uh-oh, i think i might have accidentally deleted them!! :O

Re: Baking - The Beginners Guide

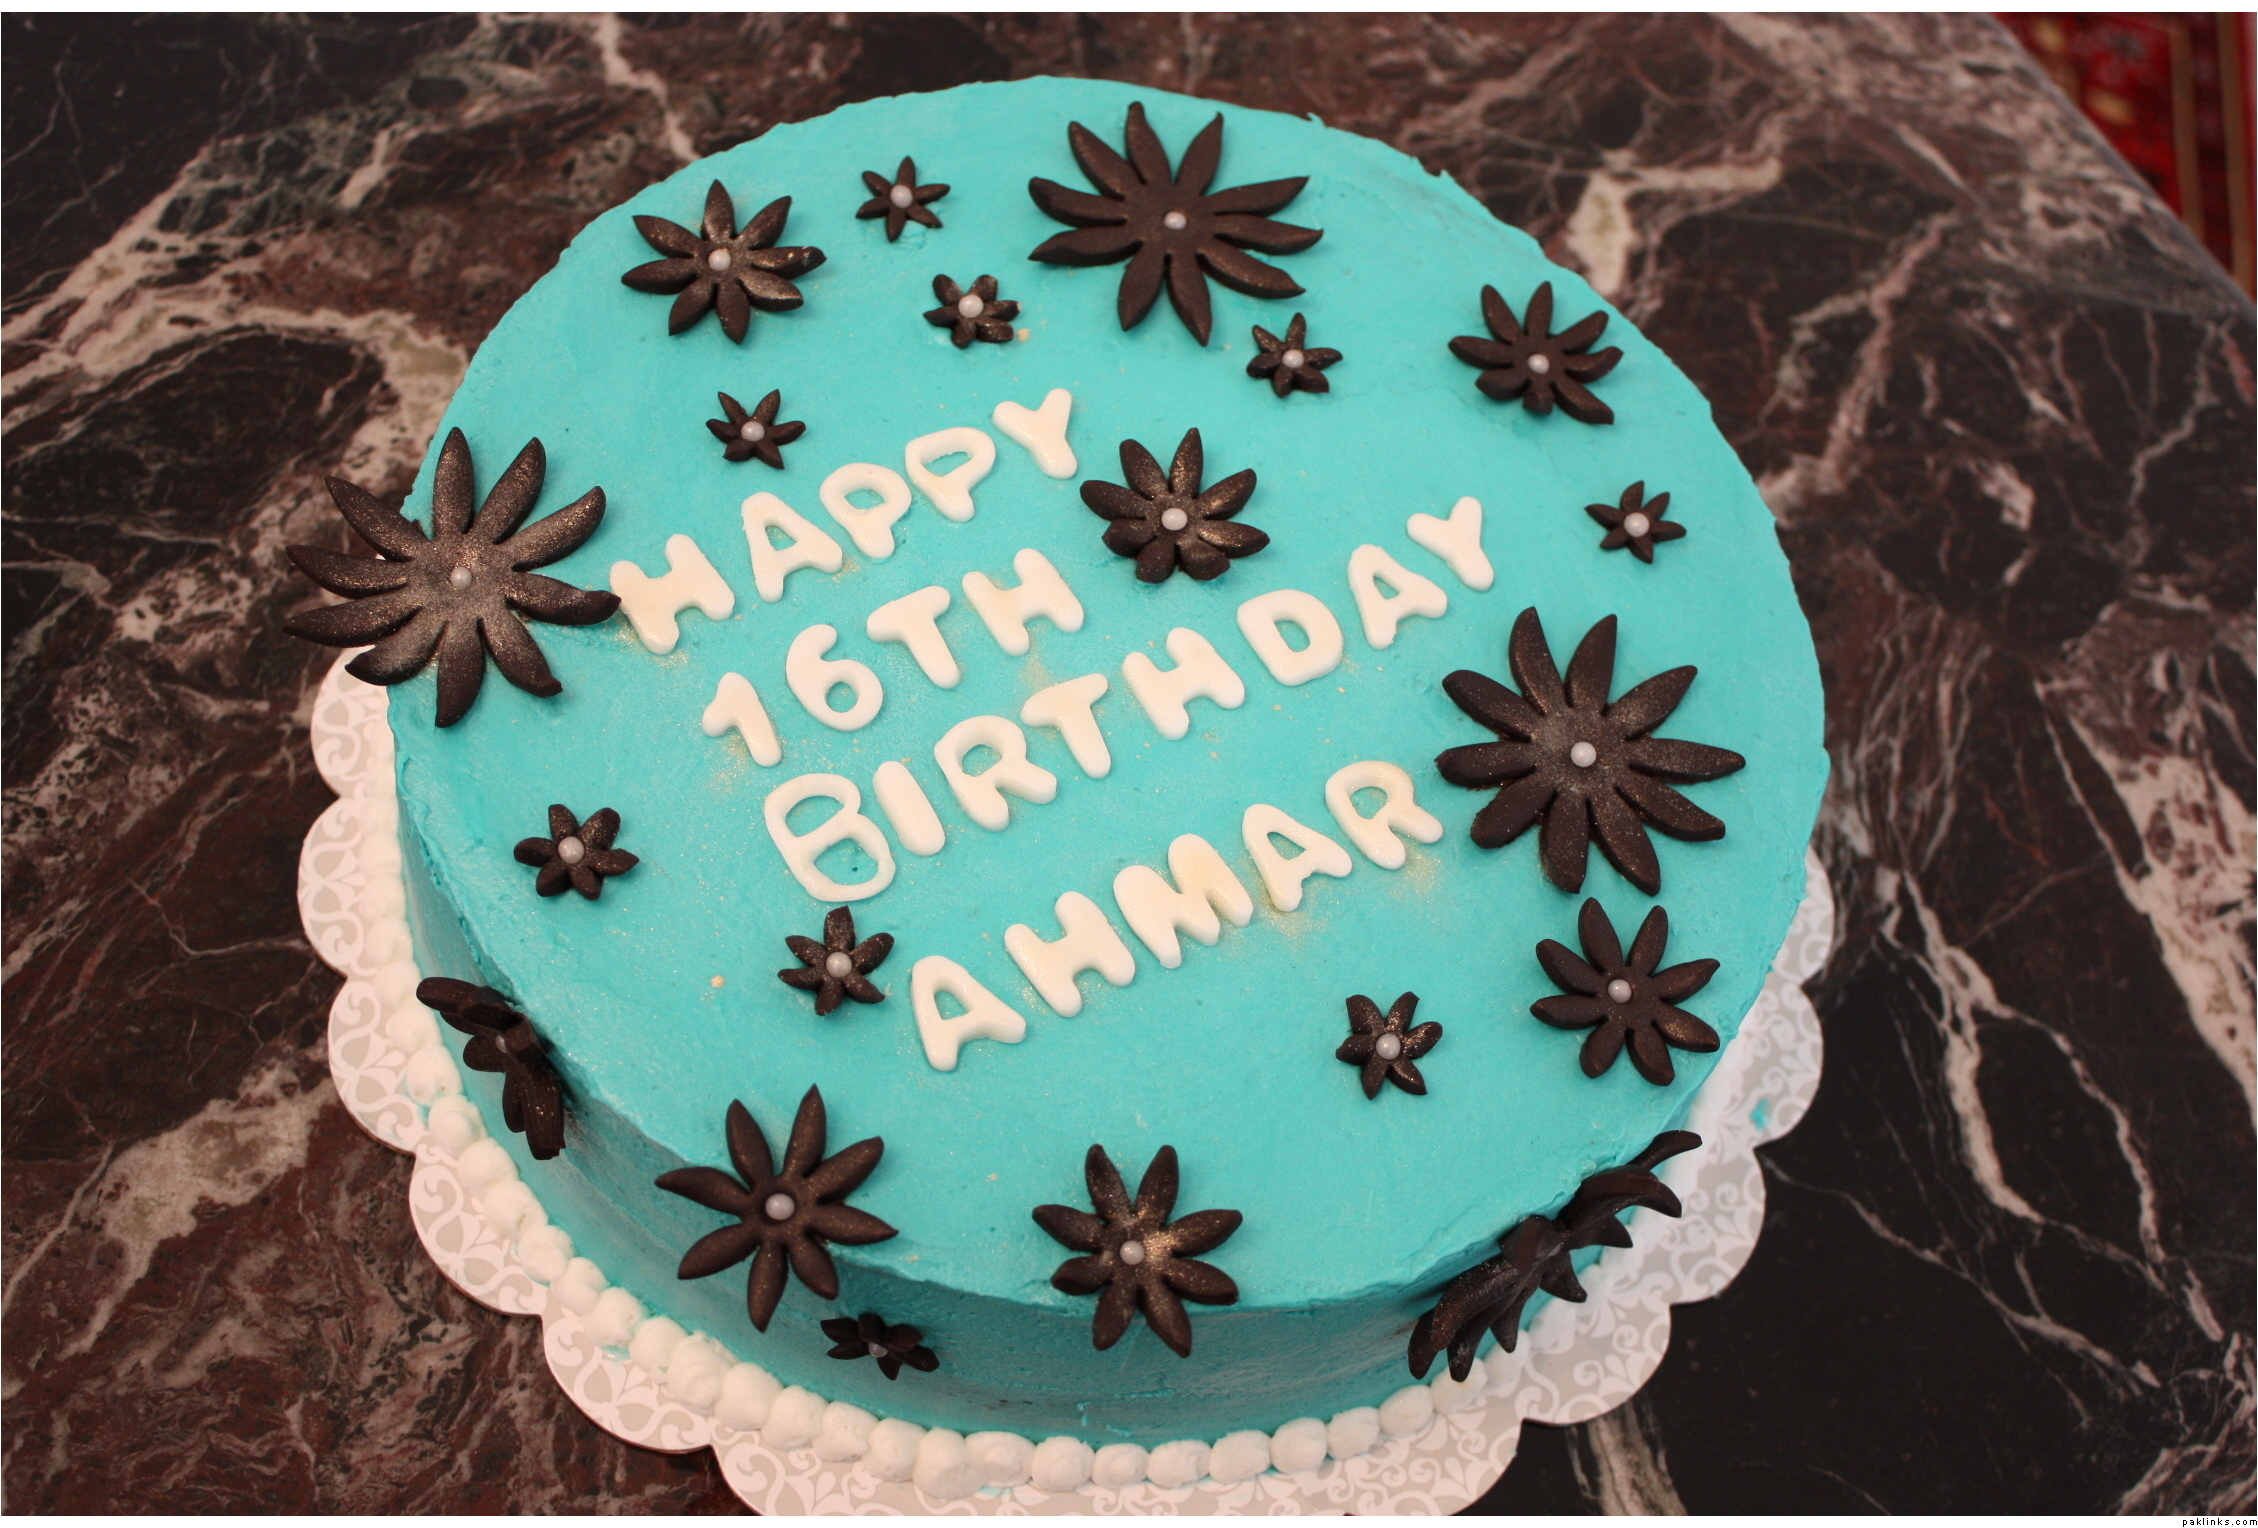
o.k. I made a cake last night and decorated it today.

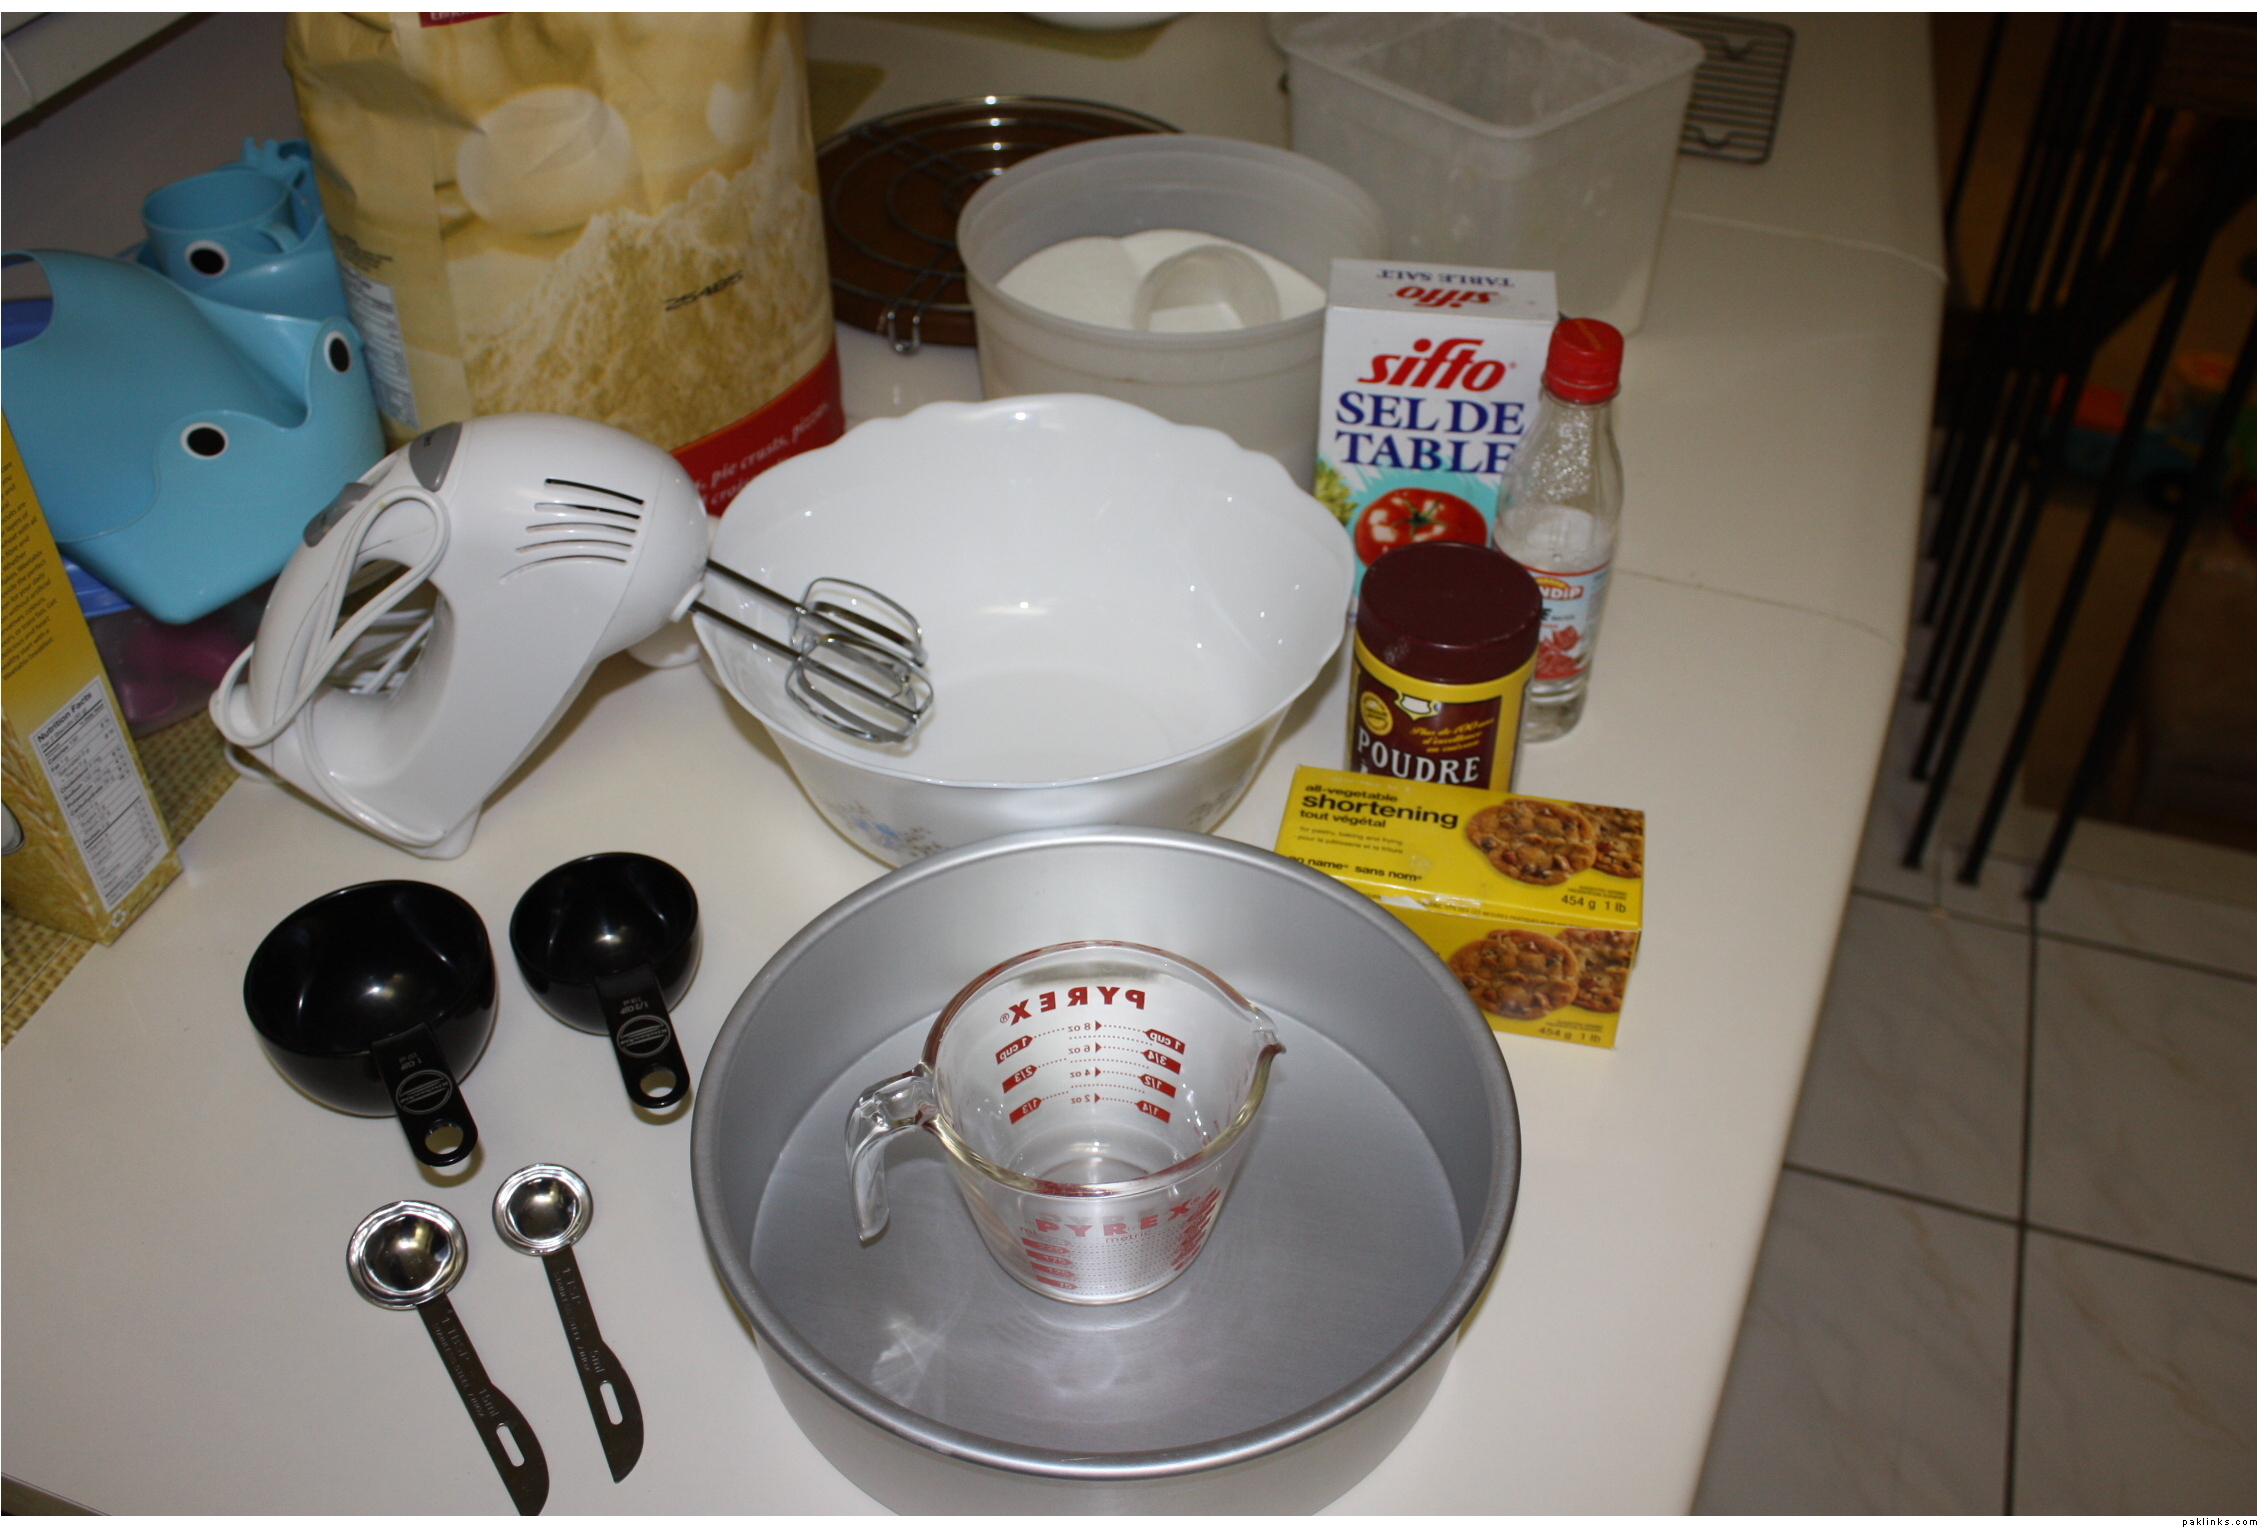
Here is what you need. Take note of the measuring utensils. They are important. There is a measuring jug for liquids (in the pan) and measuring cups for dry substances. There are also measuring spoons besides the black measuring cups.

You don’t need to buy anything fancy or expensive. You can find these in the dollar store as well, so you don’t have to break the bank. These are very important as they are the correct measuring tools.

One mistake I used to make was using a regular teaspoons and tablespoons and chai mugs as measuring tools. You can’t do that with baked goods.

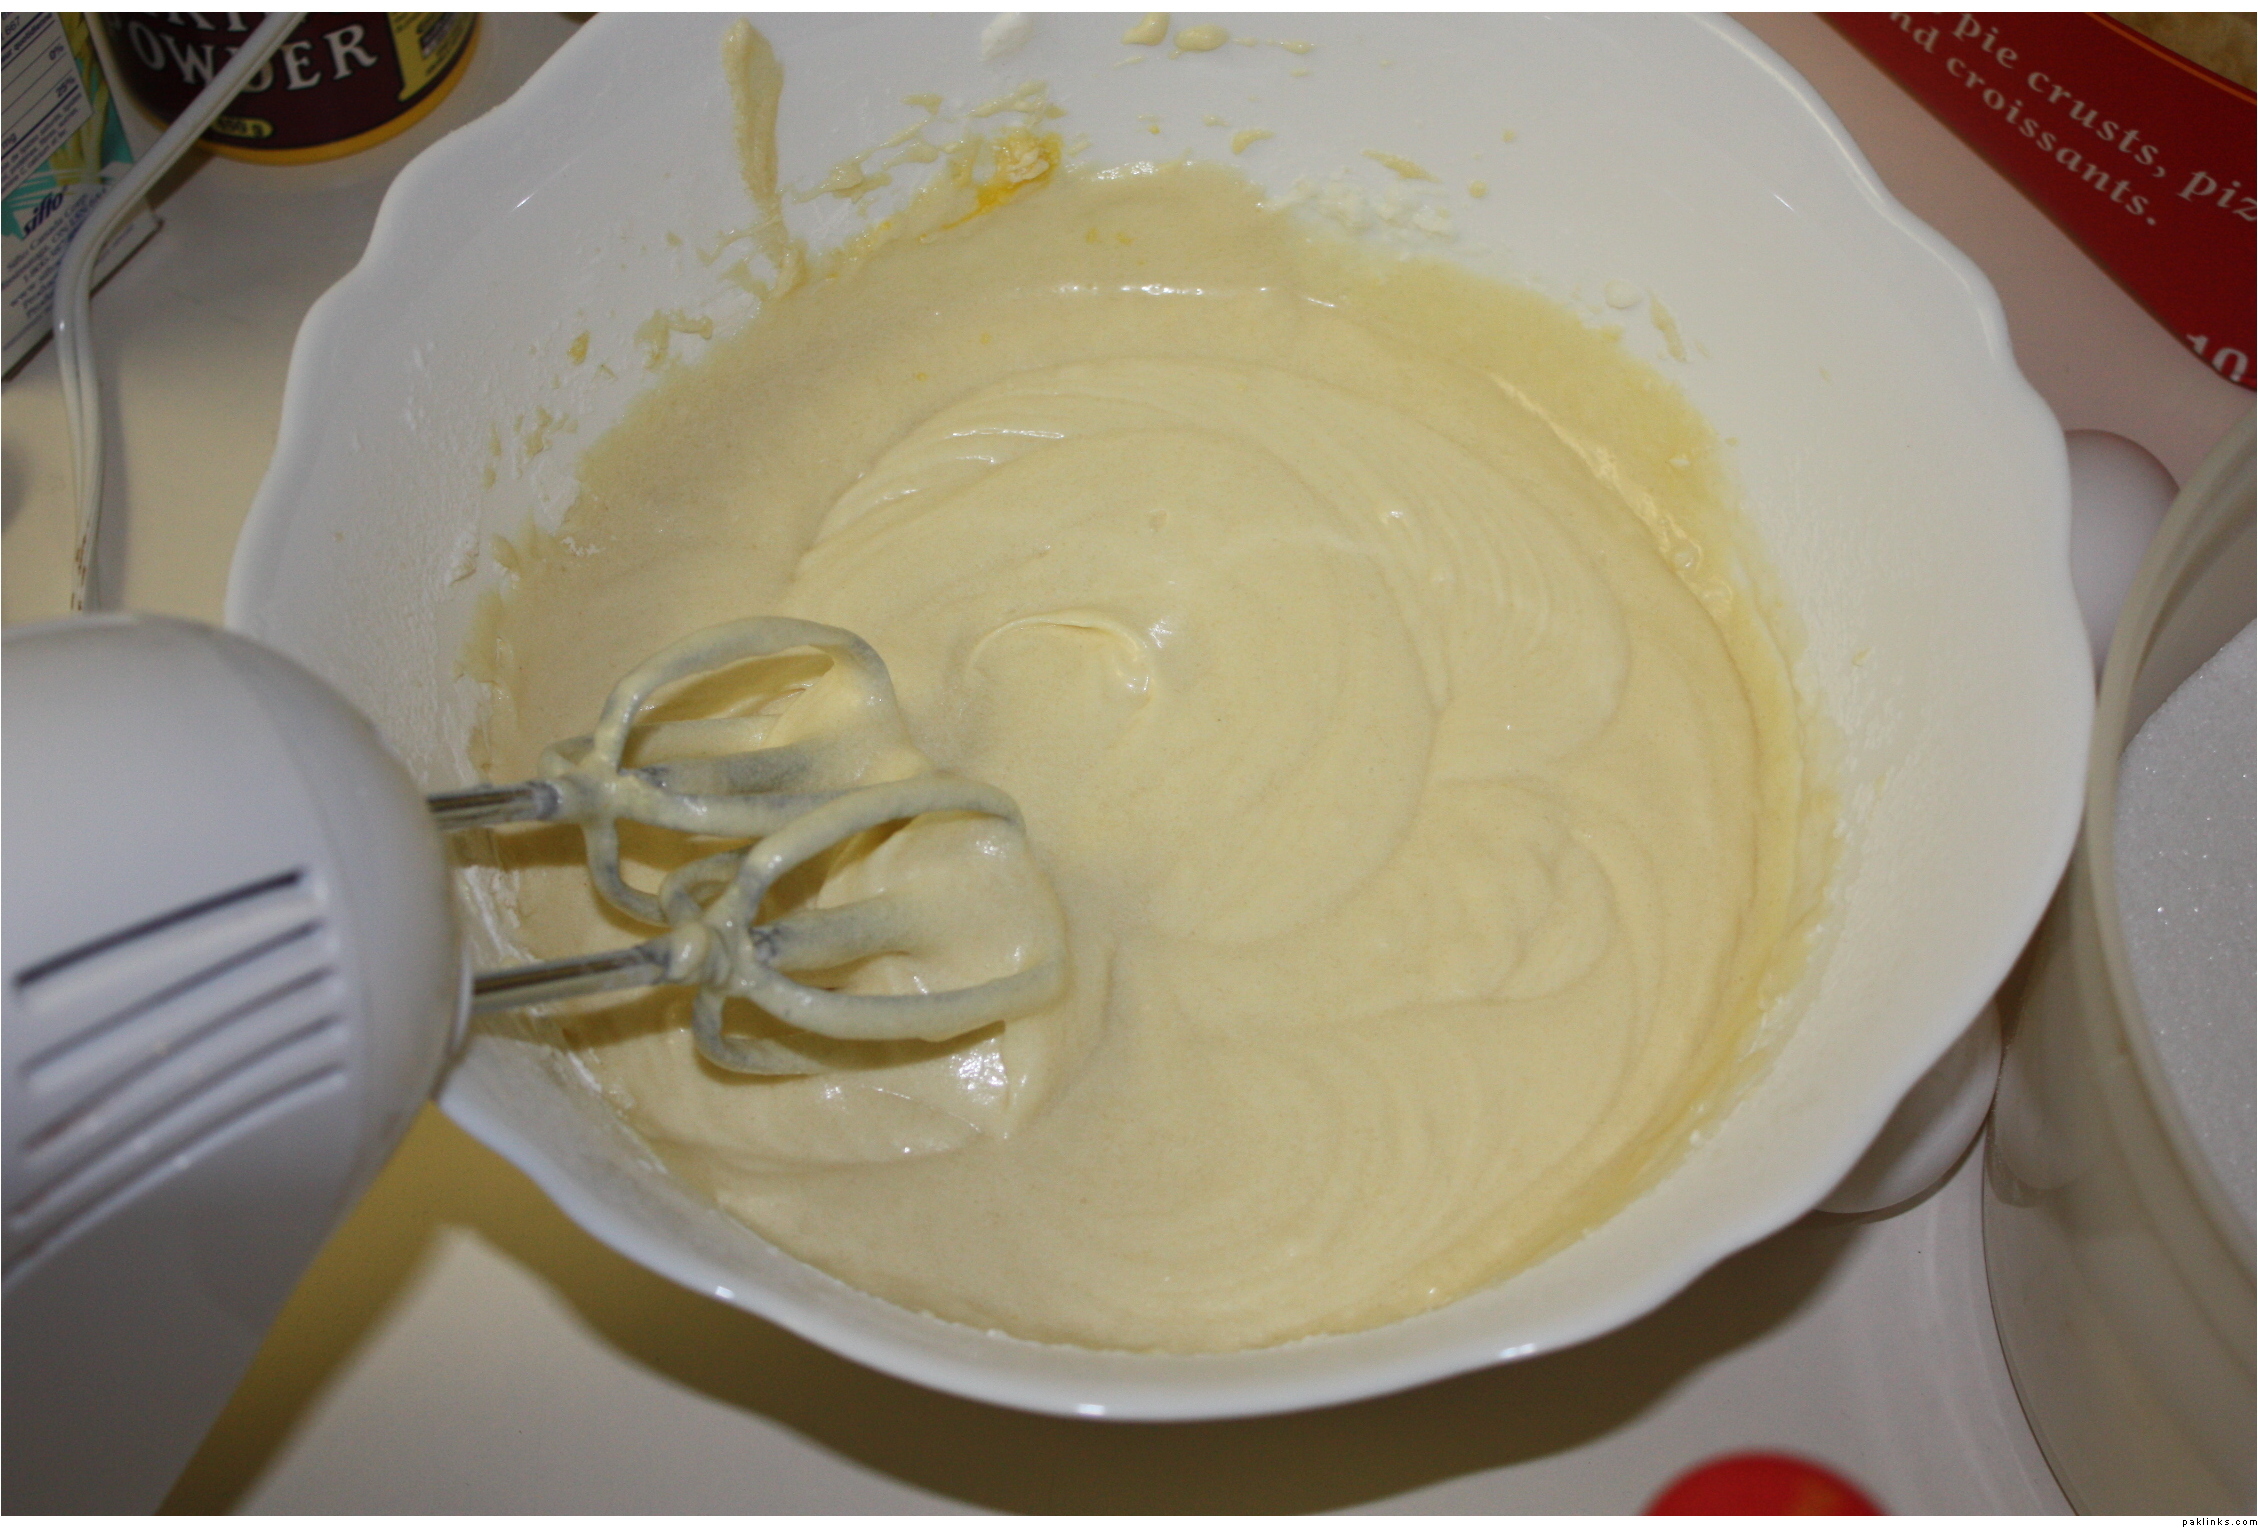
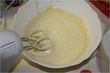
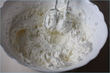
Put all your ingredients together and mix it until it is smooth and free of lumps. If you are using an electric mixture, be sure to use it on the lowest speed available. Air can become trapped into the mixture if mixed on a higher setting, which is what can cause the cake to sink in the middle while baking.

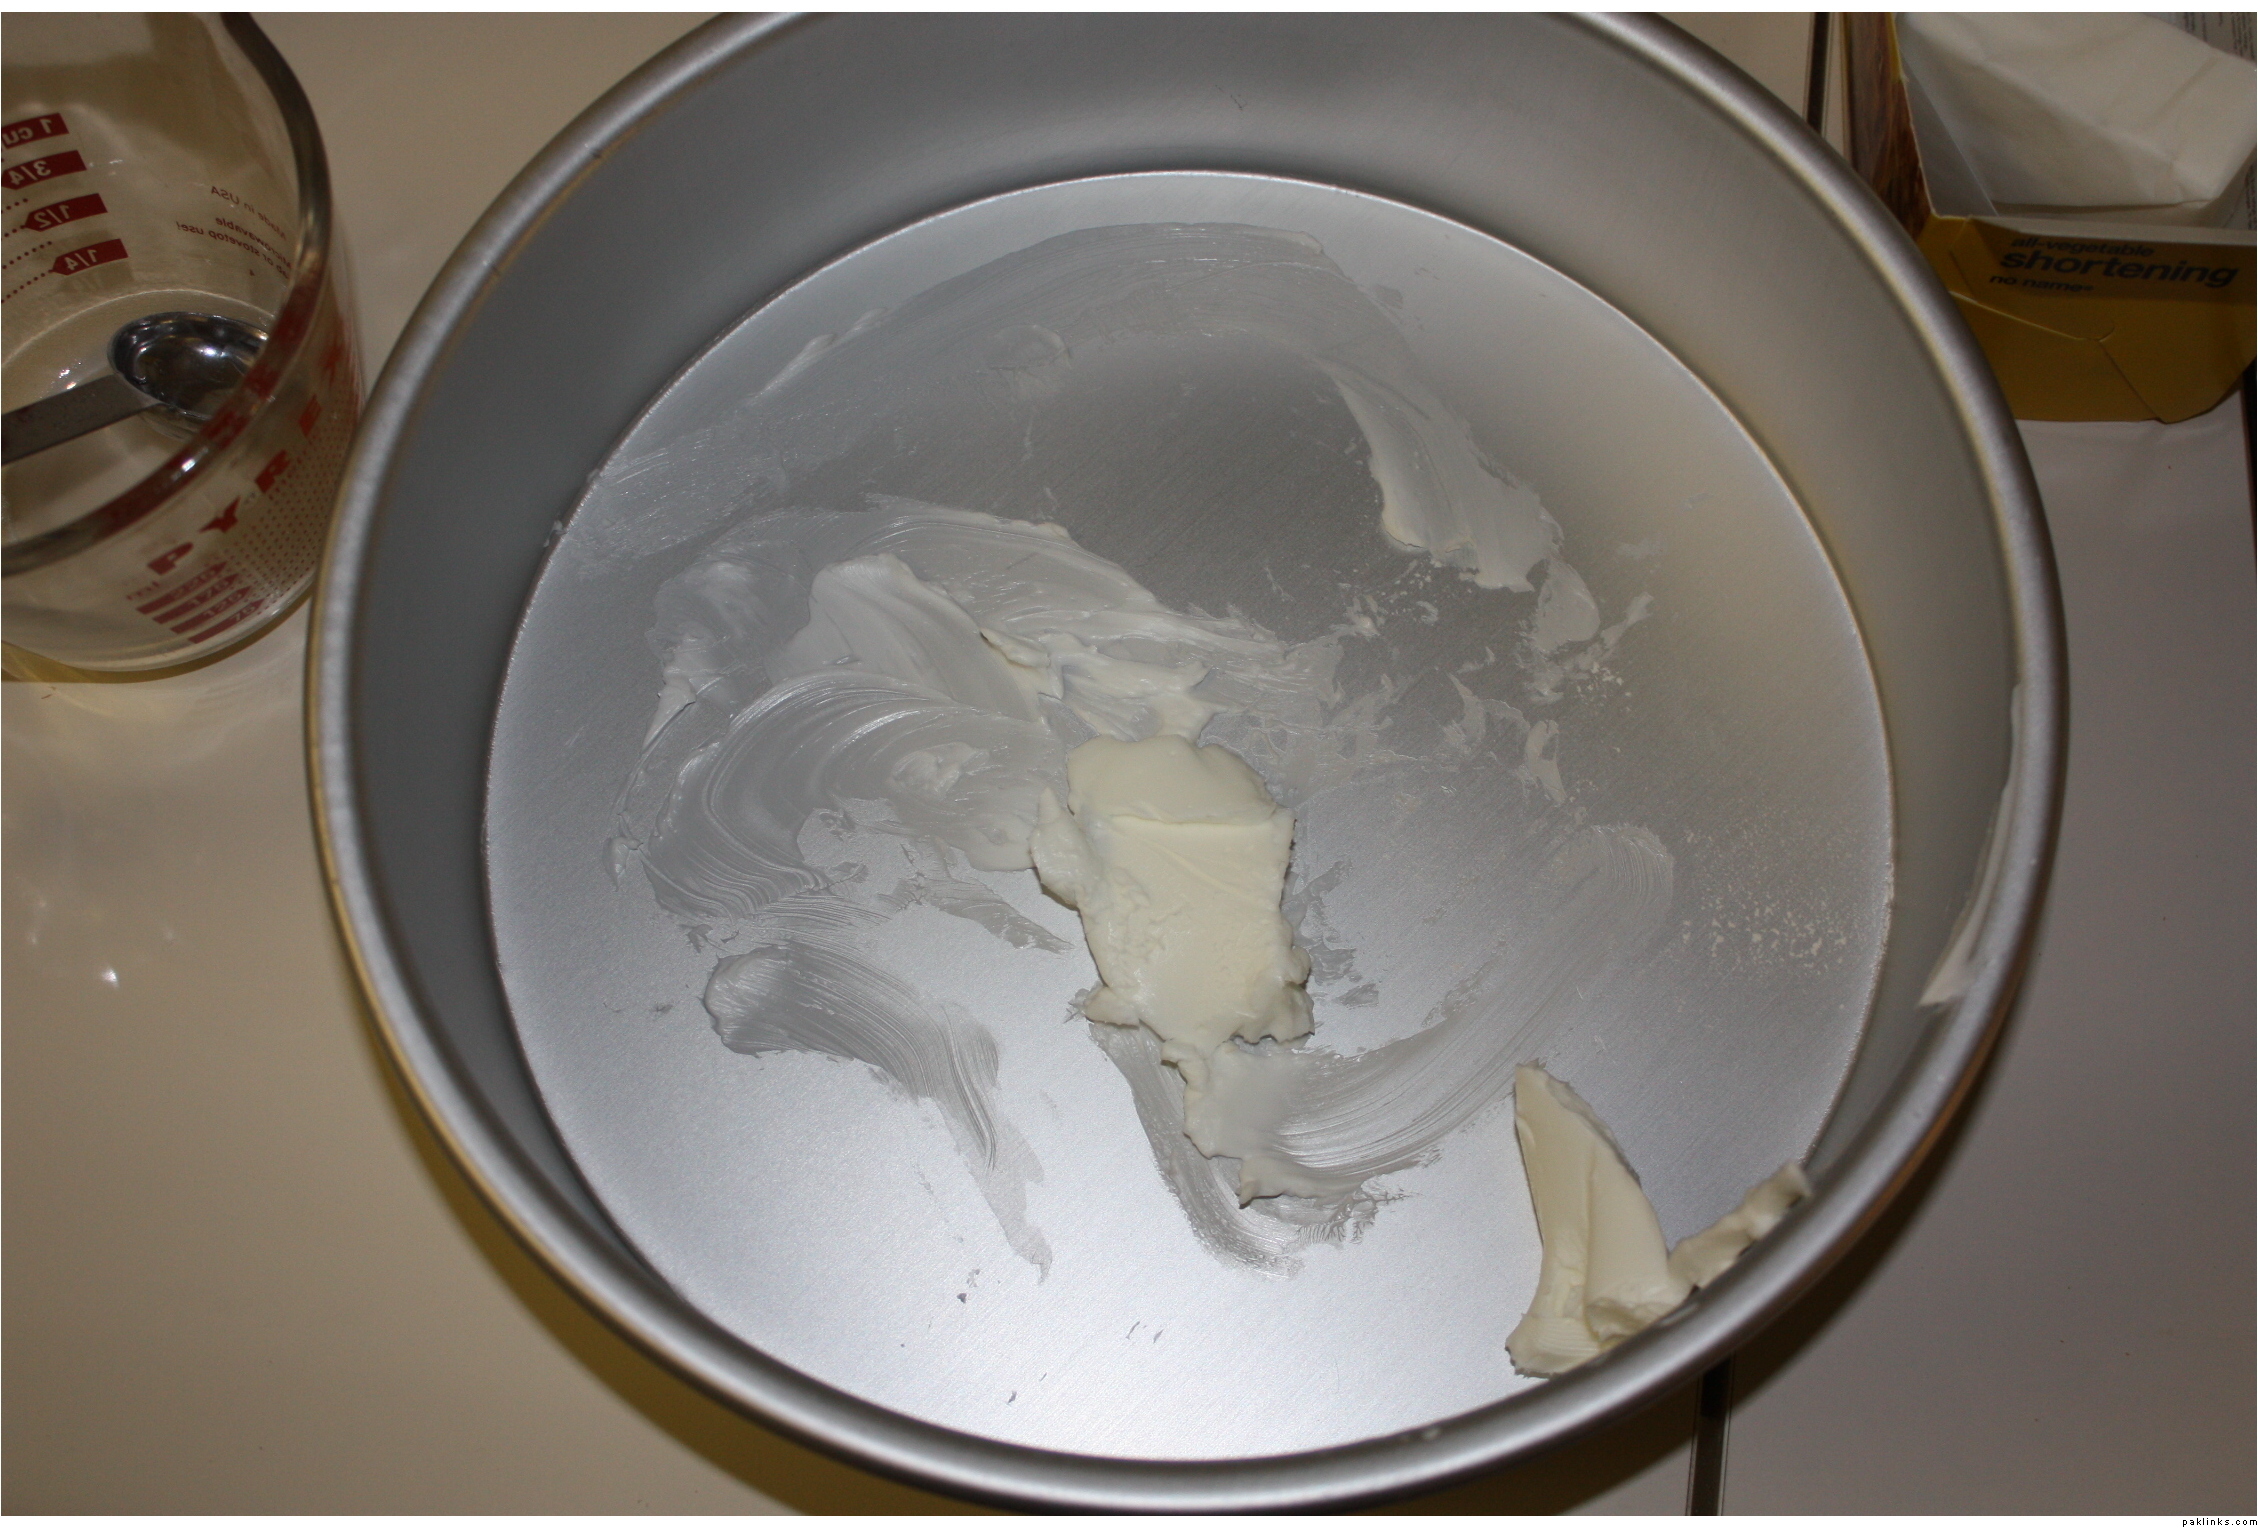
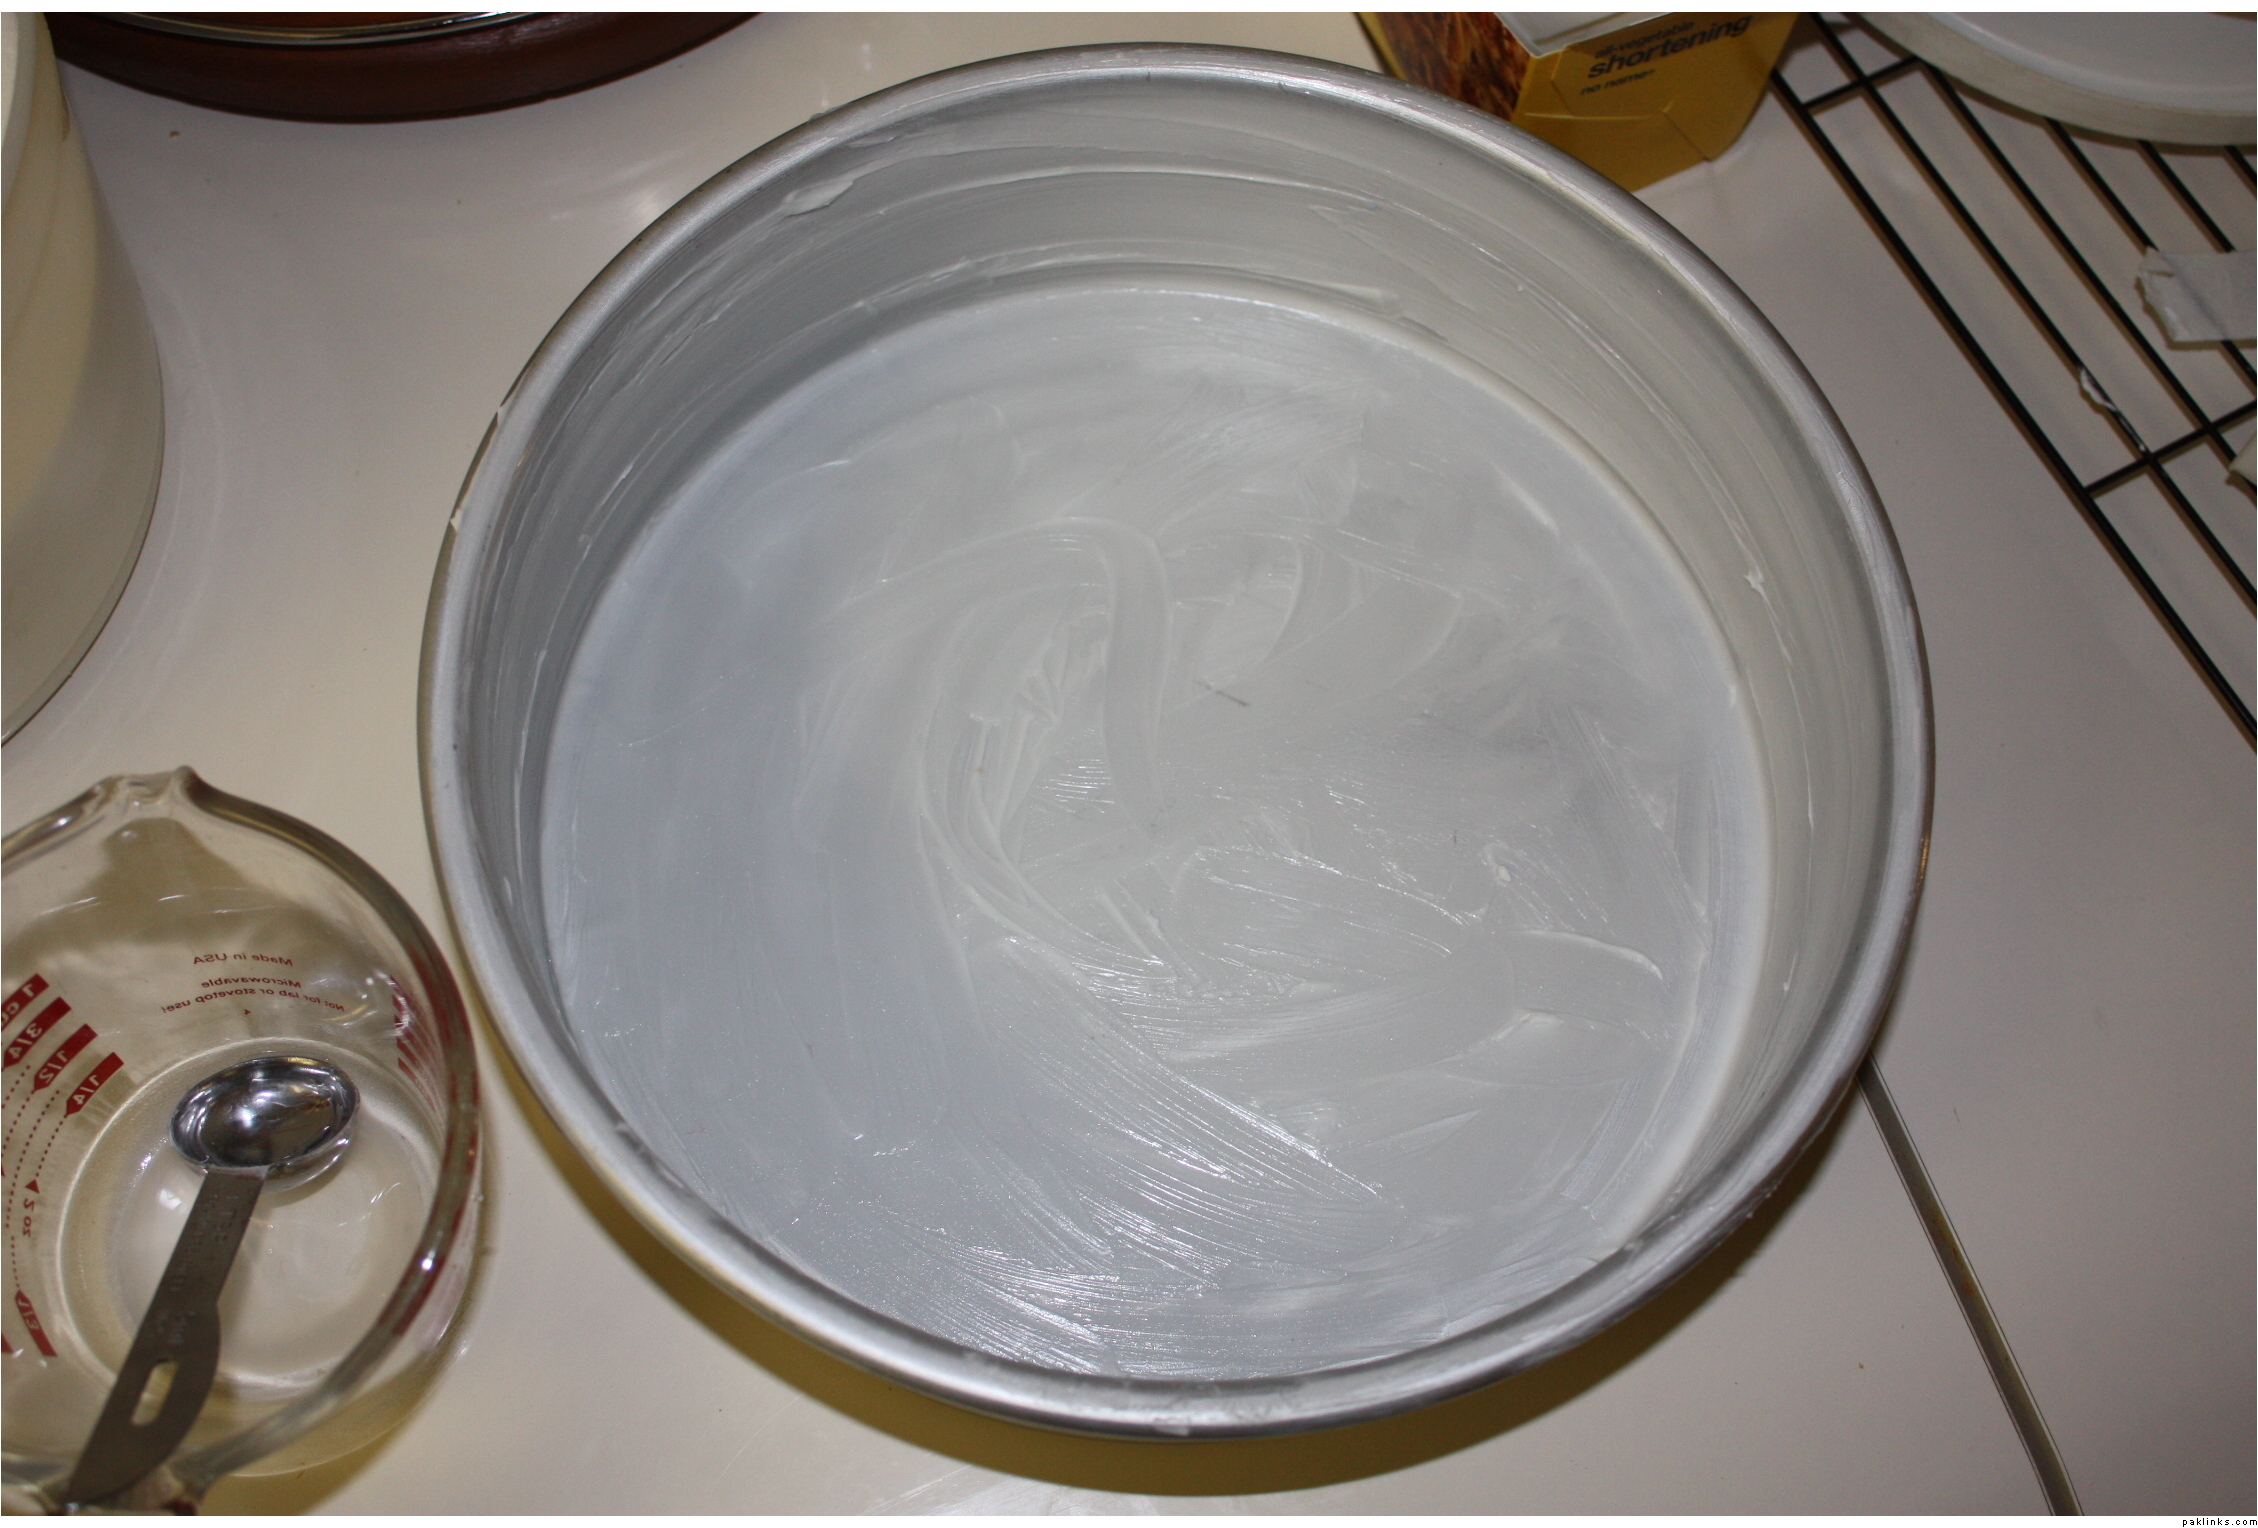
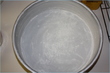
Grease your pan with LOTS of shortening. This technique works for my cakes. You can ignore this if you use the wax strips cause that seems to work for many people as well.

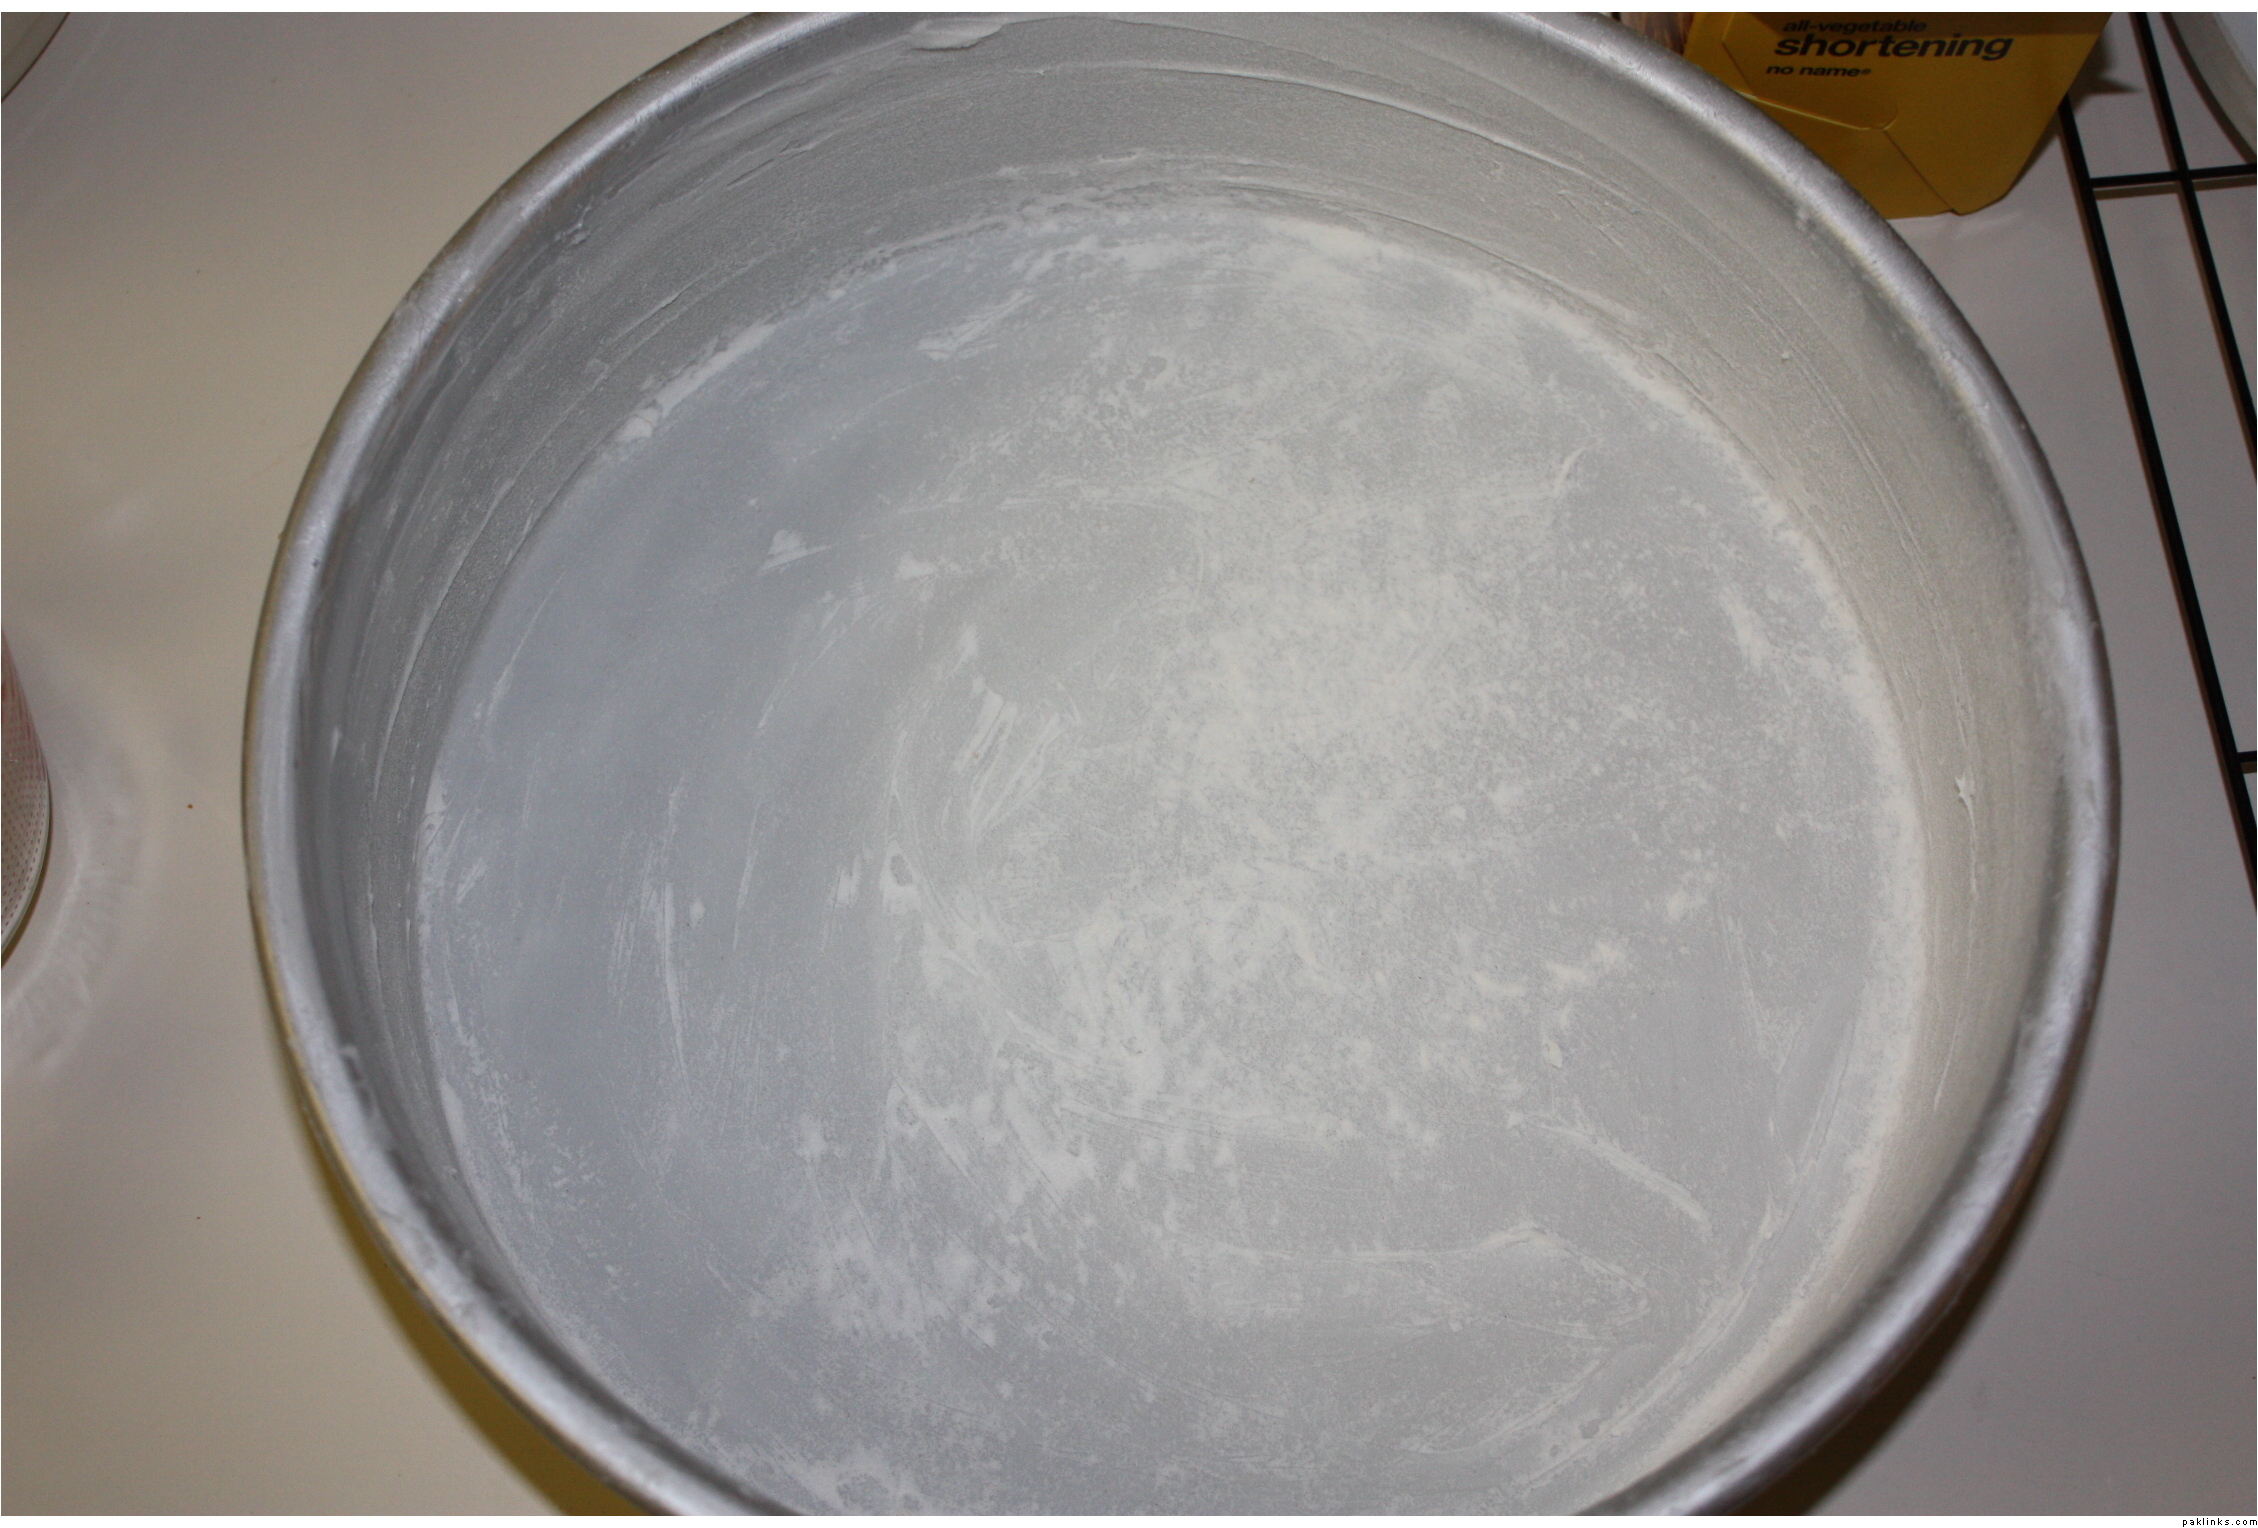
If you grease your pan, cover it with lots of flour. Make sure to shake it around so it goes everywhere.

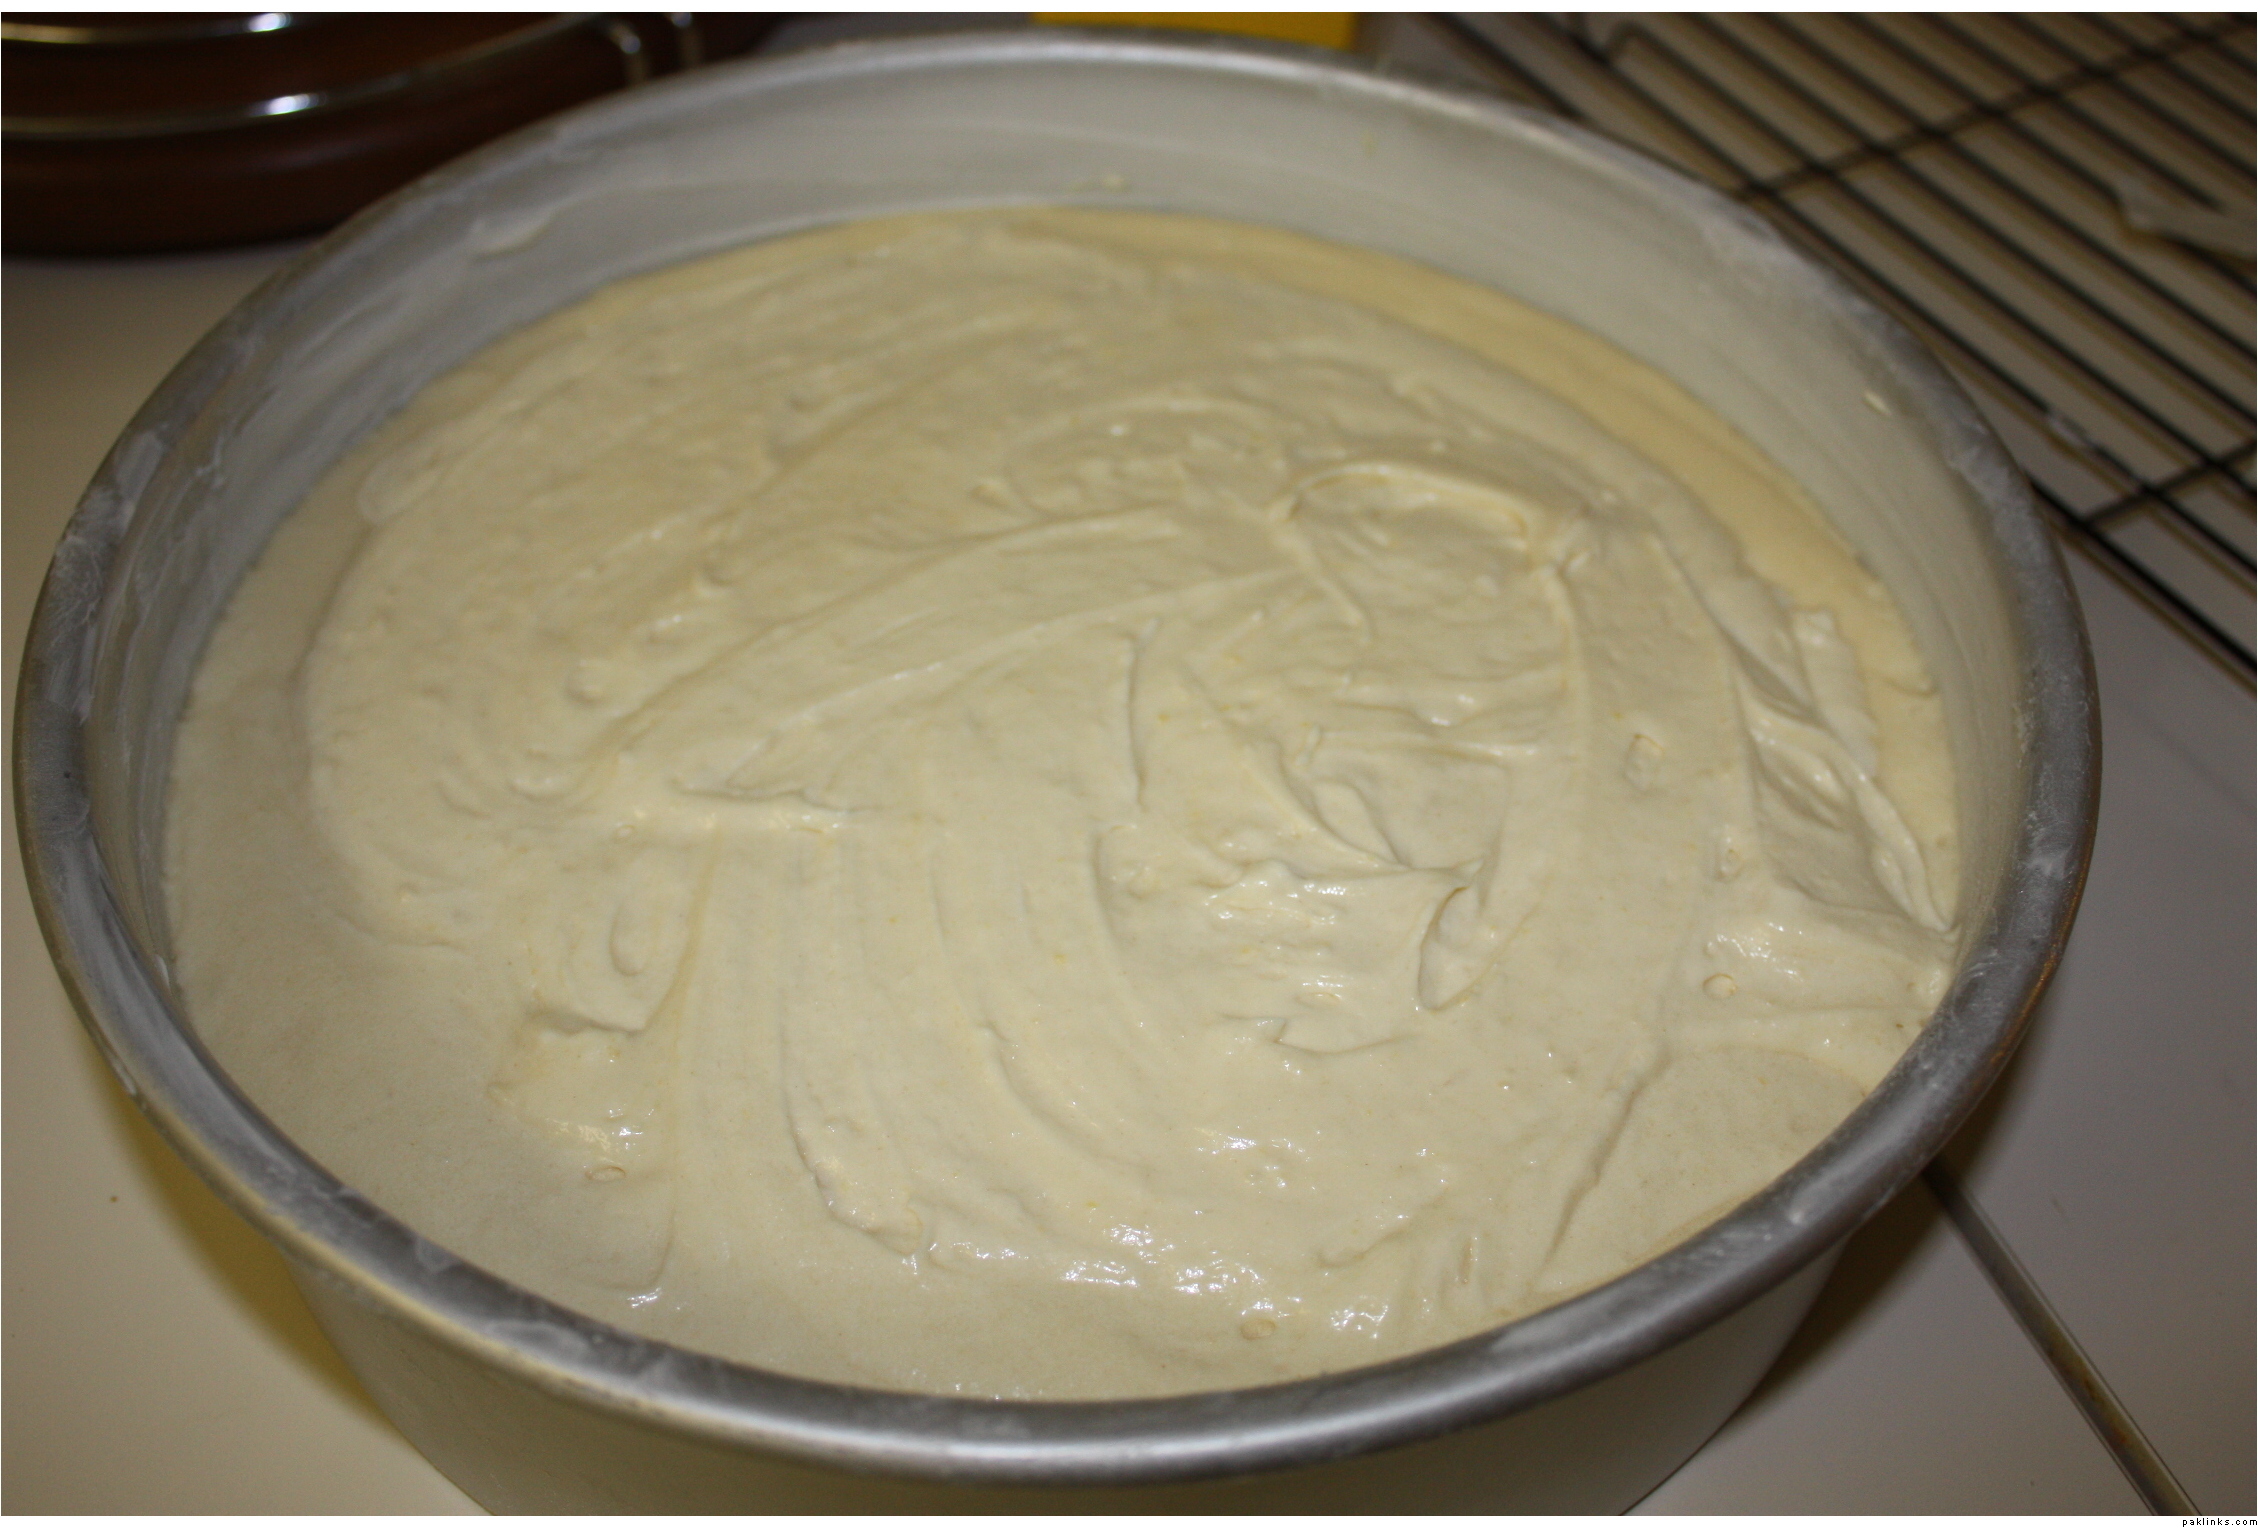
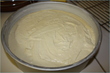
Put the batter into the pan. Leave enough room for the cake to rise. So don’t fill it more than ¾ inches.

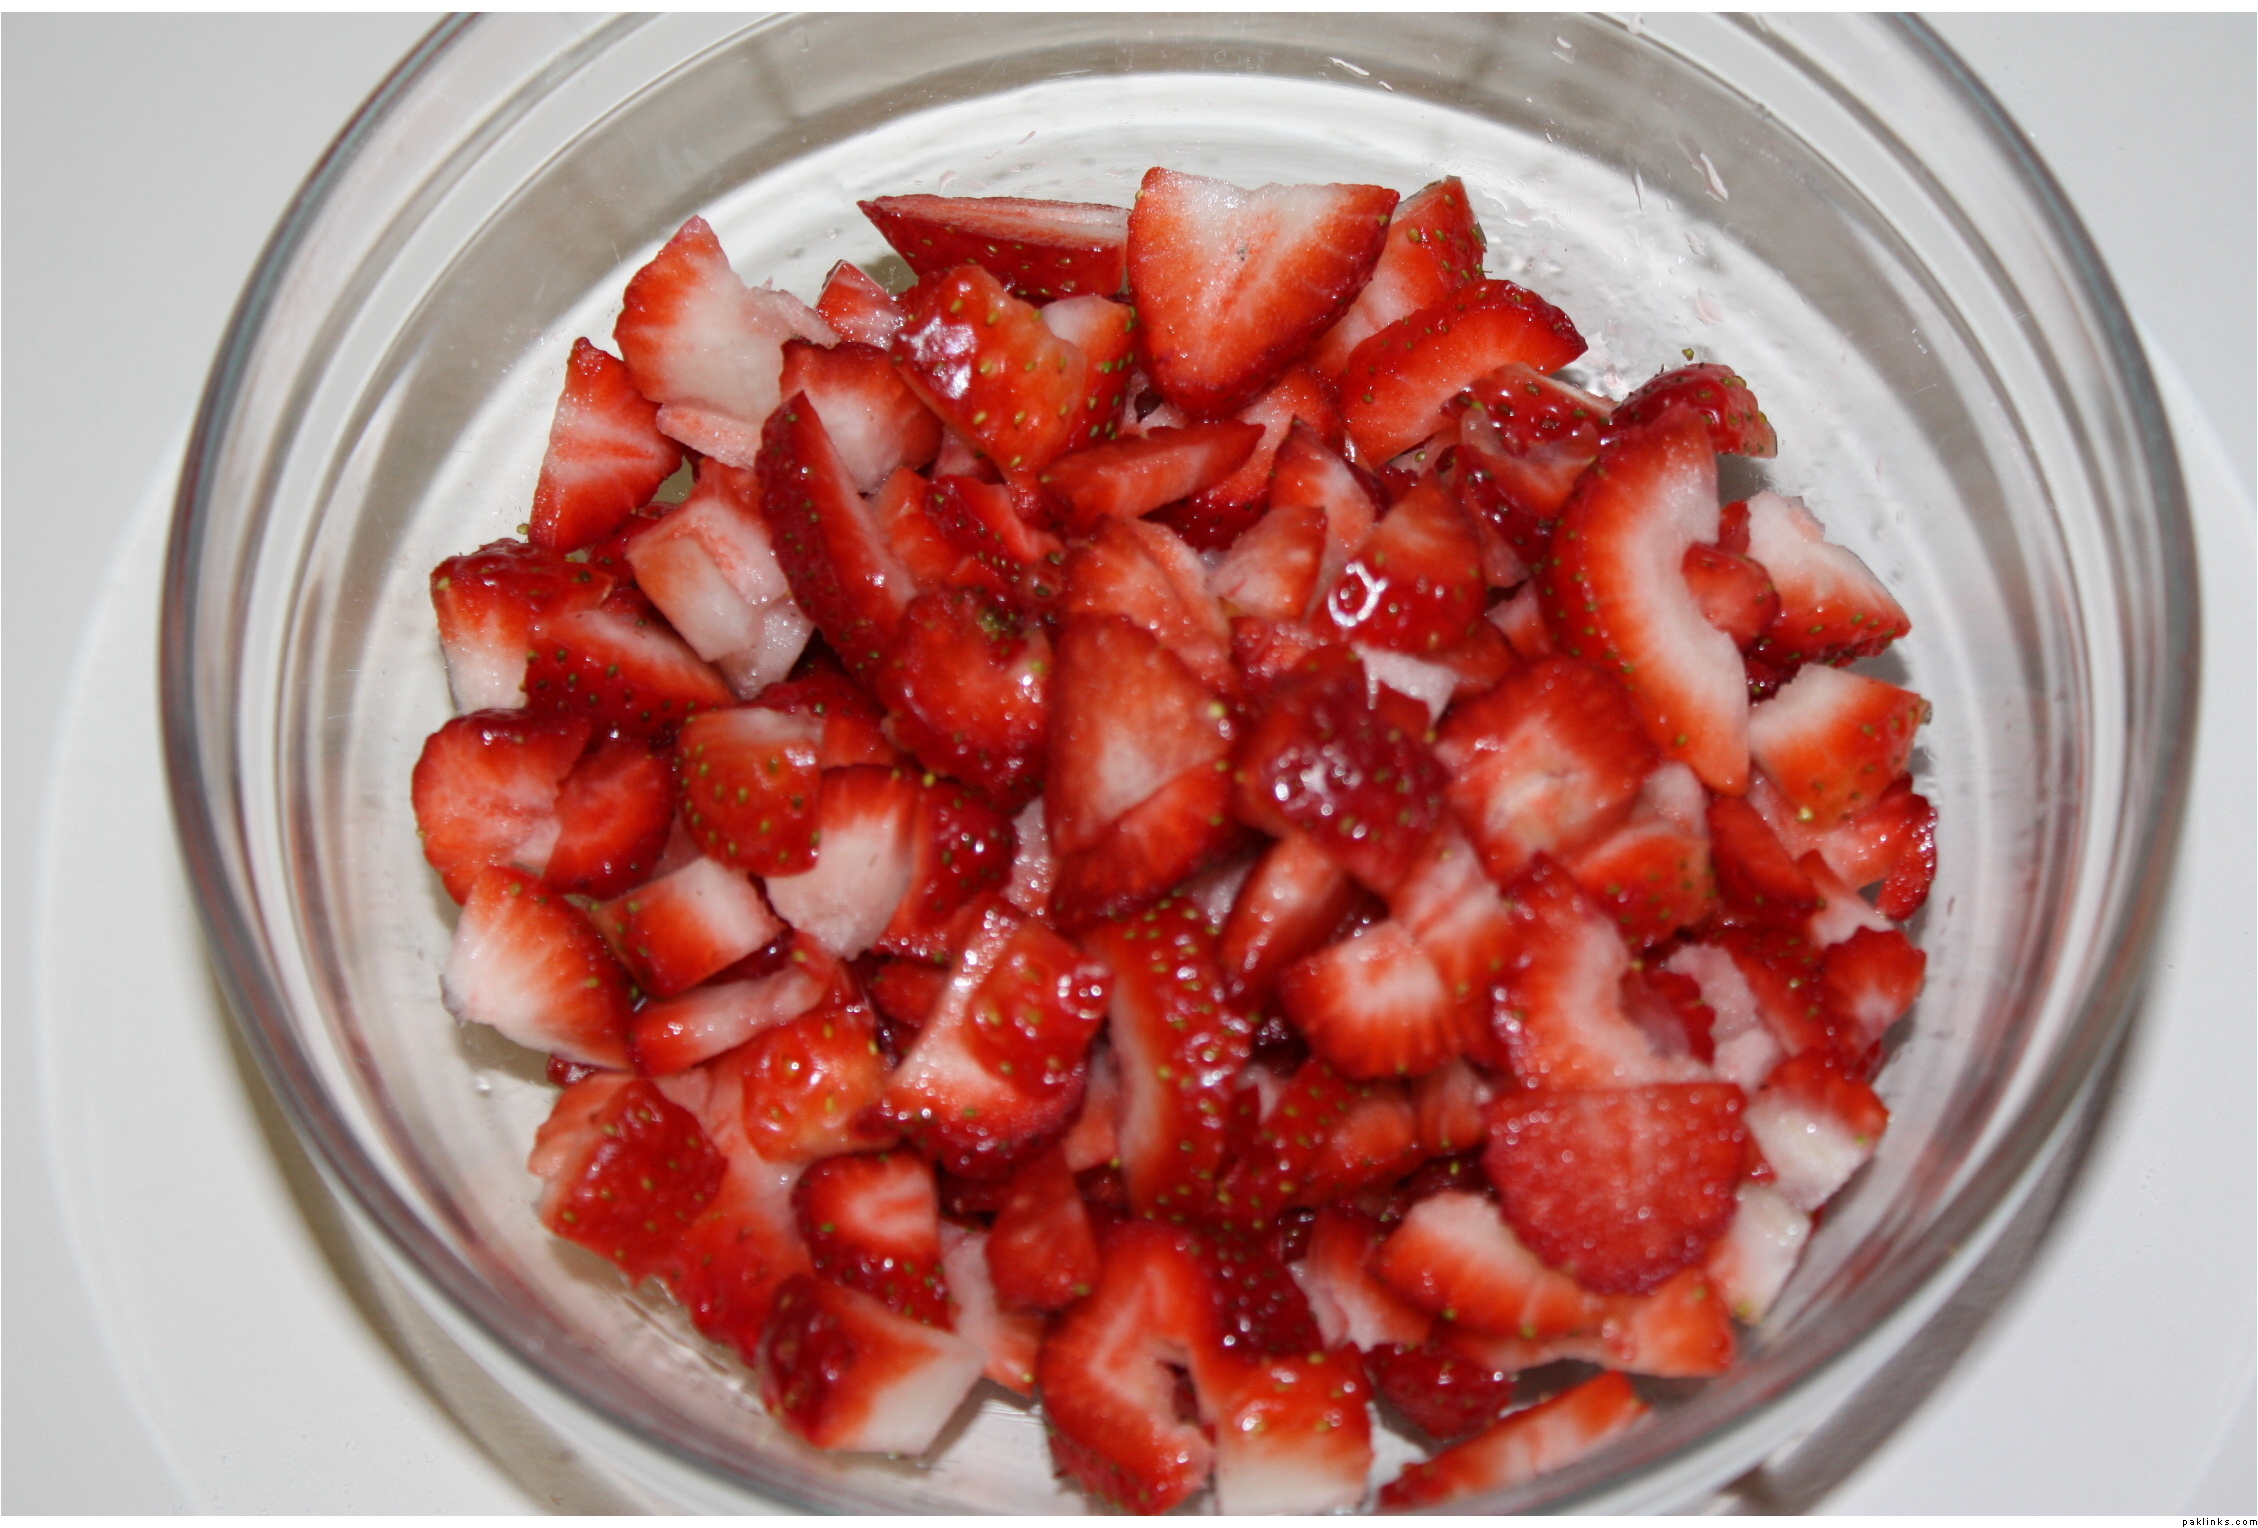
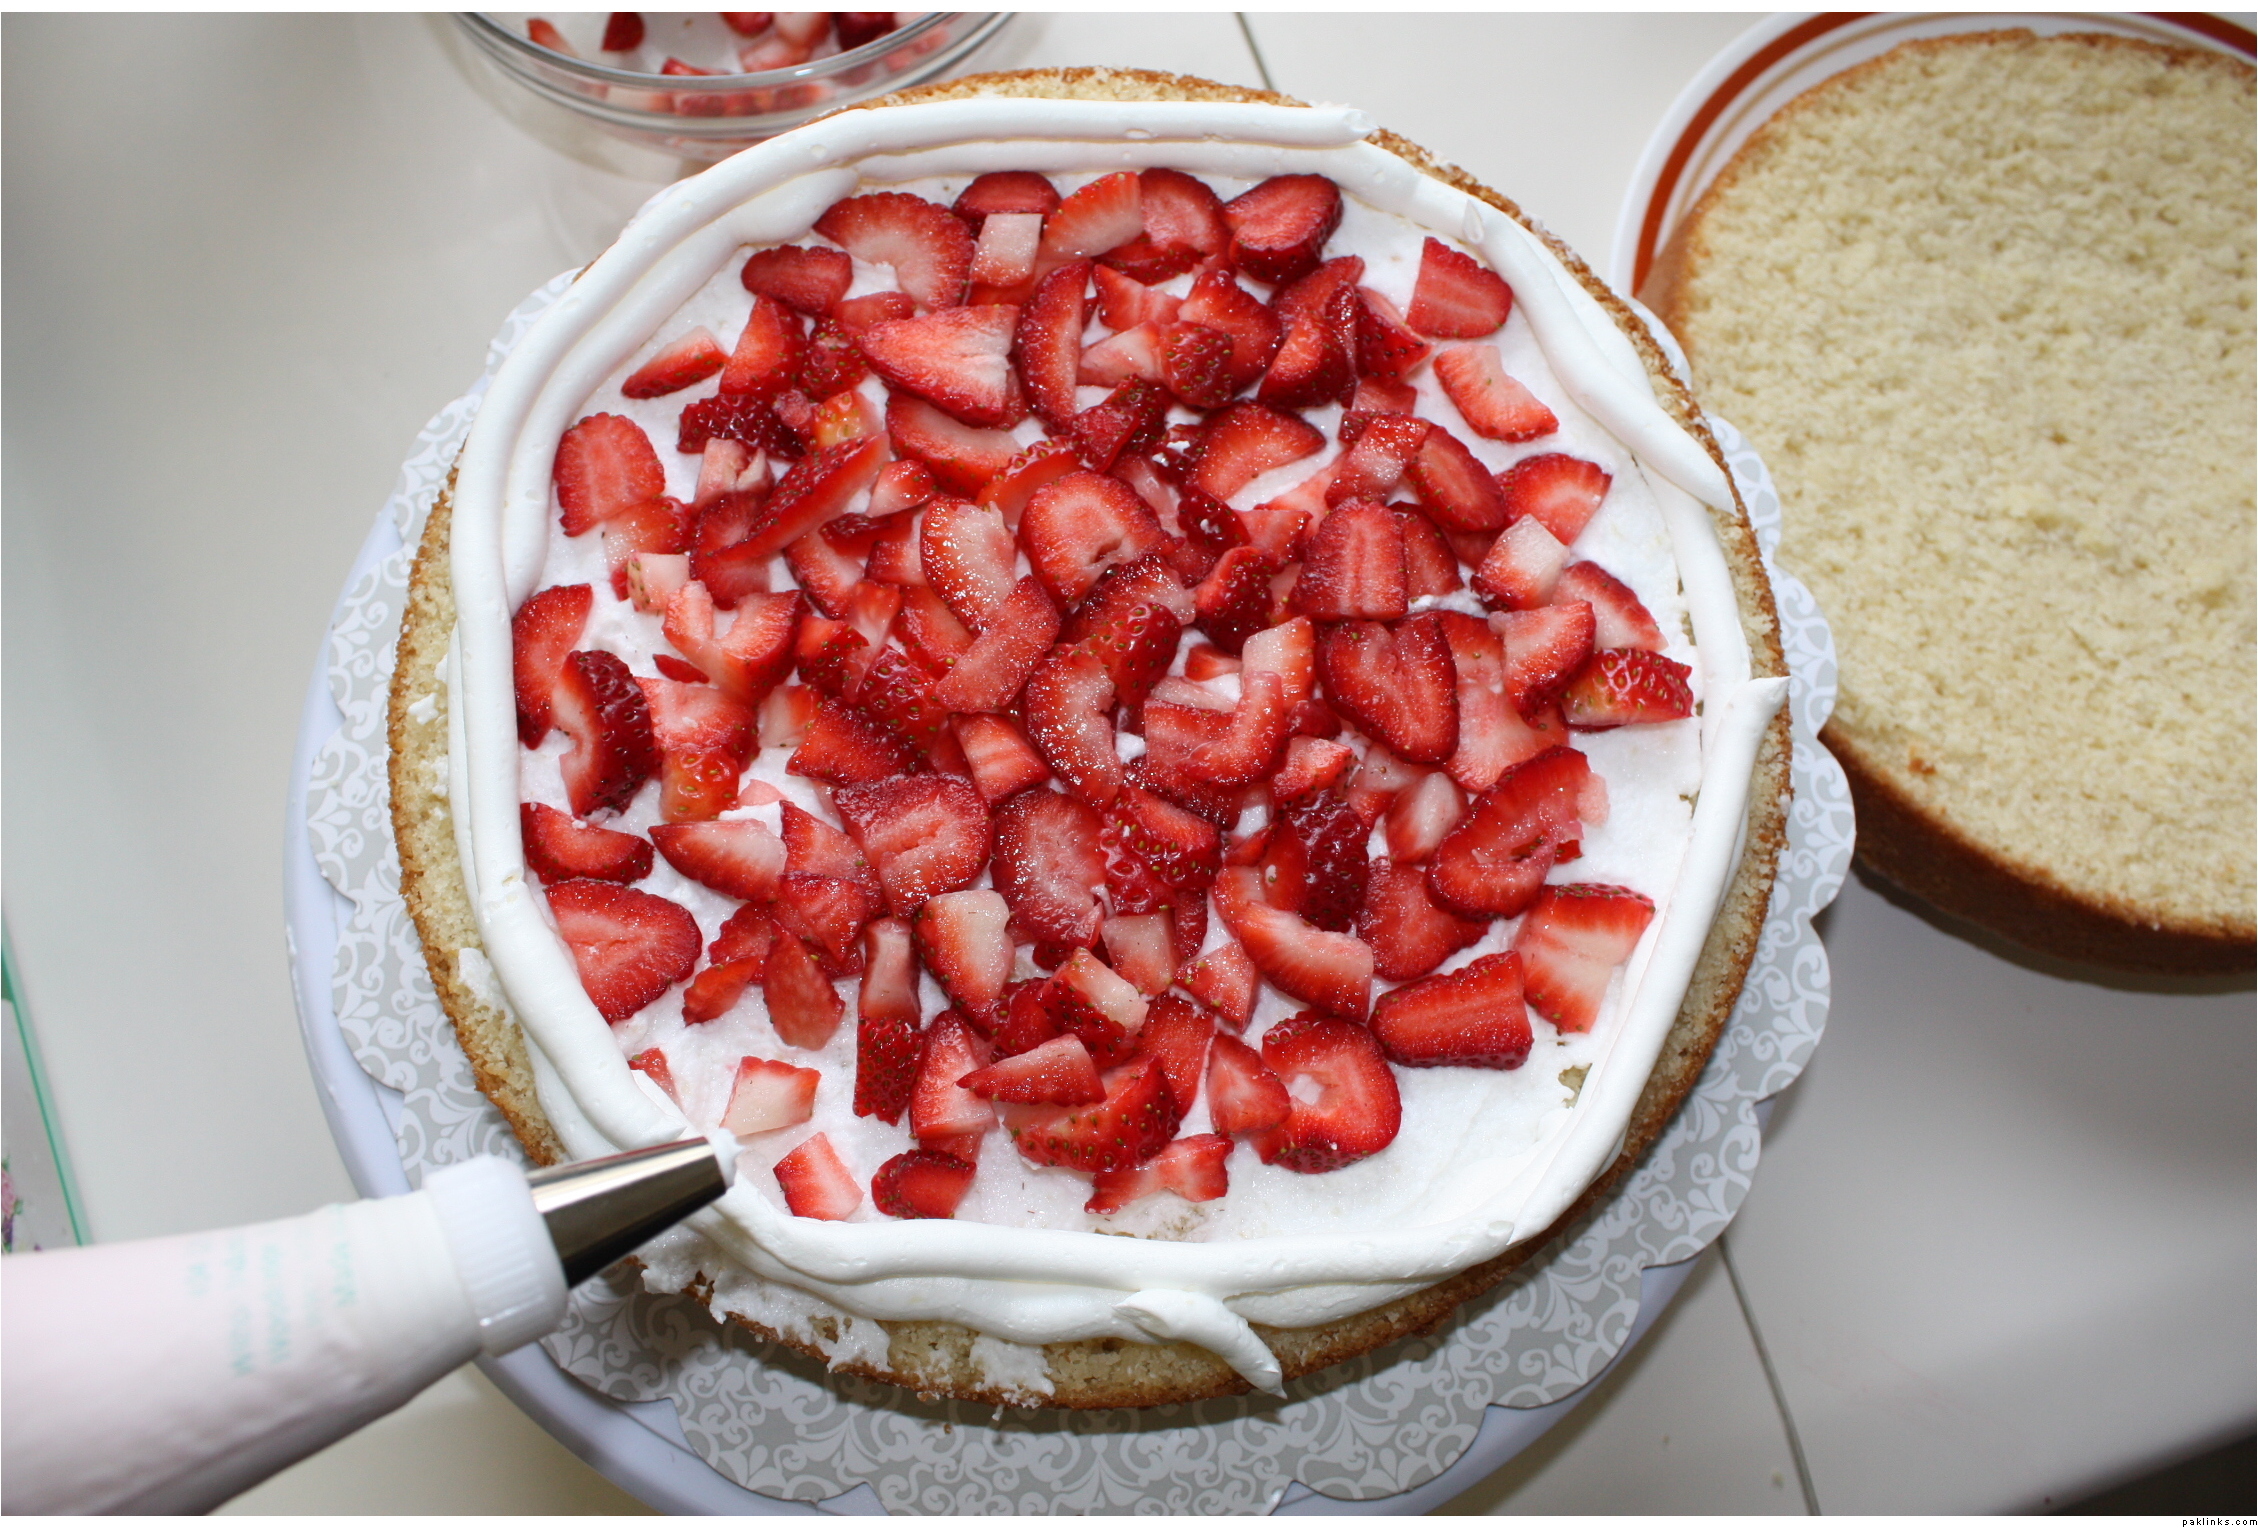
For this particular cake, I used fresh strawberries for the filling. I would not need them until the day I decorate the cake (today), so I prepped them in advance so that they would dry and not be too juicy. Left in the fridge overnight.

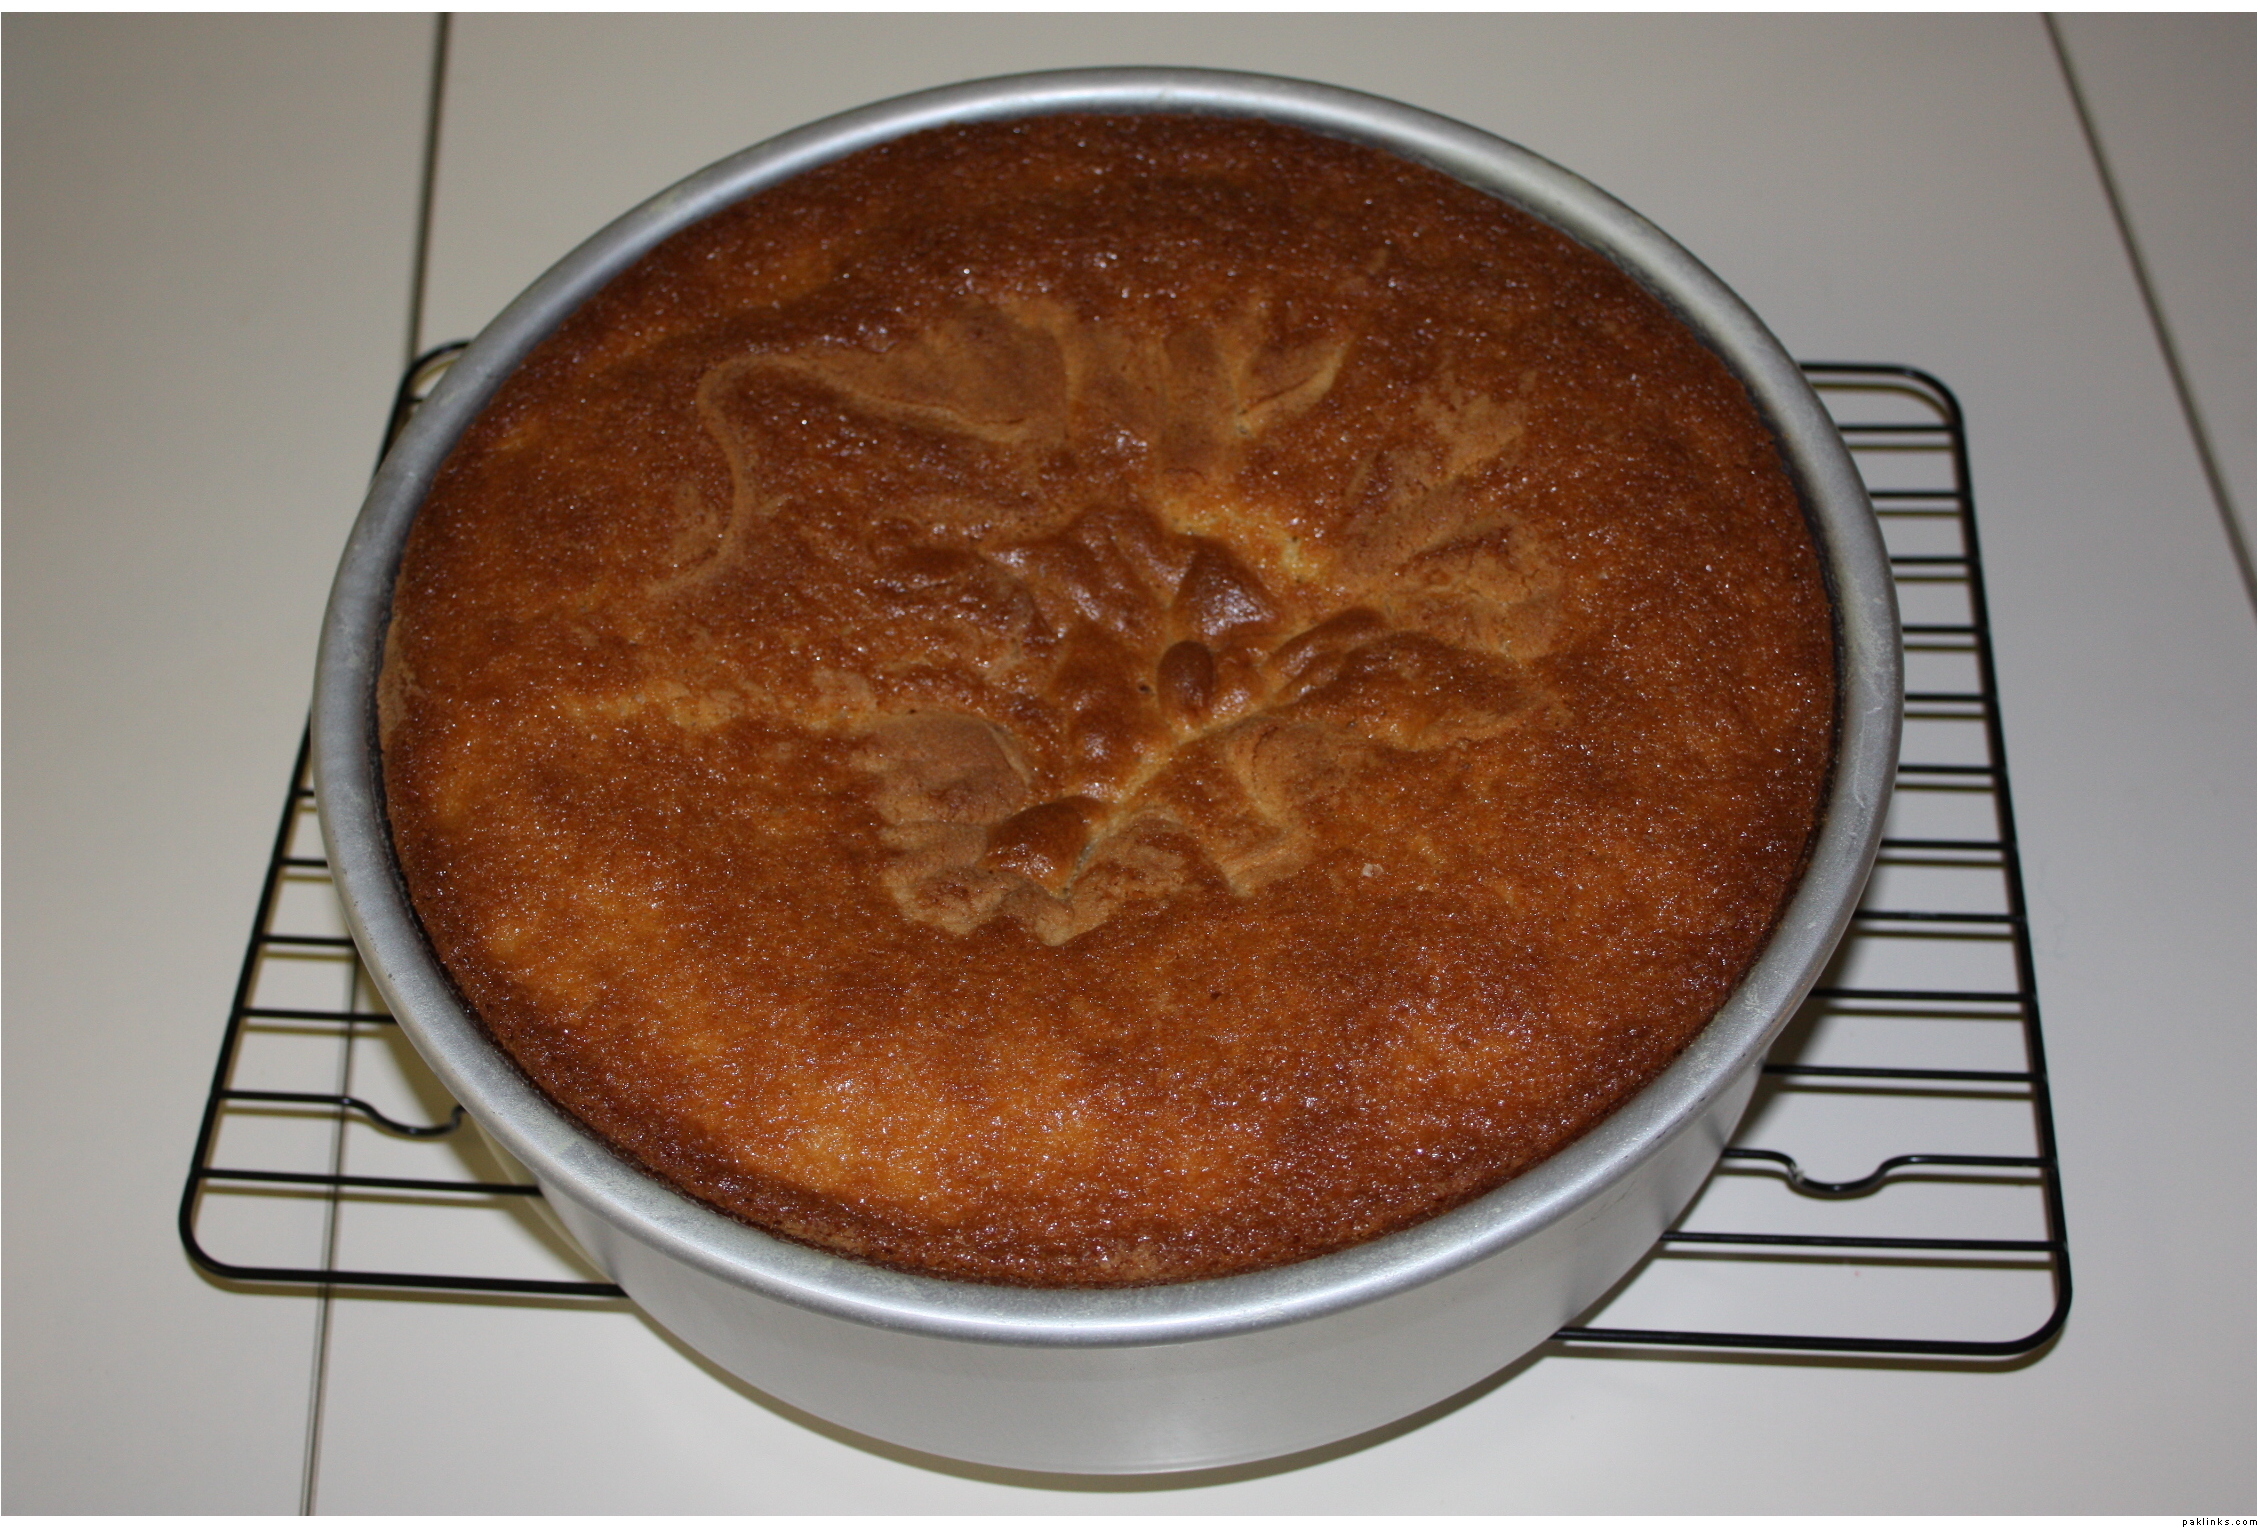
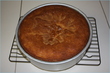
I baked the cake at 300 degrees (I have a gas oven) for 1 hour and 20 minutes. I only opened the oven after the first hour was complete. It baked fairly flat, which is how it is supposed to be.

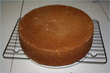
I take the cake out of the pan immediately and place it on a cooling rack. I let it cool like this (upside down) for 3 hours at room temperature.

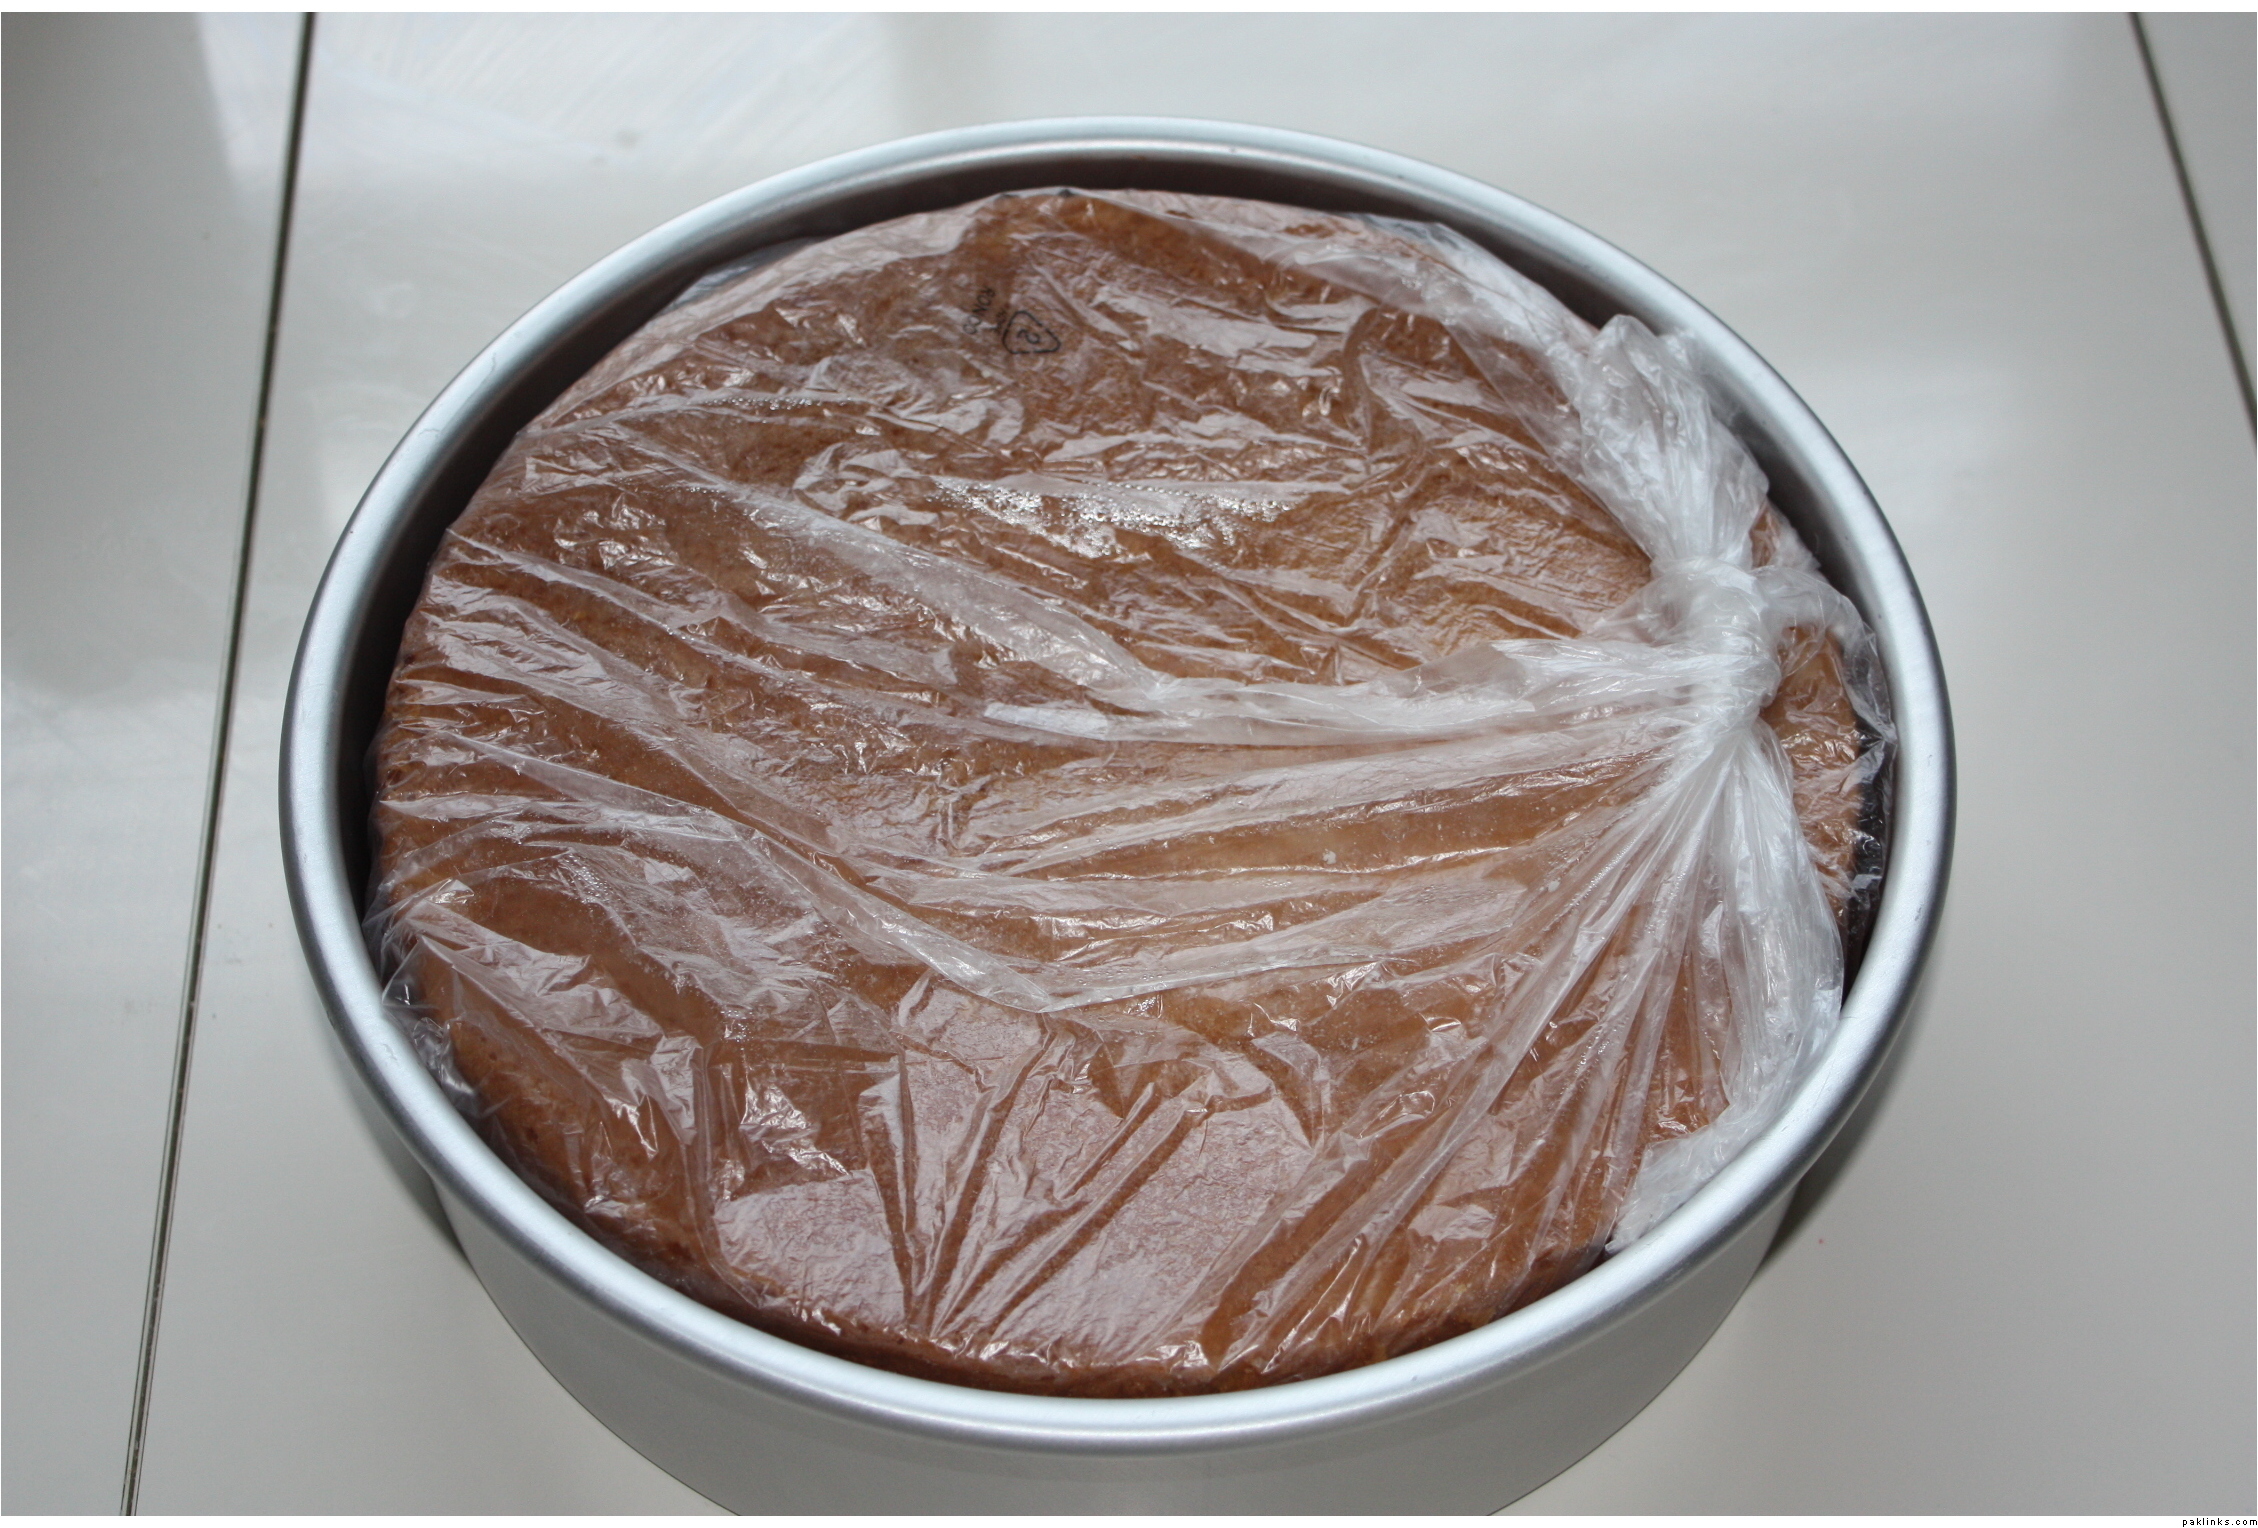
I like to bake my cake in advance, never the day I decorate it. It makes it easier and less crumbly. So I covered this cake in a plastic bag, placed it back in the pan (just out of habit to put it back in the pan) and left it in the fridge overnight.

If I have to freeze it, I wrap the cake up in saran wrap, at least 3 times, tightly covered, then put into a plastic bag, then another plastic bag and into the freezer. The day before I have to decorate it, I leave it in the fridge overnight to defrost.

The next morning – Decorating the Cake

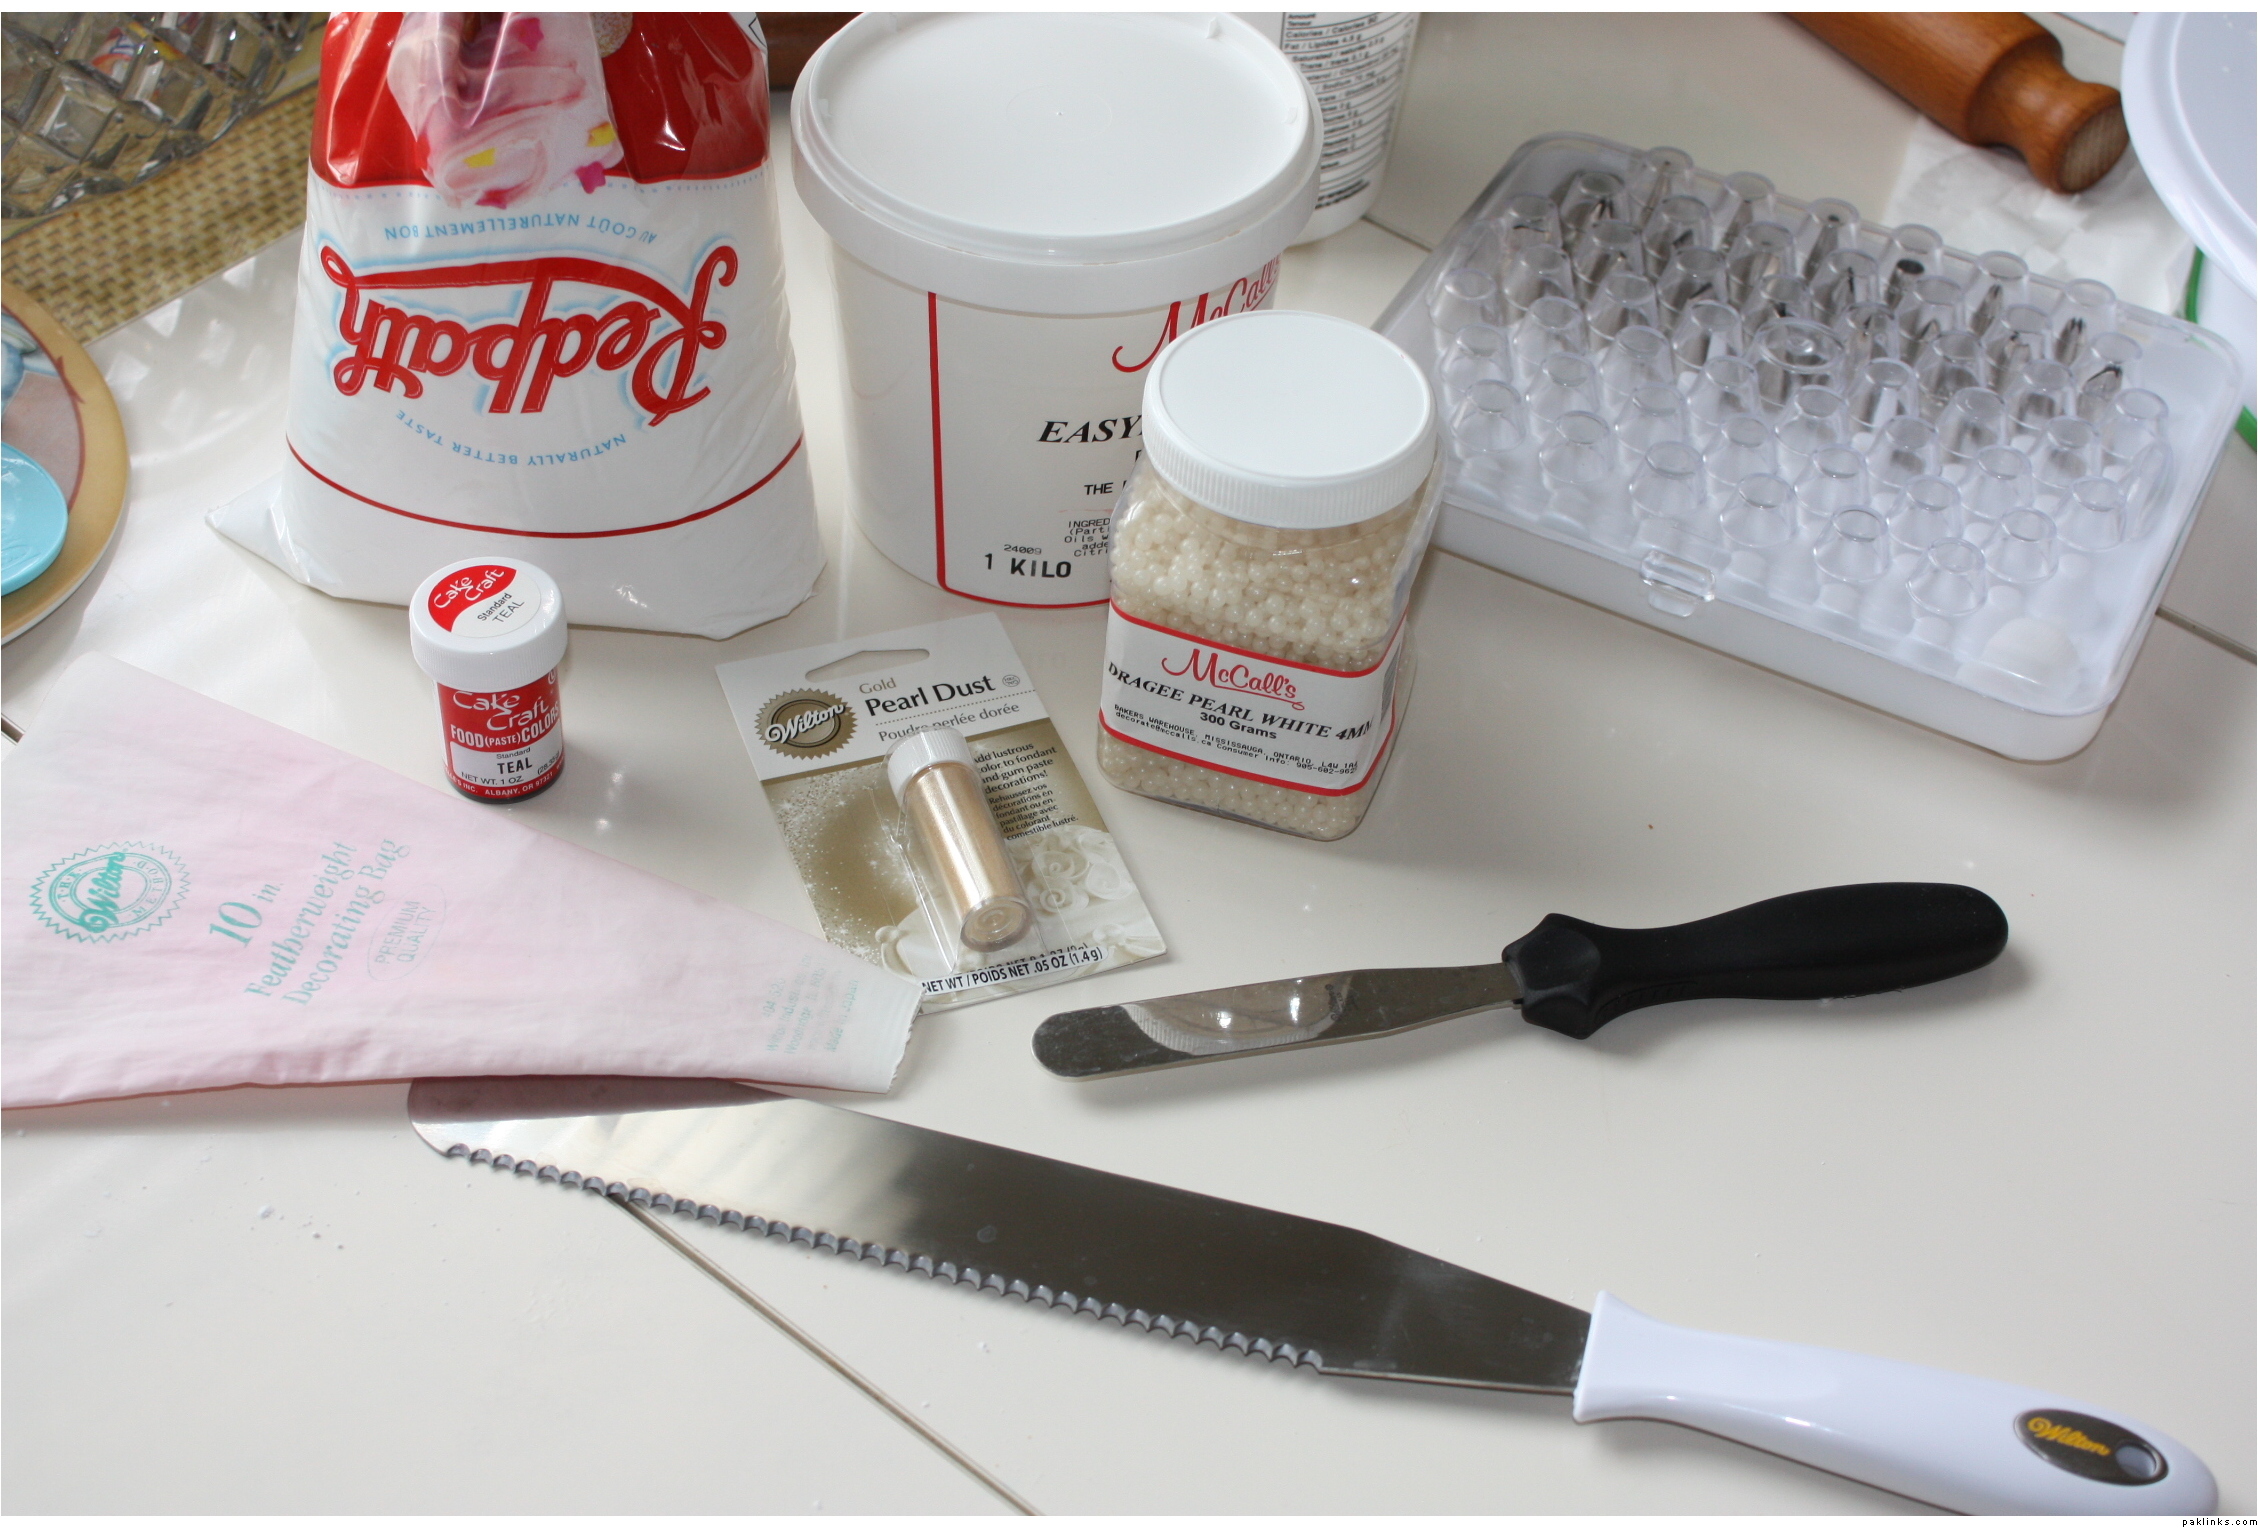
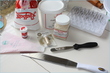
I have some of my tools here. I plan on using gold pear dust (never used before, have no clue at this point how it will turn out) as part of the decorations of the fondant. You will also see a serrated spatula. You can use any knife/spatula that is serrated, as long as the length is long enough to cut through the entire length of the cake.

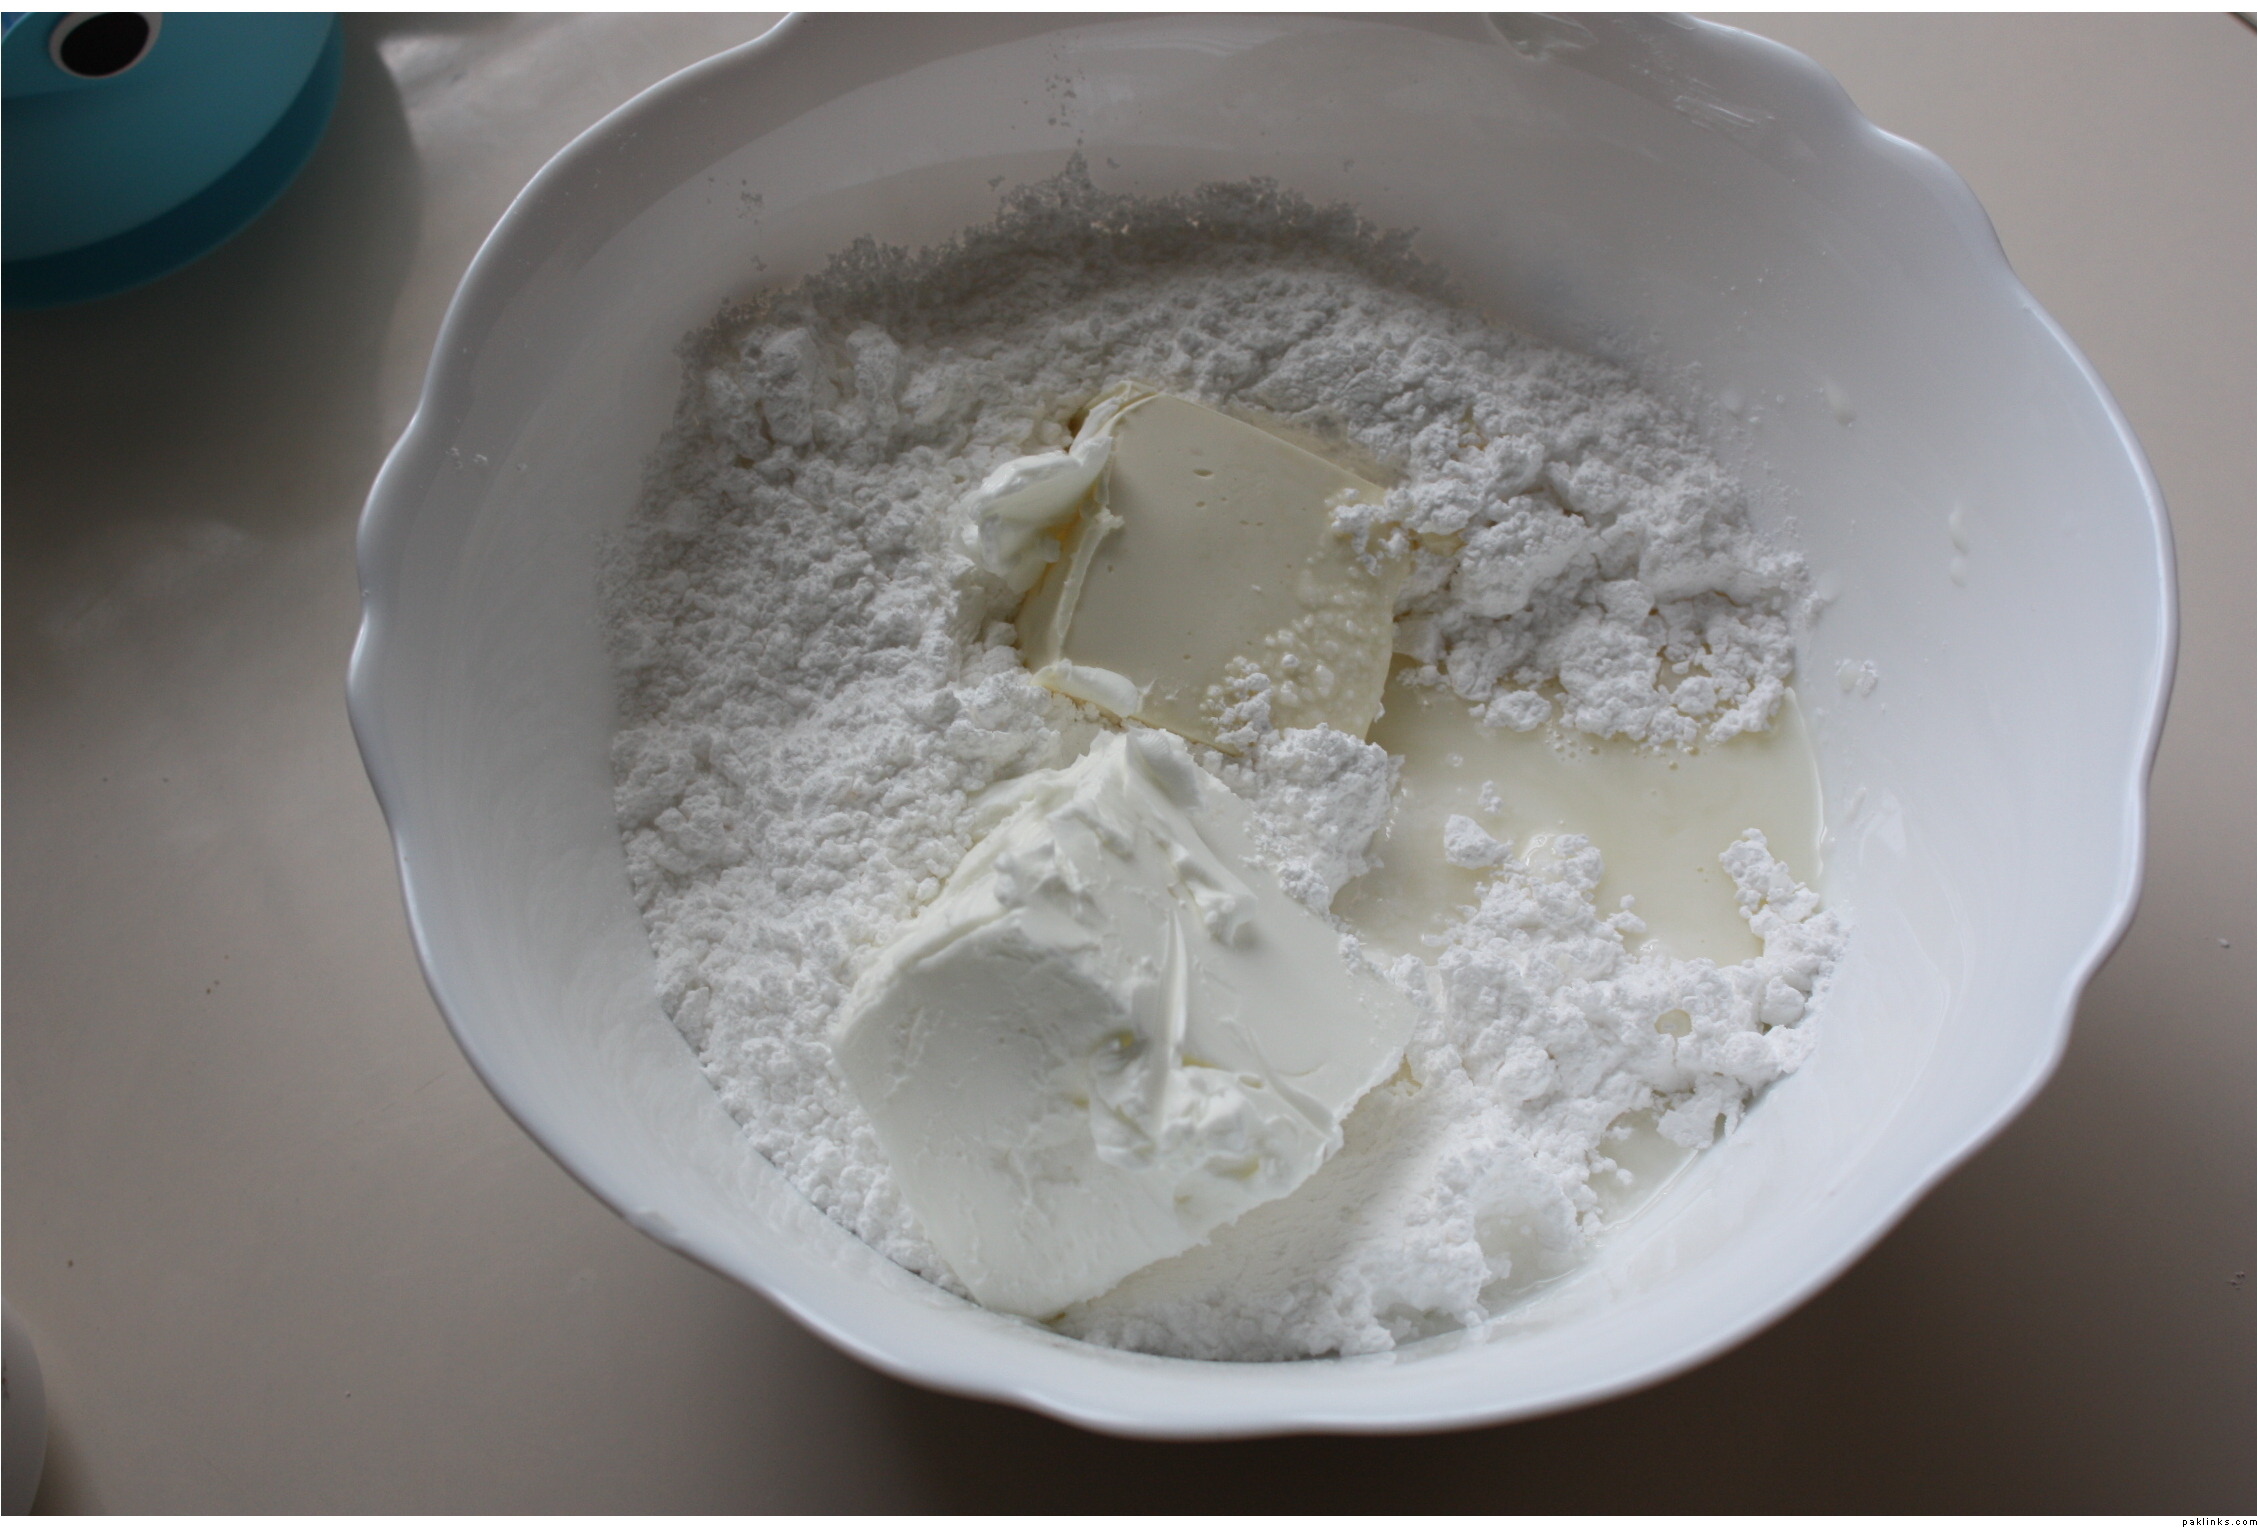
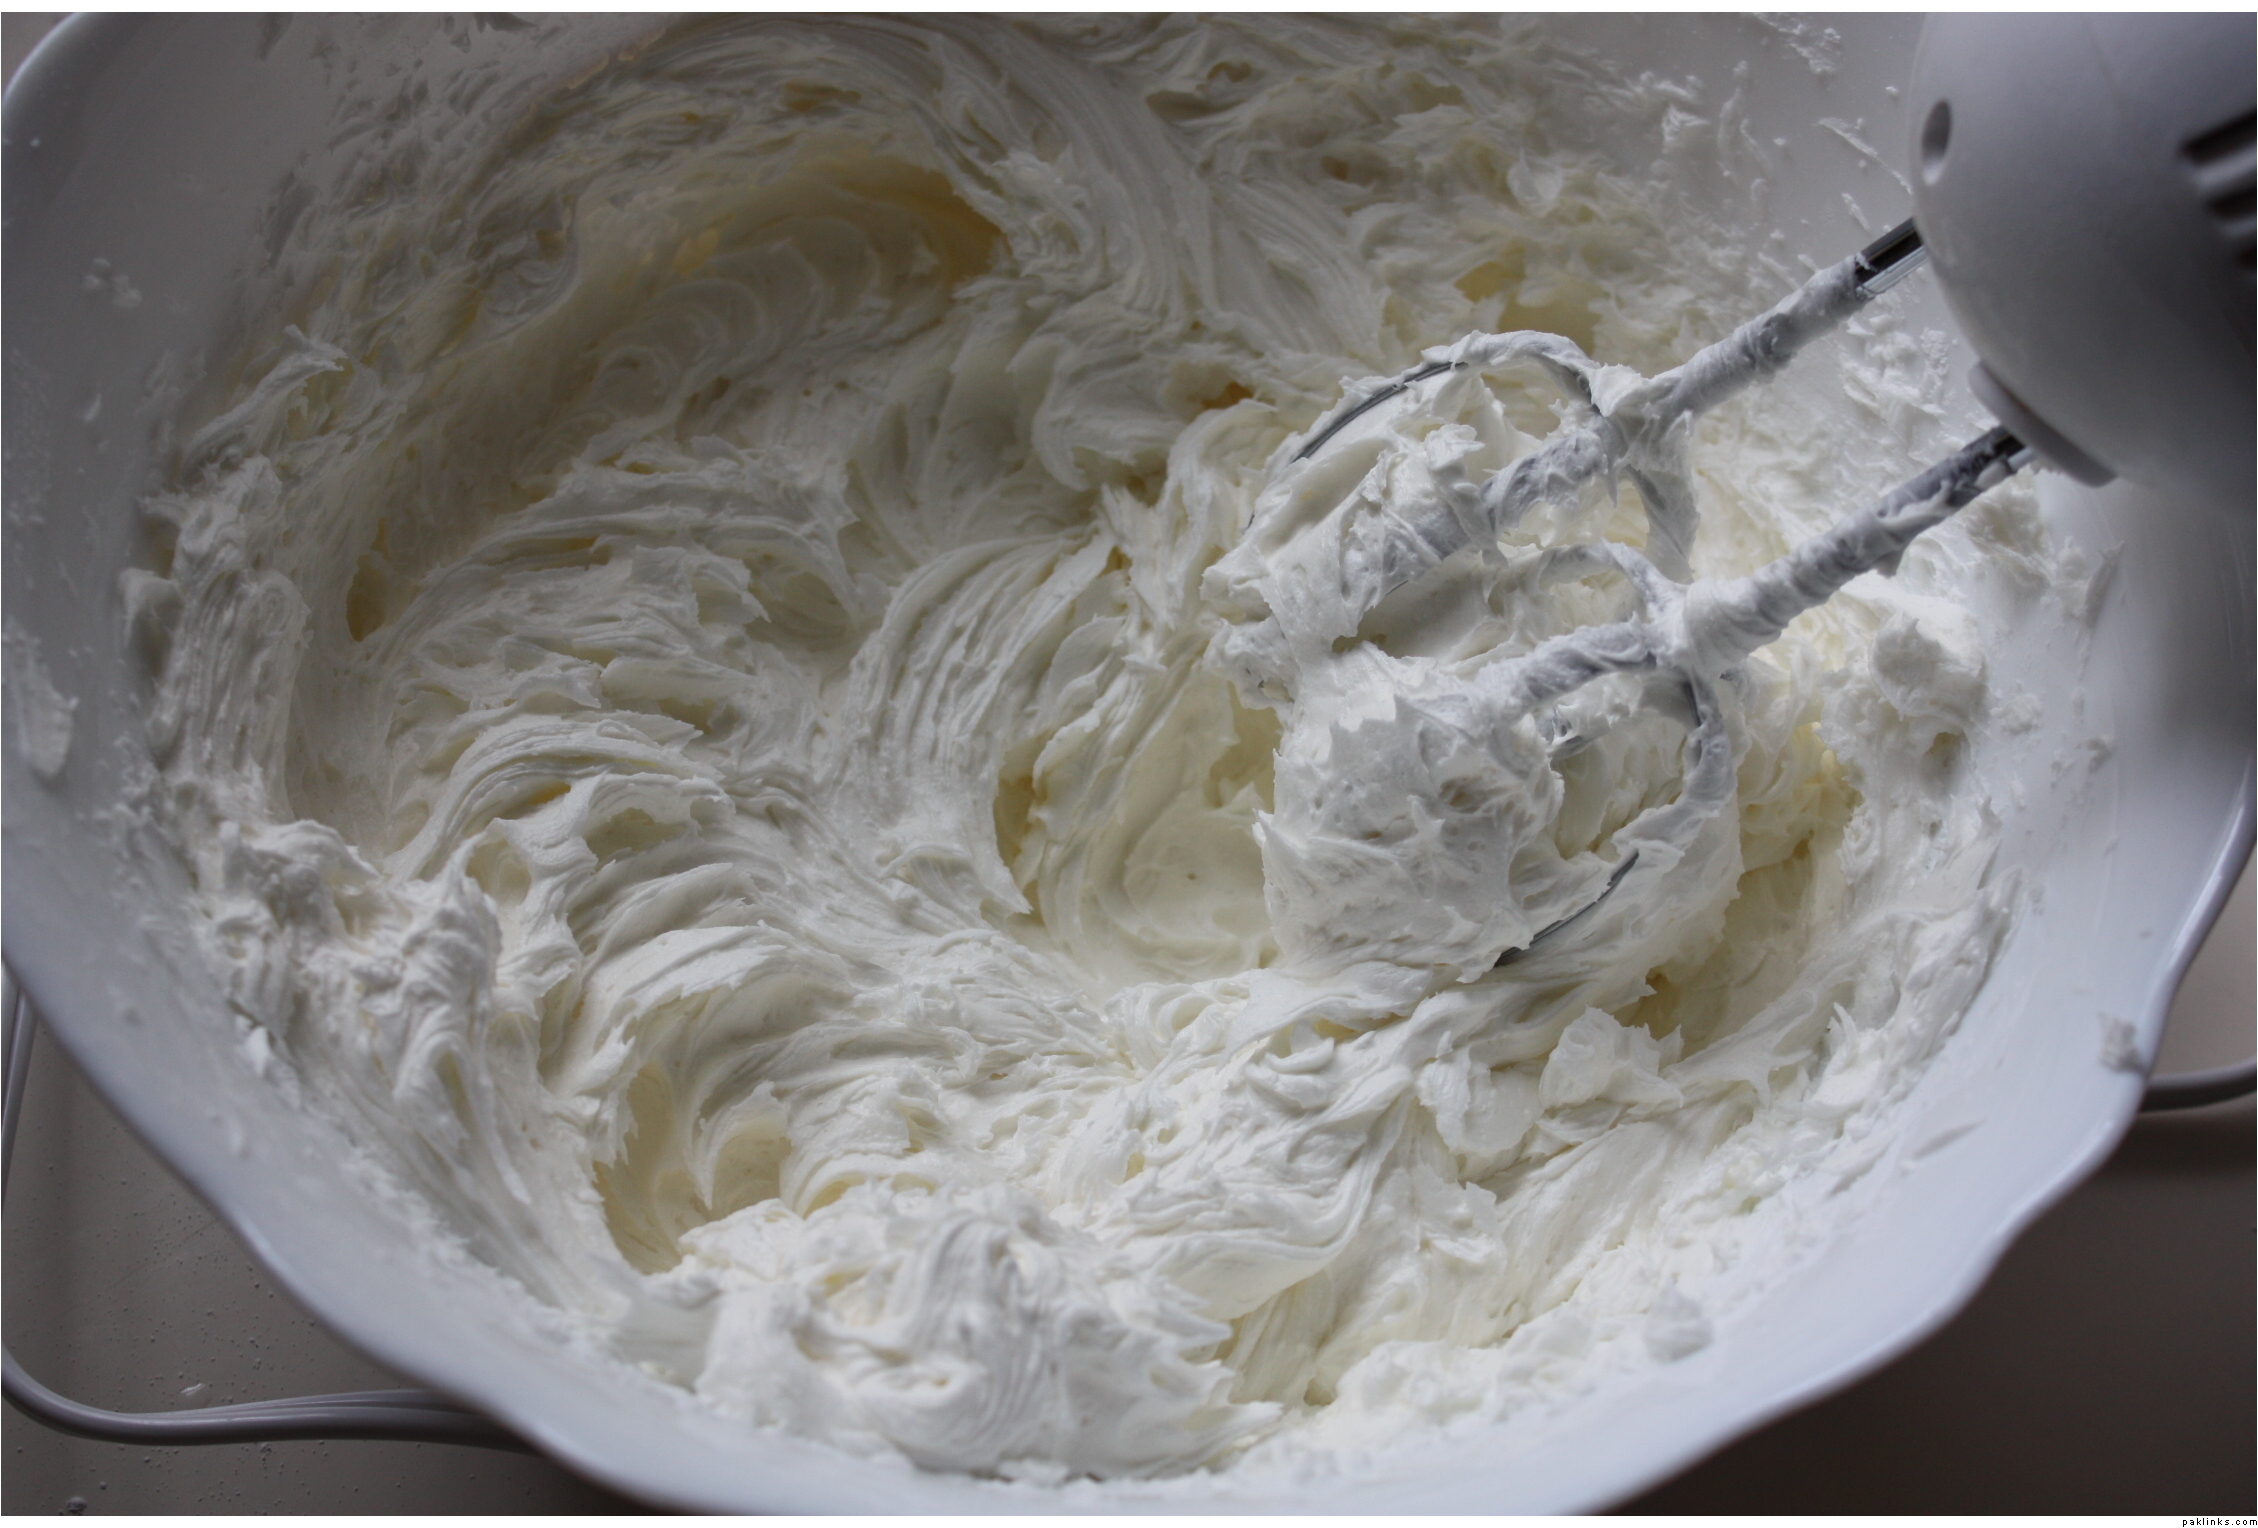
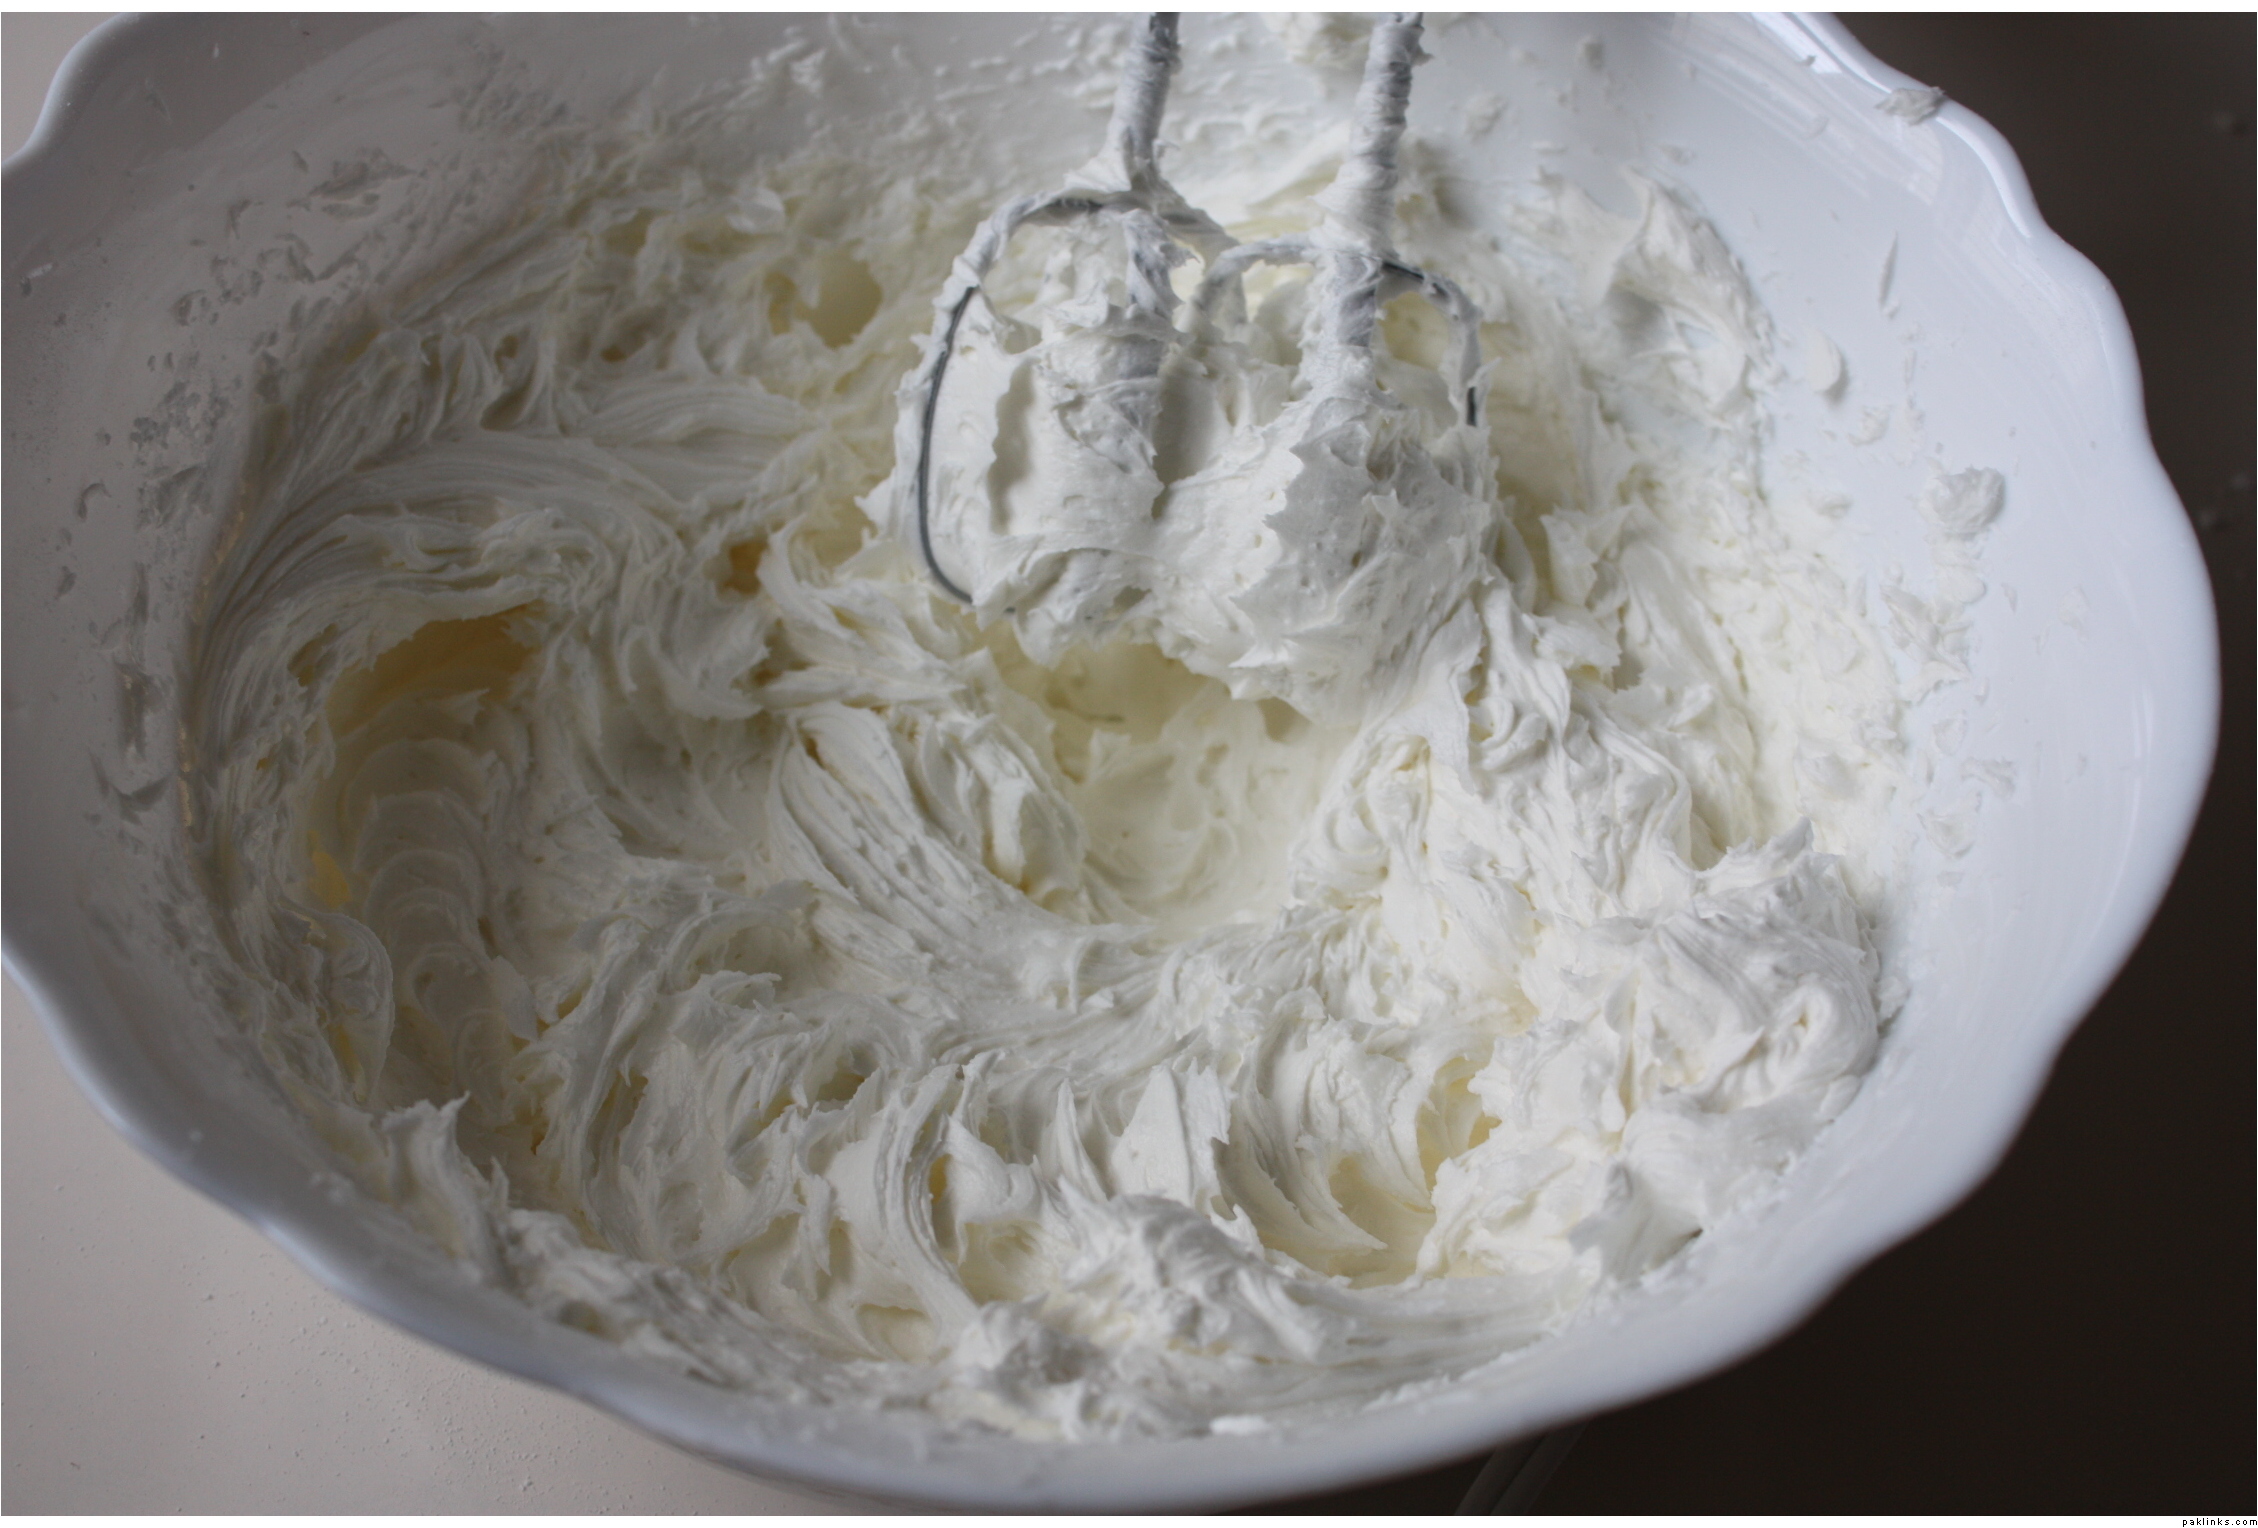
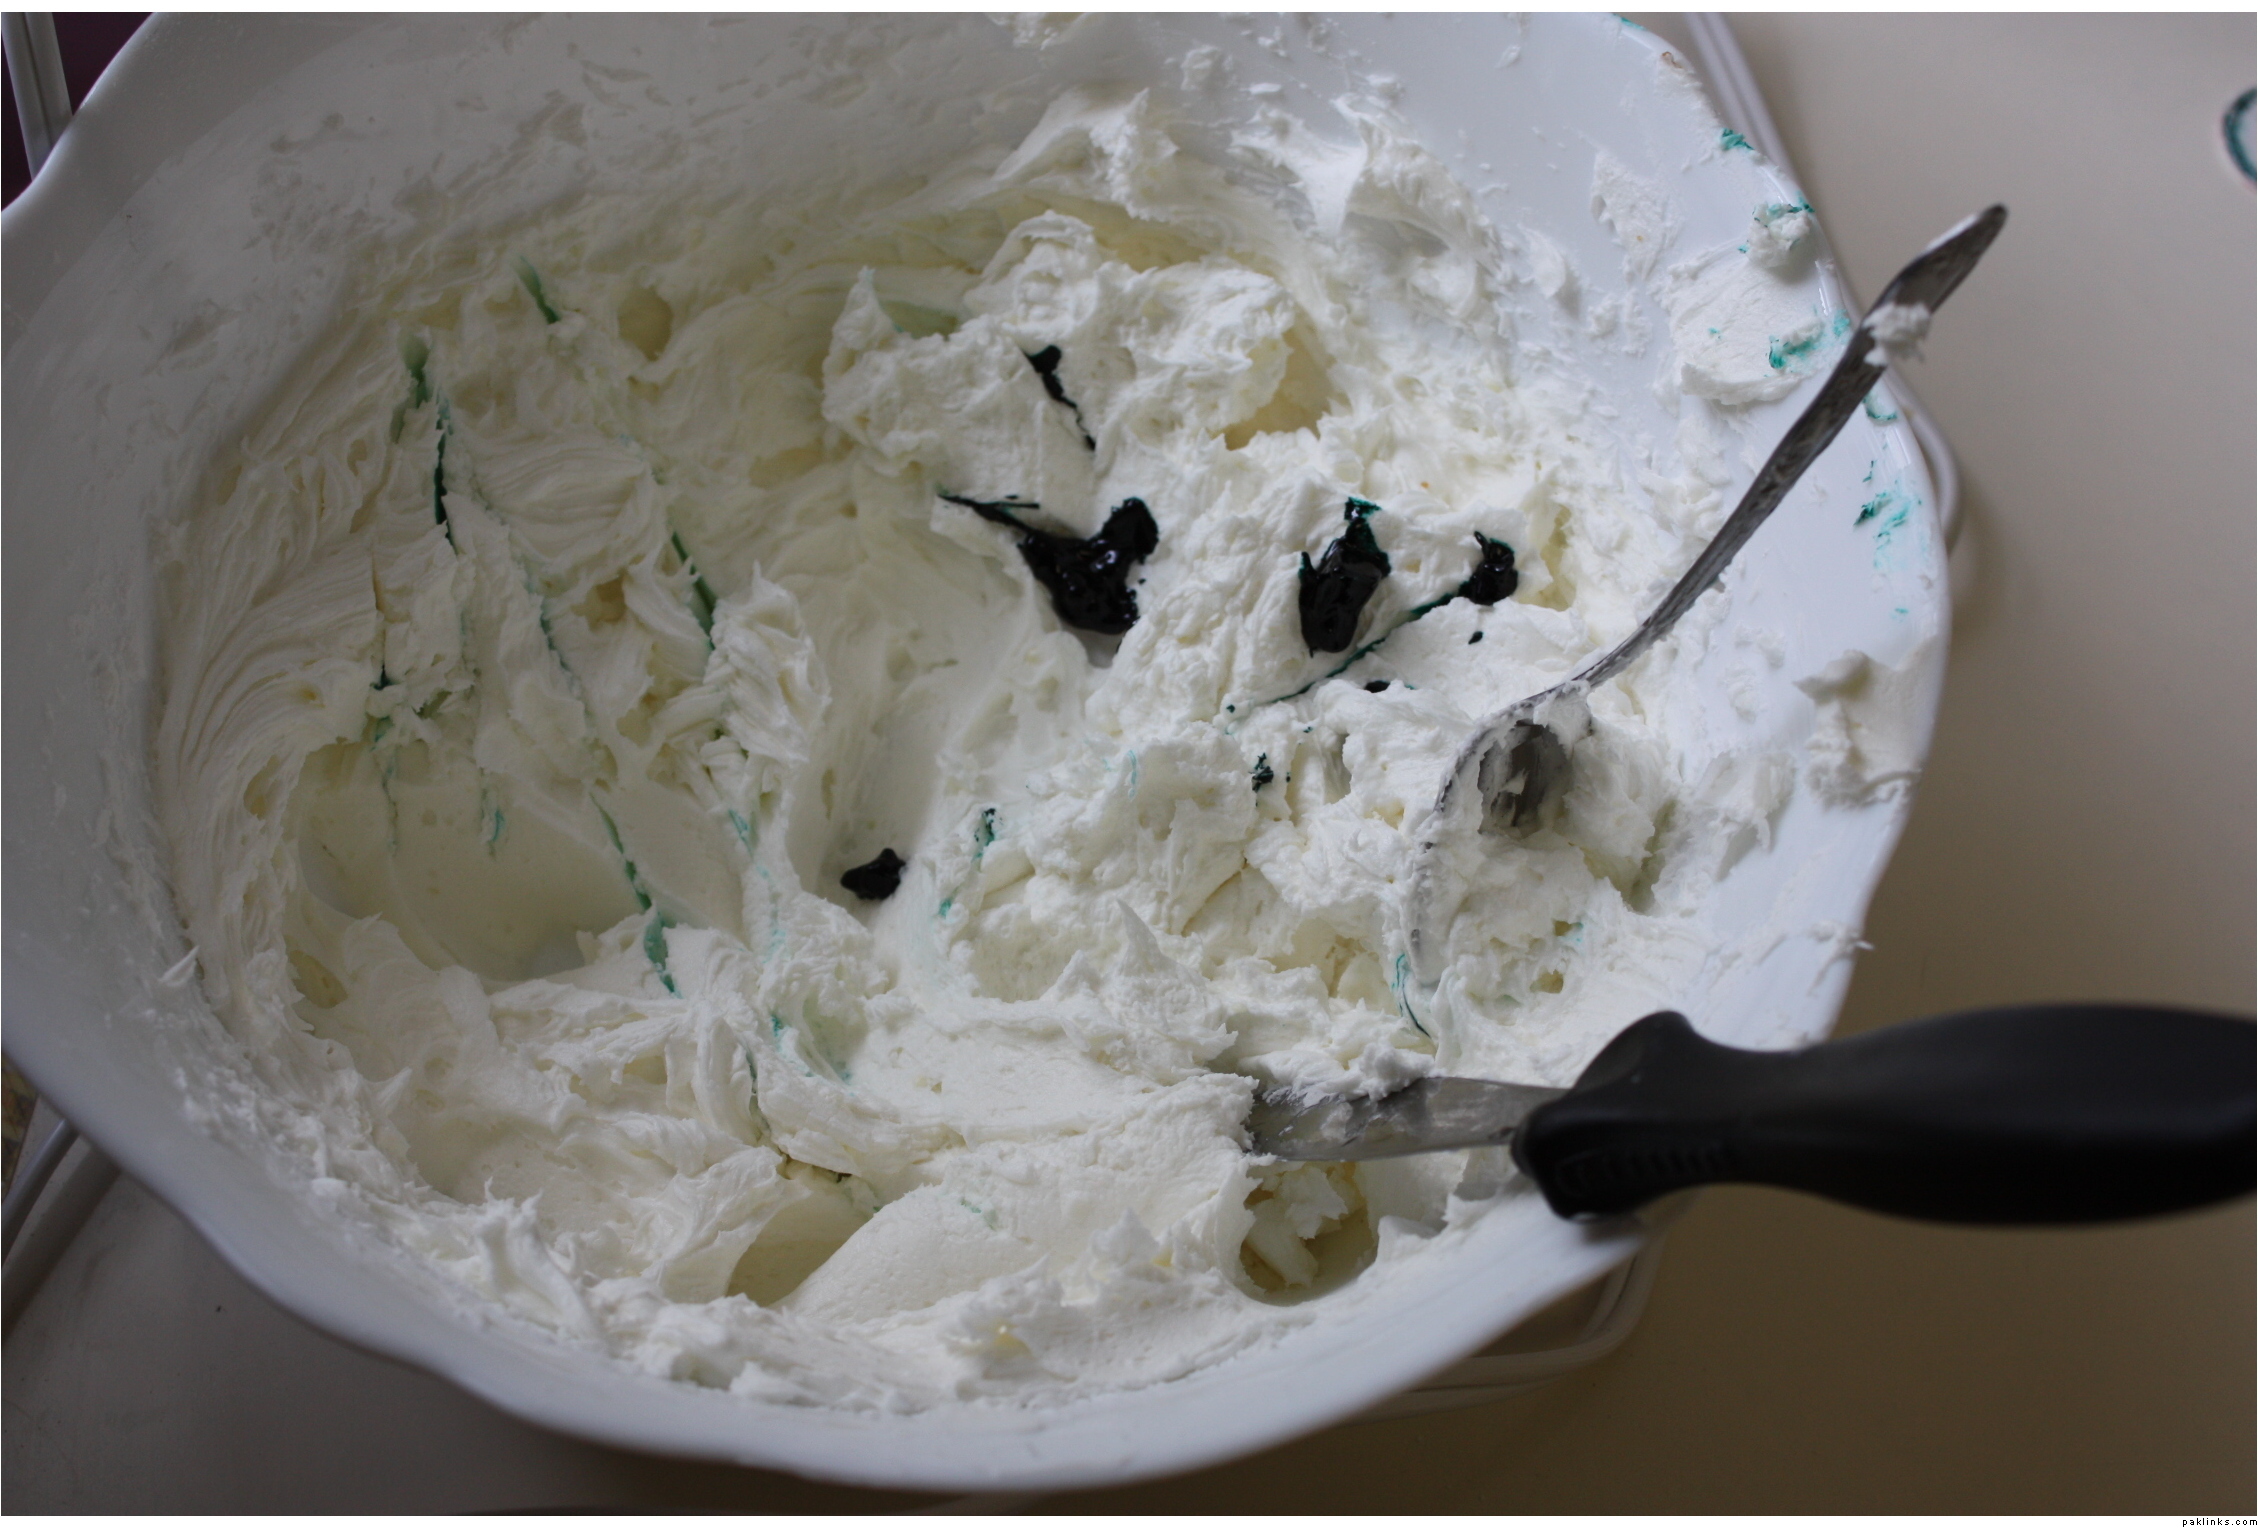
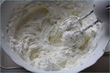
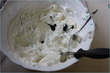
I put all my ingredients together for the icing. I include my leftover cream cheese from the last cake I made on Valentine’s Day. I also use more milk, as opposed to water, for the icing as milk tends to make the icing more fluffy.

Mix, mix, mix. You will be able to tell when the icing is ready as the consistency will change. It will become smoother, fluffier and free of lumps.

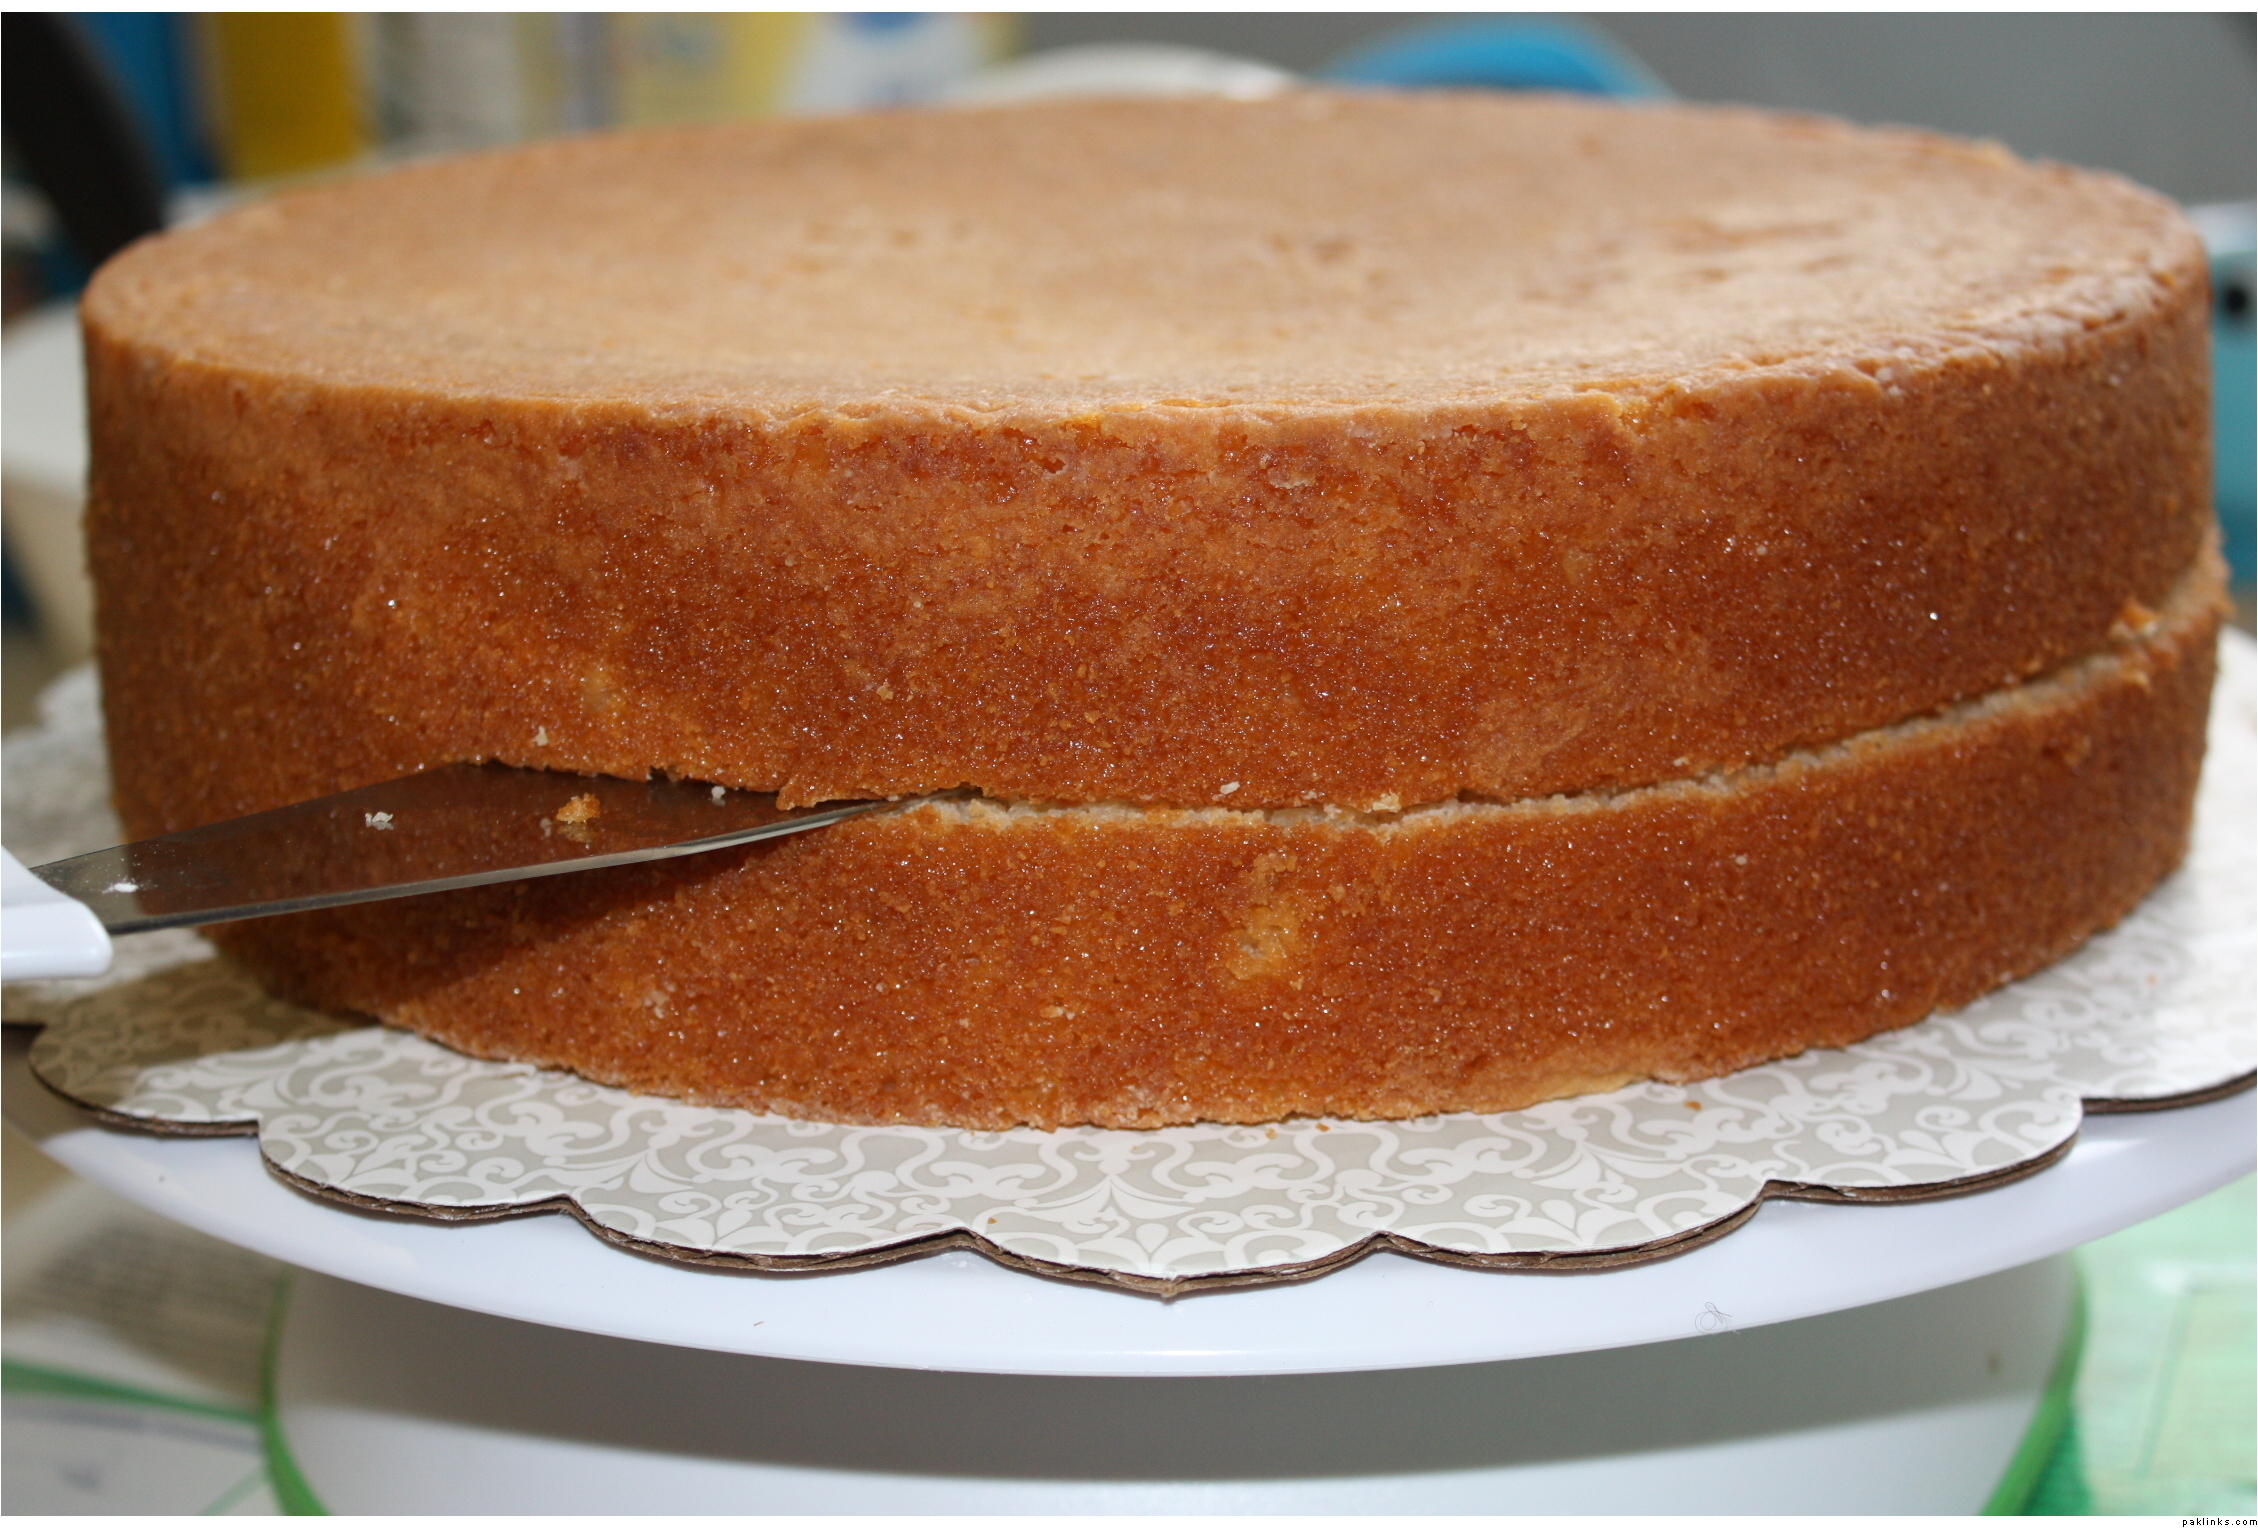
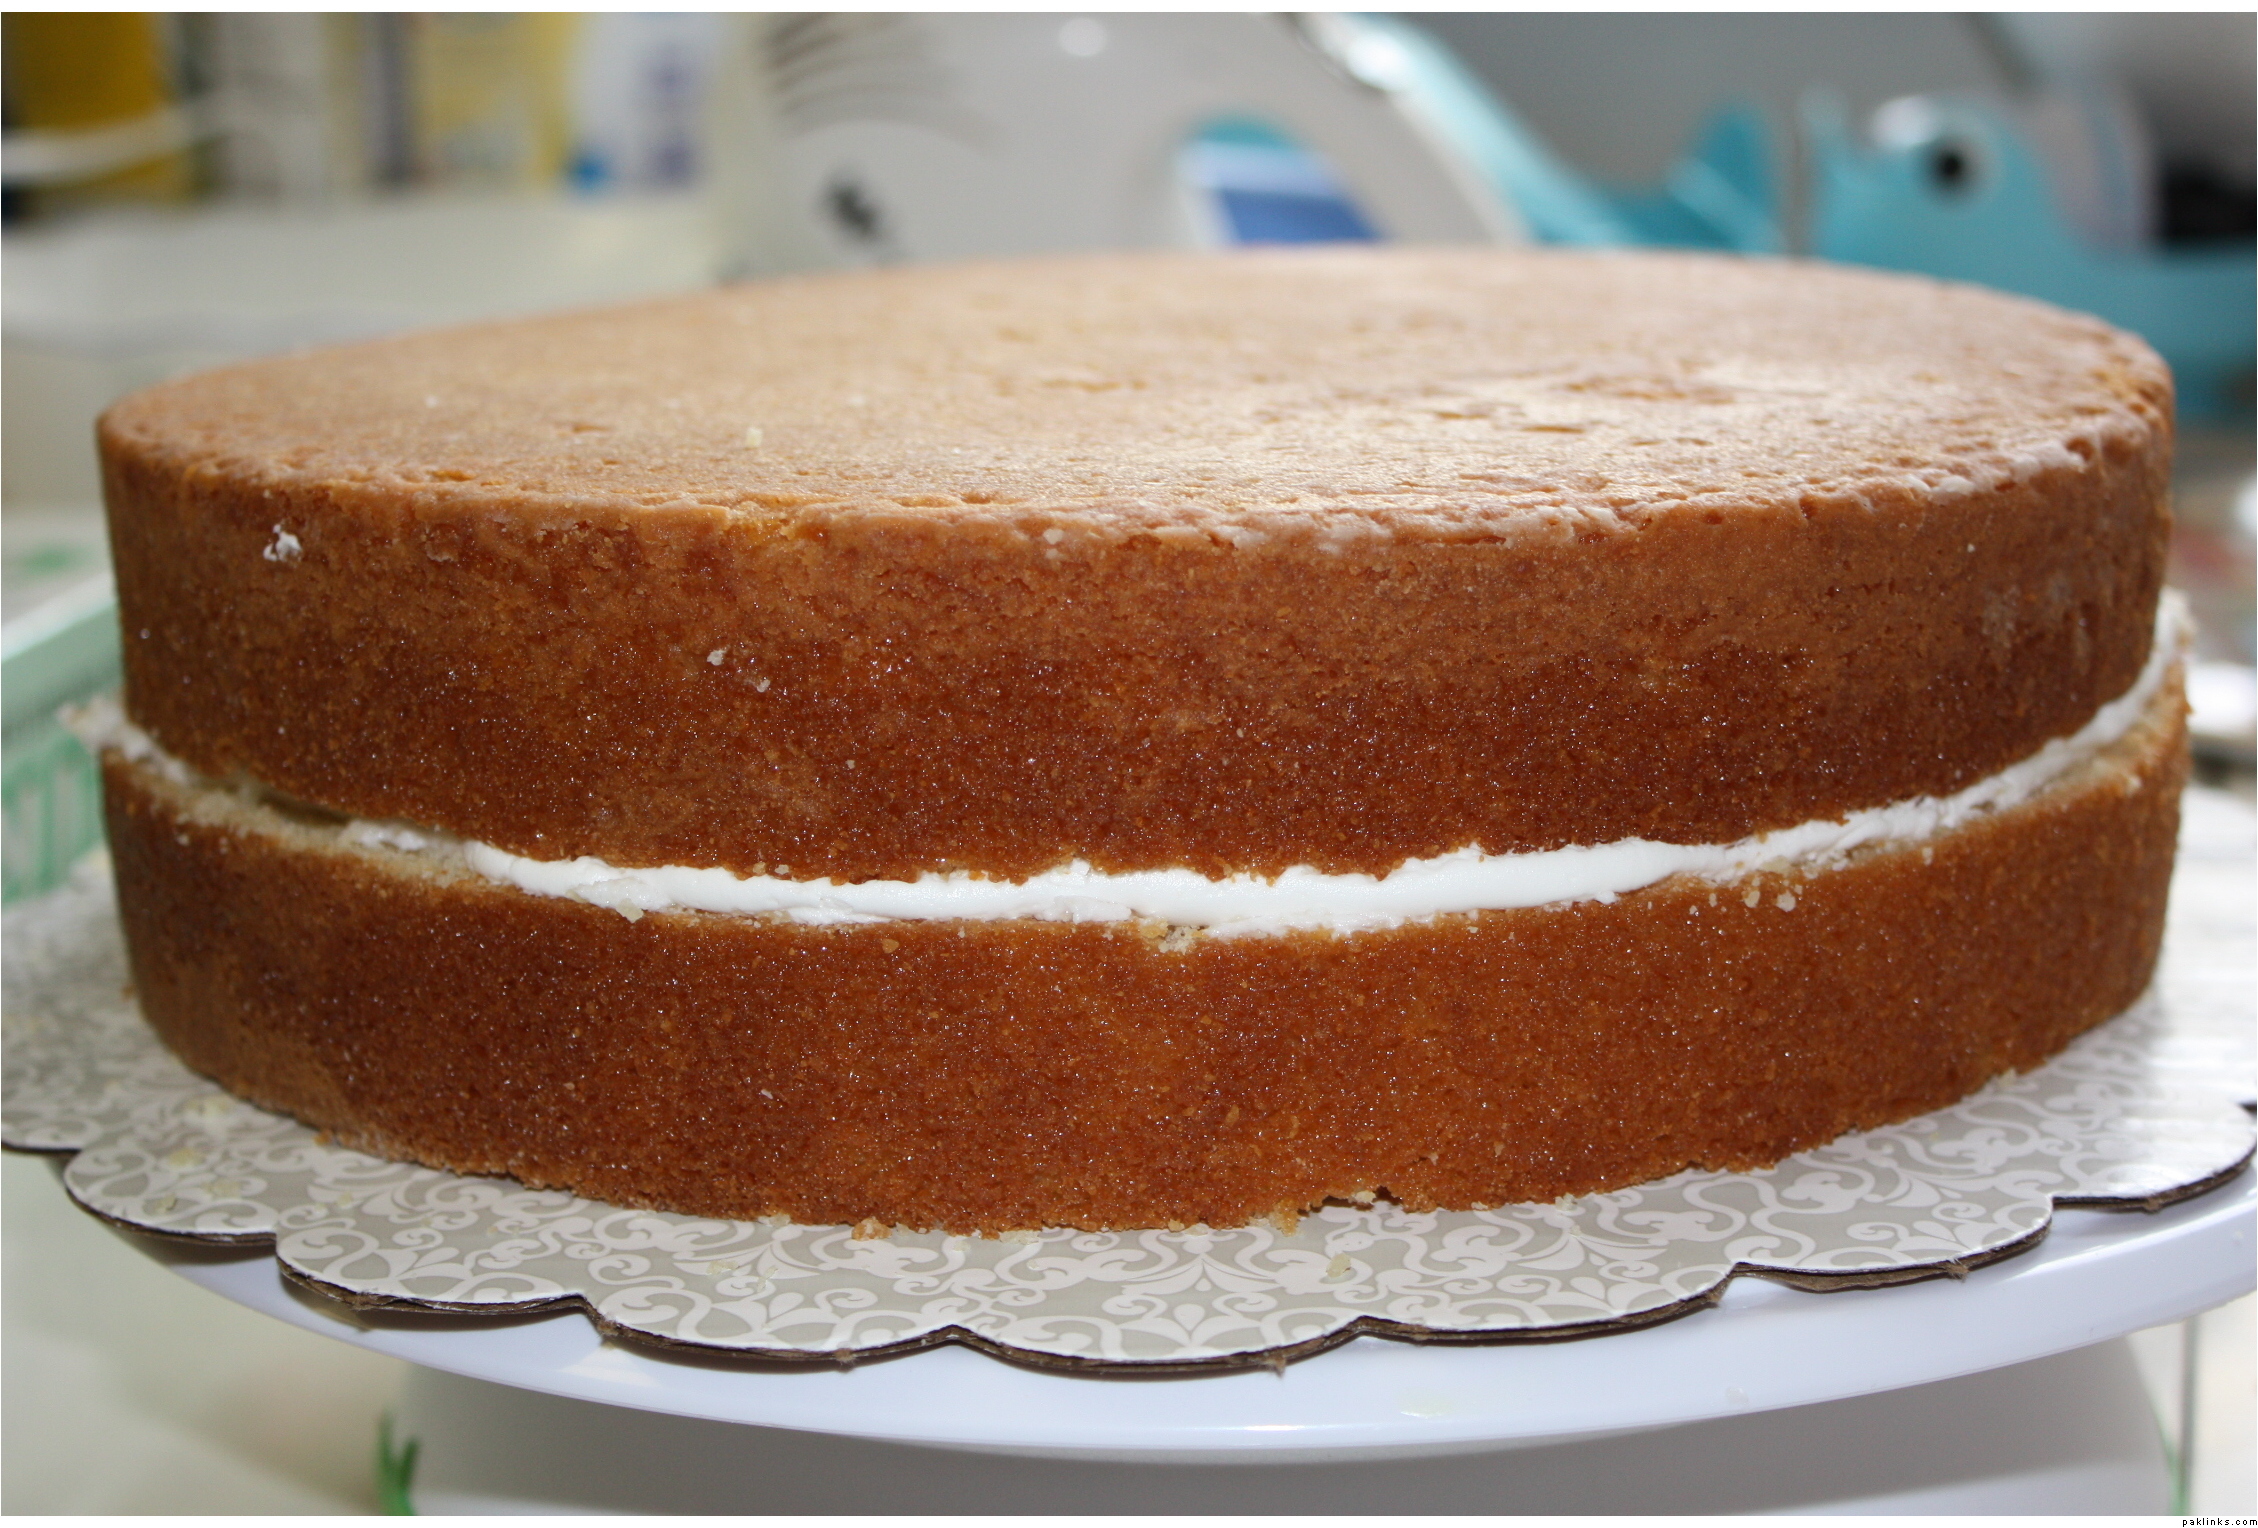
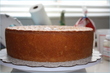
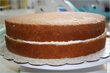
Ok here is my cake. I have it on a cake board as it makes it easier to carry. I also use a cake turntable, which makes it very easy to ice the cake. Will say more on this later. The cake is already flat, so I tend to cheat at this point. Usually, you are supposed to slice the very top layer off so it is all even. What I do if the cake bakes flat is just flip it over so that the top is on the bottom and decorate it this way.

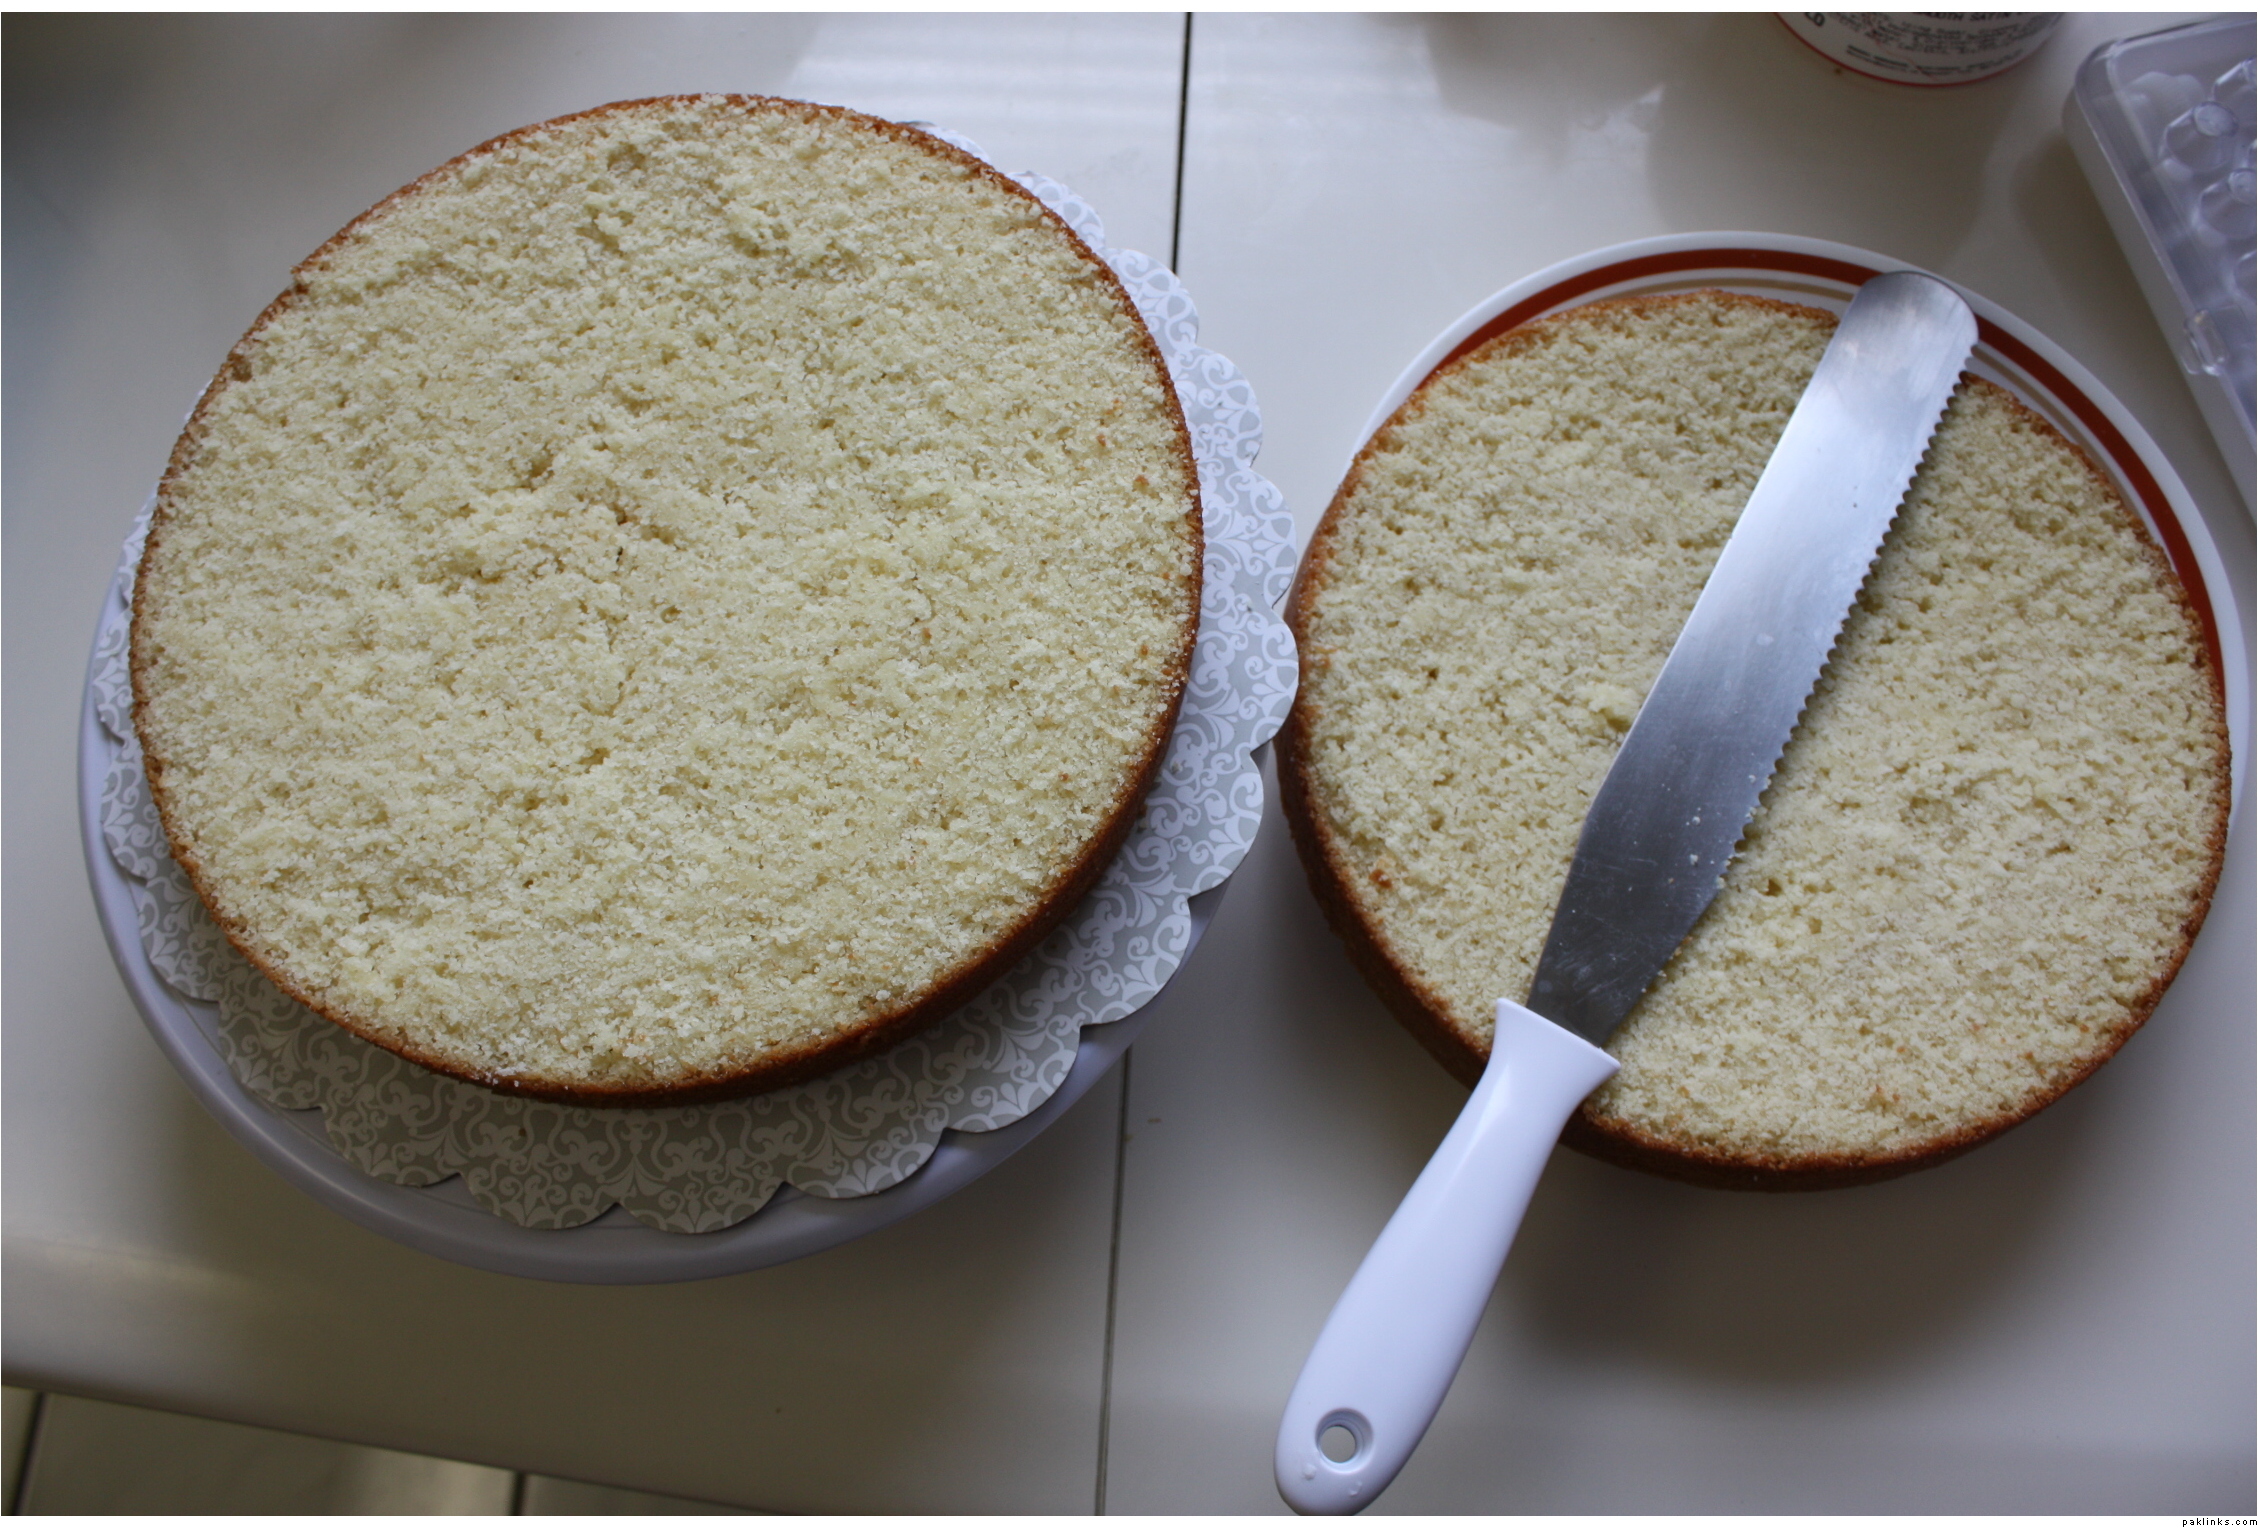
Here I’m slicing the centre of the cake in half with my serrated spatula. This is the first place the turntable comes in handy as I spin the cake while I saw through the centre.

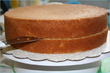
There it is in half.

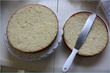
Now I insert my filling. I first put buttercream and then placed the strawberries I sliced the night before onto the buttercream. I made sure not to go all the way to the edges cause I don’t want the filling spilling out. I then piped a border around the edge so that it would hold the top and bottom pieces of the cake in place. In the past, I never piped this border when using strawberries and had issues with the strawberries falling out ….

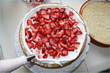
Here I put the cake together and the piped buttercream border has come into use. No strawberries sticking out hurrah

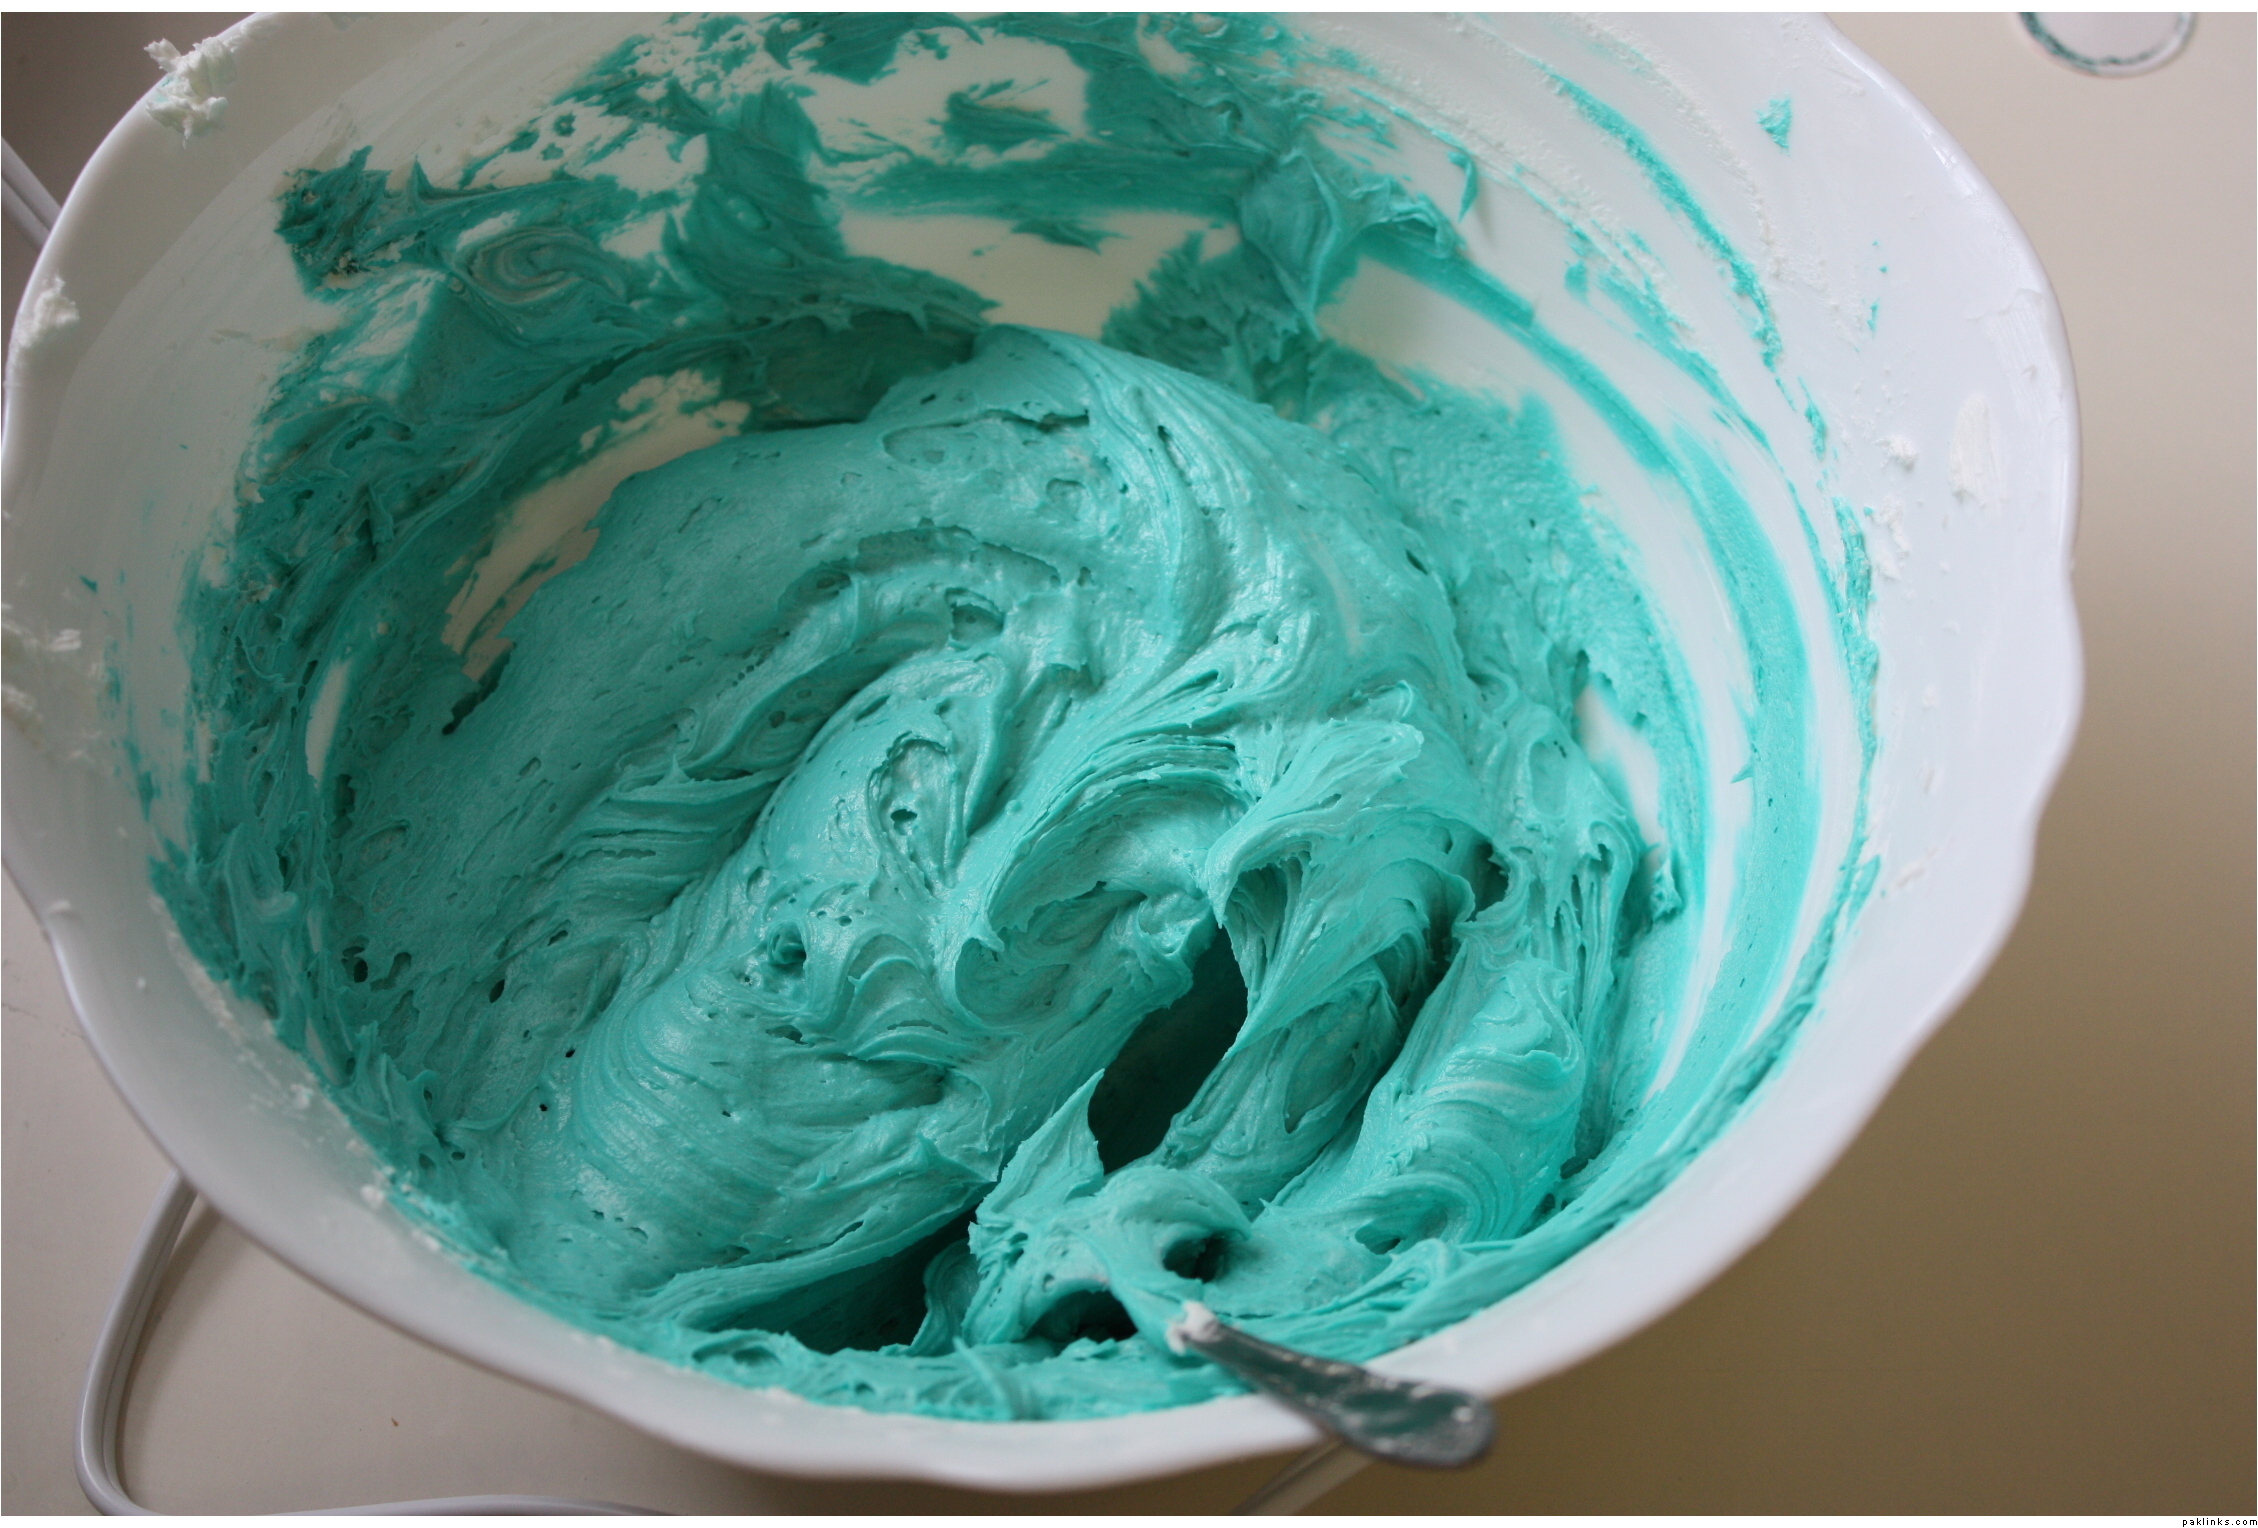
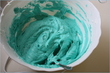
Now I add colour, with a toothpick, into the remainder of my icing. You have to be careful how much colour you use. The more you use, the more it can change the flavour of the icing – in an unpleasant way.

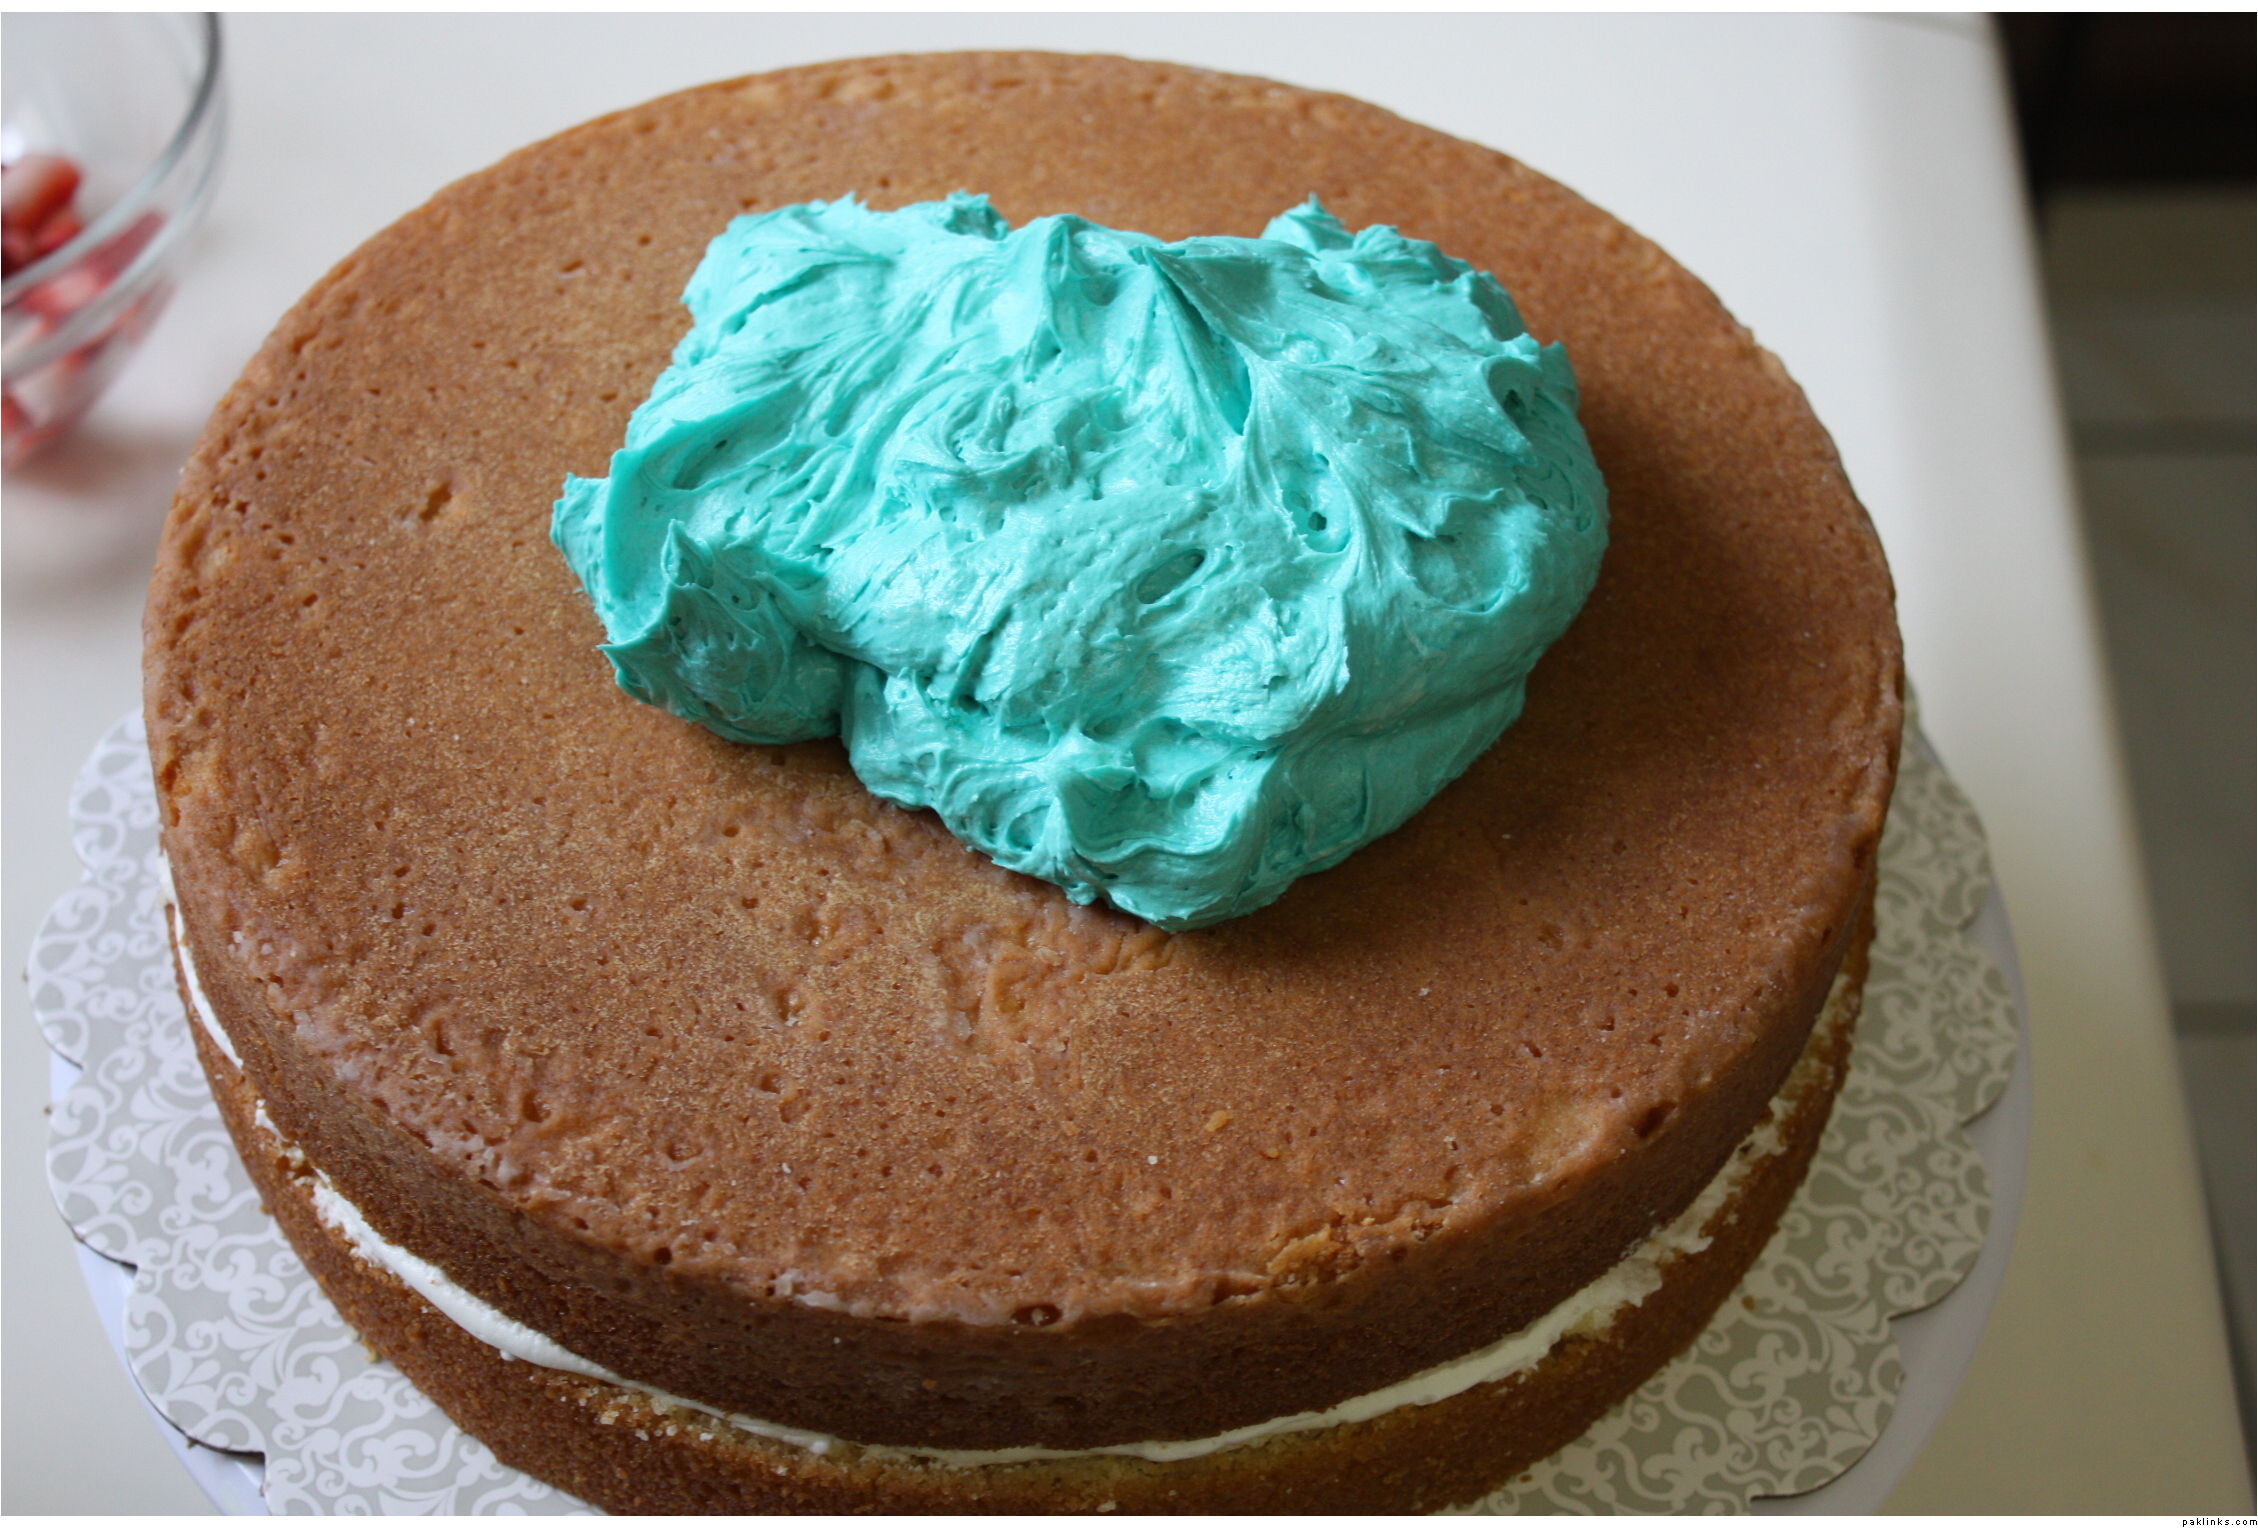
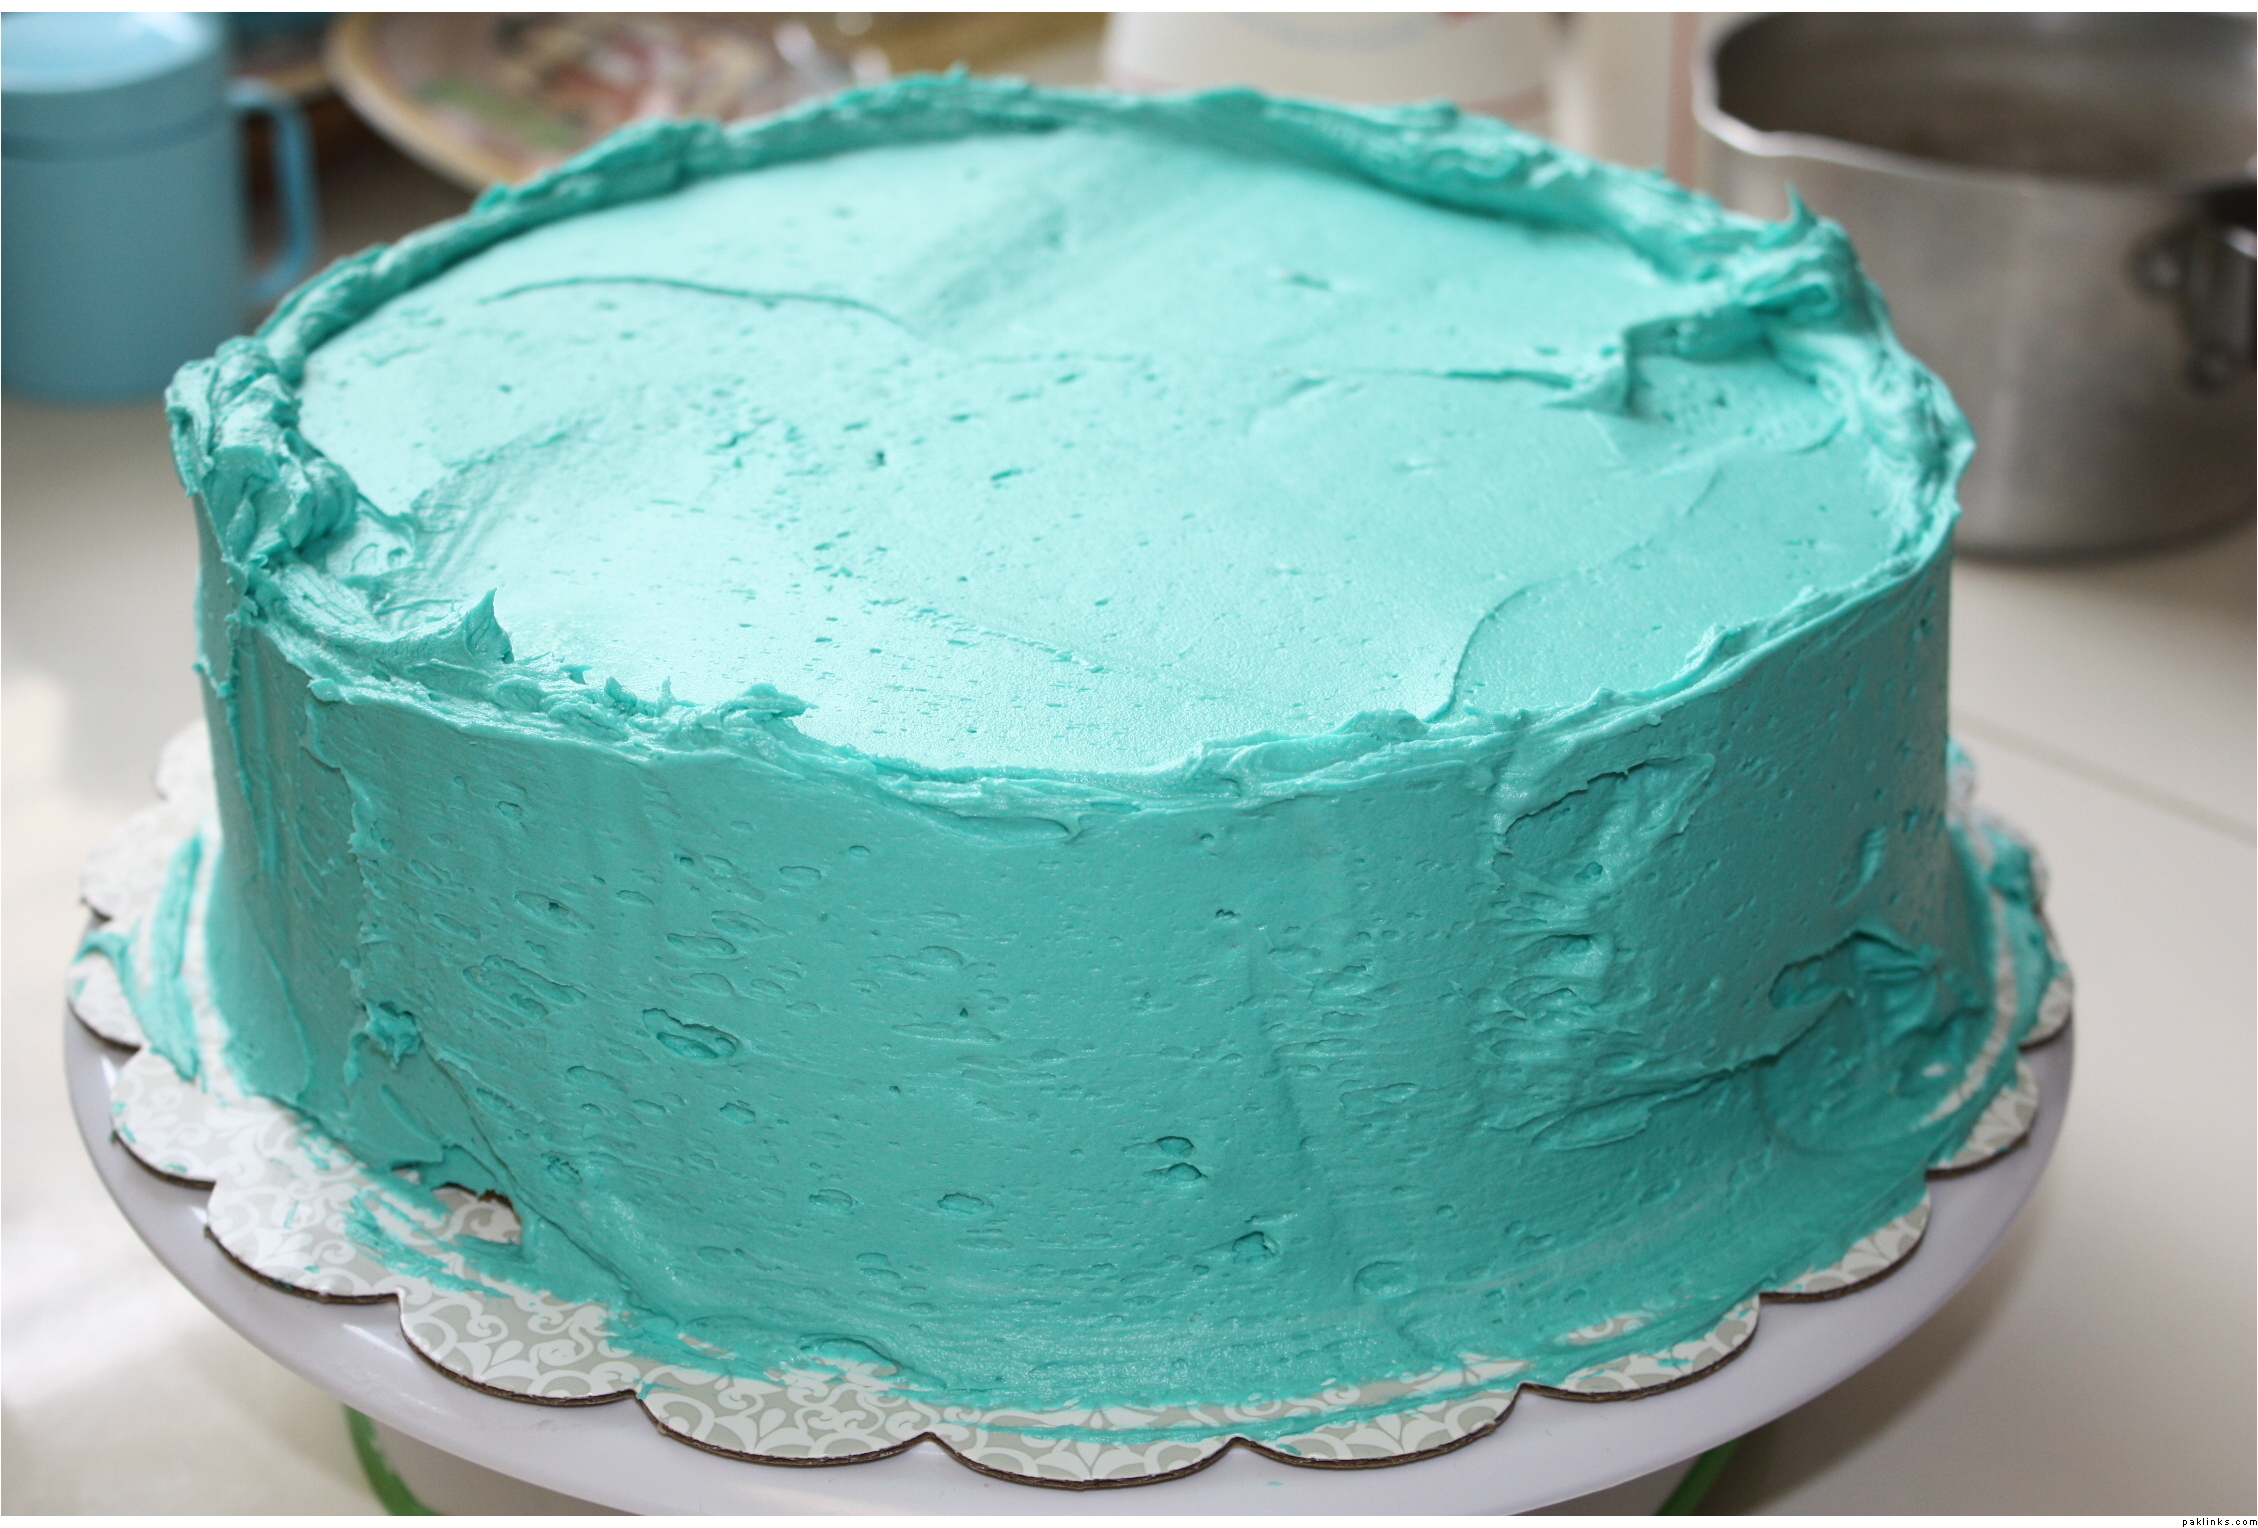
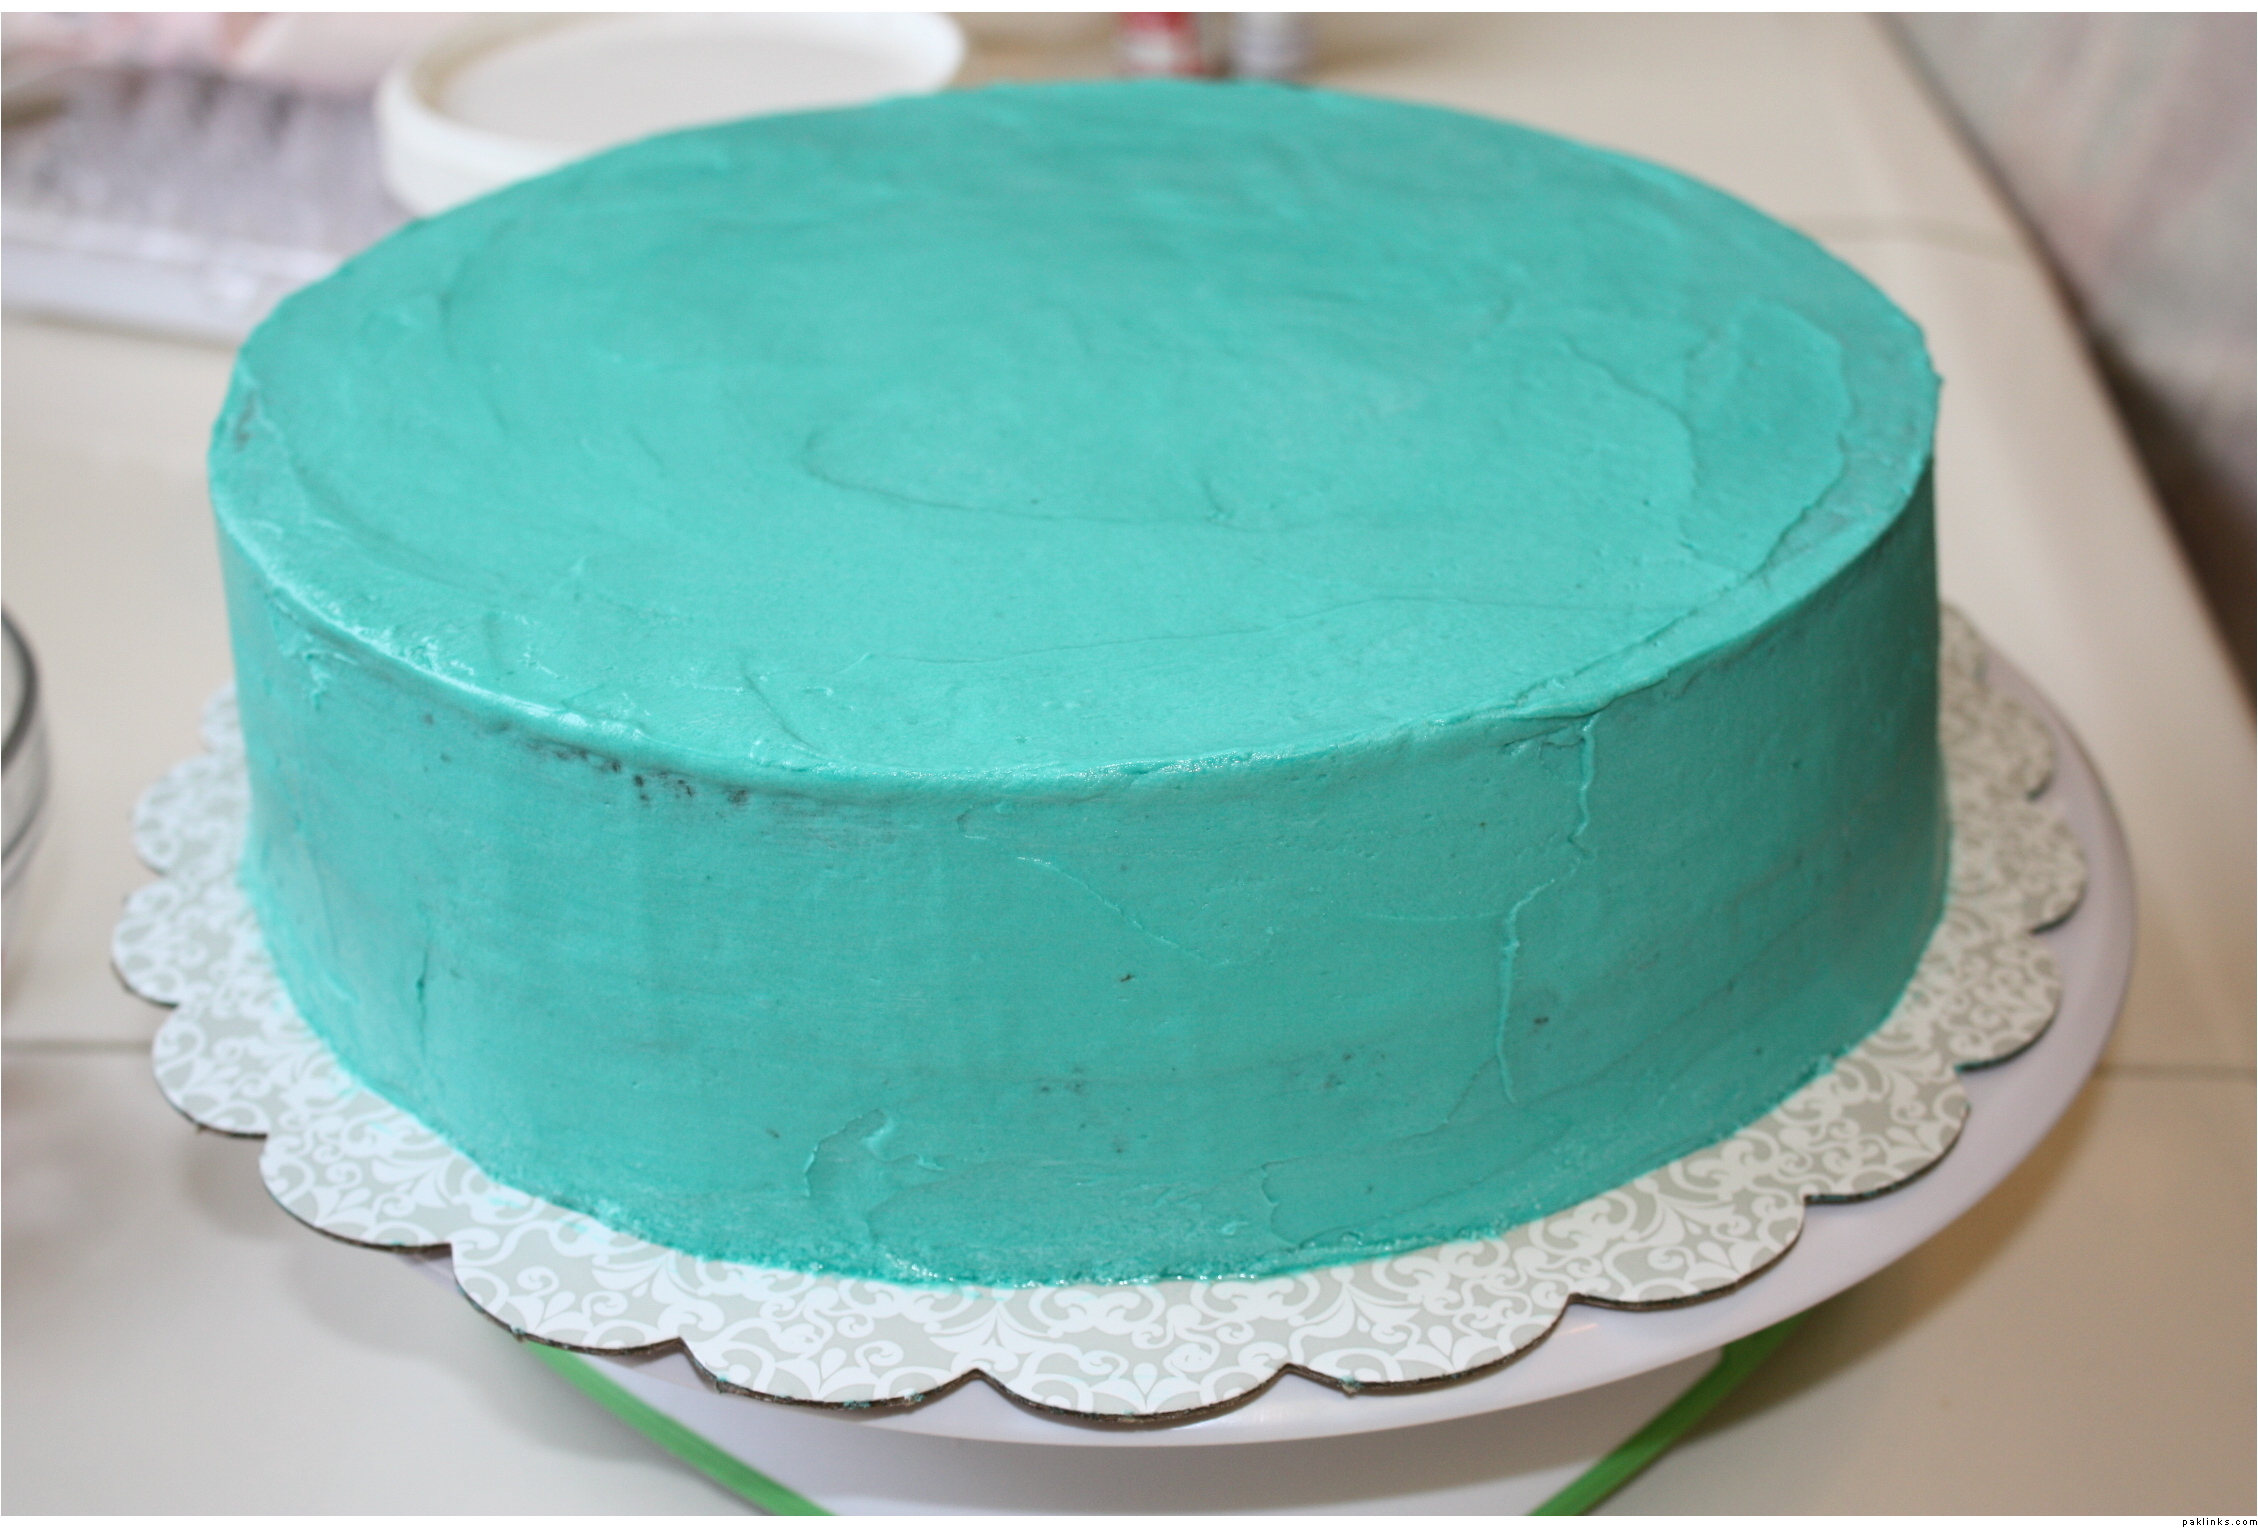
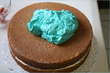
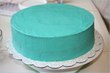
Now I’m ready to ice the cake. I start by putting a lot of icing on top of the cake. This is where the turntable comes into handy again. I use the big spatula here again and basically sweep back and forth (not with the serrated side) while spinning the cake. I keep doing this and even do this on the edges until the entire cake is covered.

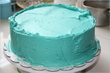
To get the smooth look, I had to keep cleaning my spatula as well as dipping it in hot water. I would also sprinkle hot water on the icing on the cake.

While you spin the cake, start at the opposite end of you. In other words, you are going to rotate the cake while pulling the icing inwards towards you while you spin the cake.

It’s hard to explain … I think the video link SGC provided in one of her posts illustrates the exact technique how to do this.

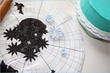
Making lilies out of chocolate fondant for the cake.
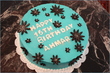
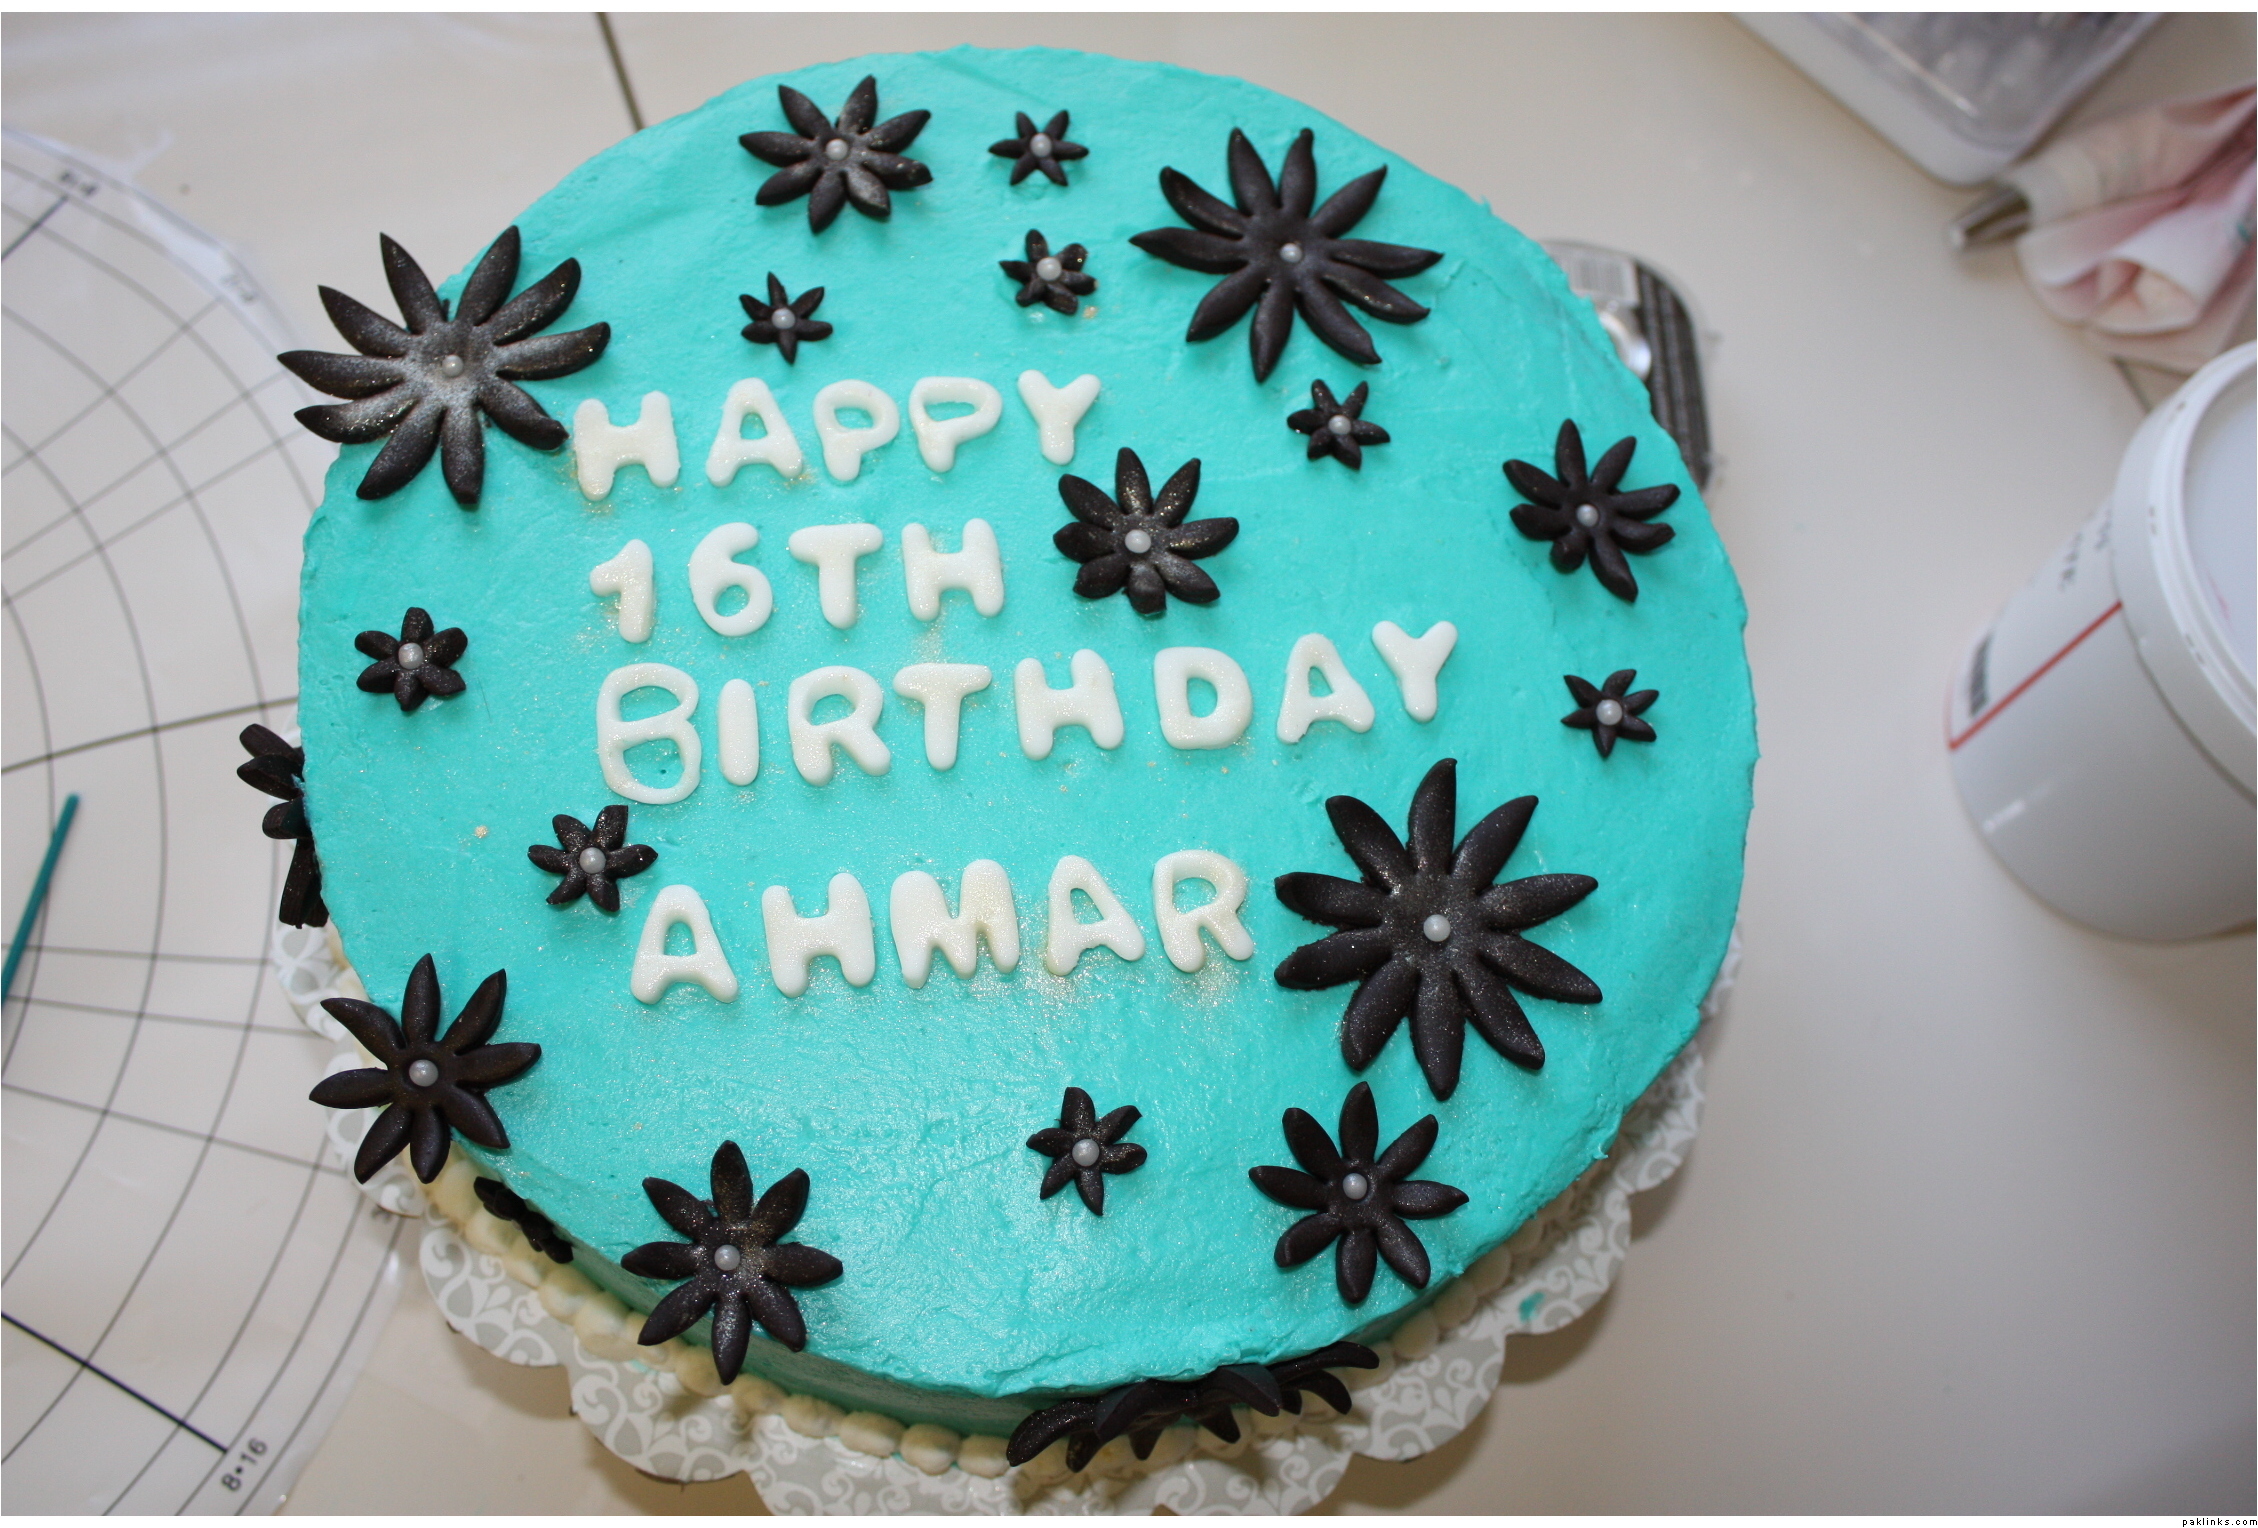
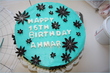
The final product:

I experimented with the pearl dust. The instructions said to just brush it on with decorating brush. I did that and it looks quite messy. Oh well, I will practice some more.

Re: Baking - The Beginners Guide

^ incredible!!! you are SO good at this, mehnaz!!! well done!!

also, i agree- it always helps to bake one day before you ice. the cake is less crumbly, esp. if its been in the fridge the night before.

p.s: if using a serrated knife or spatula seems difficult, something i’ve always found tough, you can also use a cake leveler to cut your cakes into layers.
this is the one i use- Cake Leveler - Wilton

here’s a video on how to use it-